The Kawasaki Ninja 400 is a popular choice for both new and experienced motorcycle riders. It is known for its sporty look, reliable engine, and easy handling. One important part of keeping your Ninja 400 running well is knowing the right oil capacity and how to change the oil properly.
Many riders have questions about how much oil the Ninja 400 needs, what type of oil to use, and when to change it. This guide explains everything you need to know about Ninja 400 oil capacity, oil change steps, oil types, and helpful tips for keeping your bike in top shape.
What Is The Oil Capacity Of The Ninja 400?
The Ninja 400’s engine oil capacity is a key detail for maintenance. If you use too little oil, the engine may not stay lubricated, and if you use too much, you can cause leaks or engine damage. For the Kawasaki Ninja 400 (model years 2018 and newer), the official oil capacity is:
- With oil filter change: 2.4 liters (2.5 US quarts)
- Without oil filter change: 2.1 liters (2.2 US quarts)
This means that if you are only changing the engine oil and not the filter, you need about 2. 1 liters. If you are also replacing the oil filter, you need 2. 4 liters. Always check your owner’s manual for your specific model year because there can be small differences.
Why Oil Capacity Matters
Getting the oil capacity right is more important than many new riders realize. If you use less oil than required, the engine parts might not get enough lubrication. This can lead to faster wear and expensive damage. Too much oil is also bad.
It can cause foaming and high pressure inside the engine, which may lead to oil leaks and even engine seals failing. Always measure the oil you pour in and check the level with the dipstick or sight glass after filling.
How To Check Your Ninja 400’s Oil Level
Checking your oil regularly can prevent problems before they start. Here is how to check the oil level on a Ninja 400:
- Warm up the engine for a few minutes so the oil flows well.
- Park the bike on level ground and let it sit for about 2 minutes to allow the oil to settle.
- Locate the oil sight glass (usually on the lower right side of the engine).
- Hold the motorcycle upright (not on the side stand) so it’s straight.
- Look at the oil level through the sight glass. The oil should be between the low and high marks.
- If it is below the low mark, add oil in small amounts until it reaches the proper level.
Pro tip: Do not overfill. Add small amounts, then wait a minute for the oil to settle before re-checking the level.
Choosing The Right Oil For Your Ninja 400
The oil you choose is just as important as the amount. Kawasaki recommends using a high-quality motorcycle engine oil with the following specifications:
- Viscosity: 10W-40 (commonly used for most riding conditions)
- API Service: SG, SH, SJ, SL, or higher
- JASO MA or MA2 (this is important for wet clutch compatibility)
You can use mineral, semi-synthetic, or full synthetic oils, but full synthetic oils often give better protection and longer life, especially if you ride in hot weather or push your bike hard.
Popular Oil Brands For The Ninja 400
There are many brands to choose from. Some popular choices are:
- Motul 7100 10W-40 Synthetic
- Kawasaki Genuine 10W-40
- Castrol Power1 10W-40
- Shell Advance AX7 10W-40
- Yamalube 10W-40
No matter what brand you choose, make sure it meets Kawasaki’s recommended standards.
How Often Should You Change The Oil?
Changing your oil at the right time keeps your Ninja 400 running smooth. Kawasaki recommends changing the oil every 6,000 kilometers (3,700 miles) or every 12 months, whichever comes first. If you ride in harsh conditions, like very hot weather, dusty roads, or do a lot of stop-and-go riding, it is better to change the oil more often—maybe every 3,000 kilometers (1,800 miles).
Don’t forget the oil filter! Replace it every time you change the oil or at least every second oil change.
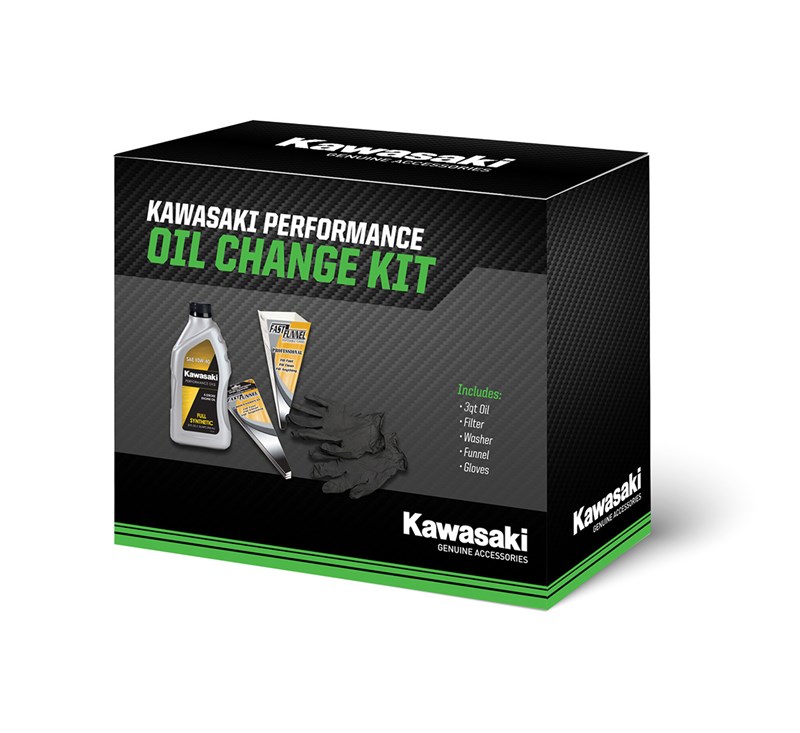
Step-by-step Ninja 400 Oil Change Guide
Changing the oil yourself is not hard, and it helps you learn more about your bike. Here’s a simple step-by-step guide:
- Gather your tools and materials:
- 2.4 liters of quality motorcycle oil
- New oil filter (optional but recommended)
- Oil drain pan
- Socket wrench (17mm for oil drain bolt)
- Oil filter wrench (if replacing filter)
- Funnel
- Clean rags or towels
- Gloves
- Warm up the engine for a few minutes. Warm oil flows out easier.
- Turn off the engine and place the bike on level ground. Use a paddock stand if you have one for stability.
- Place the oil drain pan under the drain bolt (bottom of the engine).
- Remove the oil fill cap (on top of the engine) to help oil drain smoothly.
- Loosen and remove the drain bolt using the socket wrench. Let the oil drain completely (this takes a few minutes).
- If changing the oil filter, use the oil filter wrench to loosen and remove the old filter. Some oil will come out, so keep the pan underneath.
- Wipe the filter mounting area with a clean rag.
- Rub a little new oil on the rubber seal of the new filter (this helps it seal and come off easily next time).
- Install the new oil filter. Hand-tighten, then give it another half-turn (do not over-tighten).
- Reinstall the drain bolt with a new washer if you have one. Tighten to the recommended torque (check your manual, usually around 25 Nm).
- Pour in new oil using the funnel. Start with 2.1 liters if not changing the filter, or 2.4 liters if you are. Go slowly.
- Replace the oil fill cap.
- Start the engine and let it idle for 30 seconds. Check for leaks around the filter and drain bolt.
- Turn off the engine and let it sit for a few minutes. Check the oil level with the sight glass. Add oil if needed to reach the correct level.
- Clean up tools and dispose of the old oil and filter responsibly. Many auto shops recycle used oil.
Common Mistakes When Changing Oil
Many riders make small mistakes during oil changes. Here are a few to avoid:
- Forgetting to replace the drain bolt washer, which can lead to leaks.
- Over-tightening the oil filter or drain bolt, which can damage threads.
- Not warming up the engine first, which makes oil thick and drains slower.
- Not checking the oil level after running the engine, which can lead to overfilling.
Helpful Tips For Ninja 400 Oil Changes
- Write down the date and mileage of your last oil change. This helps you remember when it’s time to do it again.
- Use a good funnel to avoid spills. Oil on hot engine parts can smoke and smell.
- If you ride in a very hot or very cold climate, check if a different oil viscosity might be better. For example, 10W-50 for hotter places.
- Always check for leaks after changing oil. A small leak can become a big problem if not fixed.
How To Tell If Your Oil Needs Changing
Even if you haven’t reached the mileage limit, sometimes oil needs changing sooner. Signs your oil is old:
- Oil looks very dark or black in the sight glass.
- Oil feels gritty (rub a little between fingers).
- The engine is noisier than usual.
- The oil warning light comes on (stop riding right away).
If you notice any of these, it’s safer to change the oil early.
Synthetic Vs. Mineral Oil For Ninja 400
Riders often ask if they should use synthetic or mineral oil. Both have pros and cons:
Mineral Oil:
- Lower cost
- Good for breaking in a new engine
- Needs changing more often
Synthetic Oil:
- Higher cost
- Better protection at high temperatures
- Lasts longer
- Stays cleaner
Most riders use synthetic oil for regular riding. Mineral oil can be a good choice for the first 1,000–2,000 kilometers on a brand-new bike, then switch to synthetic.
How To Dispose Of Used Oil And Filters
Never pour used oil down the drain or on the ground. Used oil is very harmful to the environment. Put the used oil in a sealed container (like an empty oil bottle) and take it to an auto parts store or recycling center. Many places take old oil filters, too. If you’re not sure where to go, the [EPA’s recycling guide](https://www.epa.gov/recycle/used-oil-recycling) can help.
Ninja 400 Oil Change Interval Chart
For quick reference, here is a simple chart for oil and filter change intervals:
| Riding Condition | Oil Change Interval | Filter Change Interval |
|---|---|---|
| Normal street riding | 6,000 km / 12 mo | Every oil change |
| Aggressive/track riding | 3,000 km / 6 mo | Every oil change |
| Dusty or hot conditions | 3,000 km / 6 mo | Every oil change |
If you use your Ninja 400 for track days or ride in tough conditions, change oil and filter more often for best results.
How Much Does An Oil Change Cost?
Doing your own oil change is usually cheaper than having a shop do it. Here’s a cost breakdown:
- Motorcycle oil (2.4 liters): $20–$40 (depending on brand and type)
- Oil filter: $7–$15
- Crush washer: $1–$2 (optional, recommended)
- Shop oil change: $50–$80 (includes parts and labor)
Doing it yourself can save money and help you learn more about your bike.
Signs Of Oil-related Problems
Sometimes, problems happen even if you do regular oil changes. Watch out for these warning signs:
- Oil leaks under the bike or around the filter/drain bolt
- White smoke from the exhaust (could mean oil is burning)
- Very loud engine noise
- Oil warning light on the dashboard
If you notice any of these, check the oil level right away and talk to a mechanic if needed.
Can You Use Car Oil In A Ninja 400?
It’s not recommended. Car engine oil does not always work with motorcycle wet clutches. Using car oil can make your clutch slip. Always use oil labeled for motorcycles (JASO MA or MA2).
Advanced Oil Tips For Ninja 400 Owners
- Use a torque wrench for drain bolt and filter. This helps avoid stripping threads, which is a common beginner mistake.
- Consider using a magnetic drain plug. It catches tiny metal particles, keeping your oil cleaner.
- If you ride mostly in the city with lots of short trips, change the oil a little more often. Short rides don’t let oil get hot enough to burn off moisture.
- Try to check your oil every few rides, especially before long trips.
How To Read The Oil Sight Glass Correctly
Some riders get confused with the oil sight glass. Here’s how to do it right:
- Make sure the bike is upright, not leaning.
- Let the engine cool for a few minutes before checking.
- The oil should be between the two lines on the glass. If you can’t see oil, it’s too low. If the sight glass is fully covered, it might be overfilled.
What If You Lose The Drain Bolt Washer?
The washer helps seal the drain bolt and prevent leaks. If you lose it, you can use a new crush washer of the same size (usually 12mm for the Ninja 400). Don’t reuse old washers many times—they flatten out and don’t seal as well.
How To Tell If Your Oil Is Good Quality
- It should be clear and amber (not black or gritty).
- It should not smell burnt.
- Good oil usually comes from trusted brands and meets JASO MA/MA2 standards.
Some riders like to send old oil for analysis (used oil analysis) to see how the engine is wearing, but this is not needed for most street riders.
What To Do If You Spill Oil
If you spill oil on your engine or driveway, clean it up right away. Use a rag and some degreaser for the engine. For the driveway, kitty litter or sand helps soak it up, then sweep it away.
What To Check After An Oil Change
- Look for leaks under the engine and around the oil filter.
- Make sure the oil level is correct after running the engine and letting it settle.
- Double-check that the drain bolt and oil filter are tight.
A Checklist For Ninja 400 Oil Changes
- Warm up engine
- Gather tools and supplies
- Remove oil fill cap
- Drain old oil
- Replace oil filter and washer
- Install drain bolt
- Add new oil slowly
- Check for leaks
- Run engine and re-check oil level
- Dispose of old oil responsibly
- Record date and mileage
Why Regular Oil Changes Matter
Oil is the lifeblood of your Ninja 400’s engine. It reduces friction, helps cool the engine, and keeps dirt and debris away from moving parts. Skipping oil changes or using the wrong oil will shorten engine life and can cause costly repairs.
Regular oil changes are one of the easiest ways to keep your bike reliable for years.
Knowing the correct oil capacity for the Ninja 400 is essential for keeping your motorcycle healthy and running at its best. Always use the recommended amount—2. 4 liters with an oil filter change, 2. 1 liters without. Choose high-quality motorcycle oil and change it on time.
Doing your own oil changes helps you save money, learn more about your bike, and avoid problems on the road. With proper care and attention, your Ninja 400 will give you many miles of fun and reliable riding.
Frequently Asked Questions
Can I use a different oil viscosity in very hot or cold weather?
Yes, but check your manual. In very hot places, some riders use 10W-50 or 15W-50. For cold, 5W-40 can help. Always use oil with JASO MA or MA2.
What Happens If I Overfill The Oil?
Too much oil can cause foam and high pressure, leading to leaks or engine problems. If you add too much, drain some out.
Is it OK to ride if the oil is a little low?
No, always keep the oil level in the correct range. Low oil means less protection for your engine.
Can I Reuse My Old Oil Filter?
No, always use a new filter for each oil change. Old filters can clog and not protect your engine.
Can I change the oil myself if I’m new to motorcycles?
Yes, the Ninja 400 is a good bike for learning basic maintenance. Take your time, follow steps, and ask for help if you’re unsure.