Cutting plexiglass with a circular saw can seem challenging at first. Many people worry about cracks, chips, or melting edges. But with the right approach, you can achieve clean, smooth cuts that look professional. Whether you’re building shelves, creating window panes, or working on a creative project, knowing how to handle plexiglass the right way saves time, money, and frustration.
This guide walks you through everything you need to know, from preparation to safety and finishing, so you can cut plexiglass confidently with a circular saw.
Understanding Plexiglass And Circular Saws
Plexiglass, also called acrylic sheet, is a lightweight, transparent plastic used as a glass alternative. It’s much stronger than glass and less likely to shatter. However, it’s softer and more flexible, which means it can chip or melt if not cut properly.
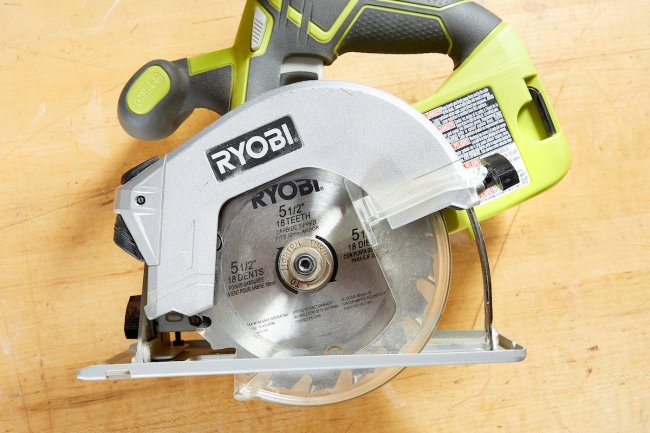
A circular saw is a power tool with a round, toothed blade that spins at high speed. It’s commonly used for wood, but with the right blade and settings, it can cut plexiglass well. The trick is to use the right technique and tools to avoid damage to the sheet.
Key Tools And Materials Needed
Cutting plexiglass is much easier if you start with the right tools and materials. Here’s what you’ll need:
- Plexiglass sheet (acrylic sheet)
- Circular saw (corded or cordless)
- Fine-tooth blade (preferably carbide-tipped, at least 60 teeth for a 7-1/4″ blade)
- Clamps to hold the sheet steady
- Work table or stable surface
- Measuring tape and straight edge
- Permanent marker or grease pencil
- Masking tape
- Safety glasses and hearing protection
- Dust mask
- Gloves
- Sandpaper (220-400 grit) or file for smoothing edges
- Vacuum or brush for cleanup
Choosing The Right Blade For Plexiglass
The blade you choose makes a big difference in the cut quality. Not every circular saw blade is suitable for plexiglass. Here’s what you should look for:
- High tooth count: More teeth mean a smoother cut. For 1/8″ to 1/4″ plexiglass, use at least 60 teeth on a 7-1/4″ blade.
- Carbide-tipped teeth: These are more durable and stay sharp longer.
- Triple-chip grind (TCG): This type of tooth shape is less likely to chip or melt the plastic.
- Blade width: Thin-kerf blades create less heat and reduce the risk of melting.
Below is a comparison of three common blade types for cutting plexiglass:
| Blade Type | Tooth Count | Cut Quality | Melting Risk | Best Use |
|---|---|---|---|---|
| Standard Wood Blade | 24-40 | Rough, chips easily | High | Not recommended |
| Fine-Tooth Carbide | 60-80 | Smooth, clean | Low | Best for plexiglass |
| Plastic/Acrylic Blade | 80+ | Very smooth | Very low | Professional finish |
Non-obvious insight: Many beginners try to use the blade already in the saw, usually meant for wood. This often leads to cracks and chips. Always switch to a blade designed for plastics or fine cuts.
Preparing Plexiglass For Cutting
Preparation is key to a good cut. Rushing this step often leads to mistakes or damage. Here’s how to set up your plexiglass for the best results:
- Leave the protective film on both sides of the plexiglass. This helps prevent scratches during cutting.
- Mark your cut line clearly with a permanent marker or grease pencil. Use a straight edge for accuracy.
- Apply masking tape along the cut line on both sides. This reduces chipping and makes it easier to follow the line.
- Support the sheet fully on a work table. The cut-off piece should not drop or bend during cutting, or it may crack at the end.
- Clamp the plexiglass securely to the table. Use soft pads or scrap wood under the clamps to avoid marking the surface.
Pro tip: If your sheet is very large, consider having a helper hold the far side steady. Movement during cutting is a common cause of uneven edges.
Setting Up Your Circular Saw
Before you start cutting, make sure your saw is set up for safety and accuracy.
- Install the right blade. Double-check for tightness and correct direction.
- Adjust the blade depth. The blade should extend just 1/8″ to 1/4″ below the plexiglass.
- Set the saw speed. If your saw has variable speed, use a lower setting. High speed can melt the edges.
- Check the base plate. Make sure it is clean and smooth. Any debris can scratch the plexiglass.
- Test on scrap. If possible, do a trial cut on a small piece first. This helps you adjust speed and check the blade.
Non-obvious insight: Many users forget to check the blade depth. Too much blade below the sheet creates extra heat, which can melt the plexiglass.
Safety Precautions When Cutting Plexiglass
Safety should always come first. Cutting plexiglass creates fine dust and sharp shards. Here are essential steps:
- Wear safety glasses to protect your eyes from chips.
- Use a dust mask to avoid breathing in acrylic dust.
- Wear gloves to protect your hands from sharp edges.
- Ensure good ventilation. Plexiglass dust can irritate your throat and lungs.
- Keep your workspace clear. Remove any objects that could get in the way or catch the saw cord.
- Check your power cord. Make sure it won’t get caught in the saw.
- Secure loose clothing and long hair. This prevents accidents with the spinning blade.
Accidents often happen because people get distracted or skip safety steps. Take a minute to double-check everything before you start.
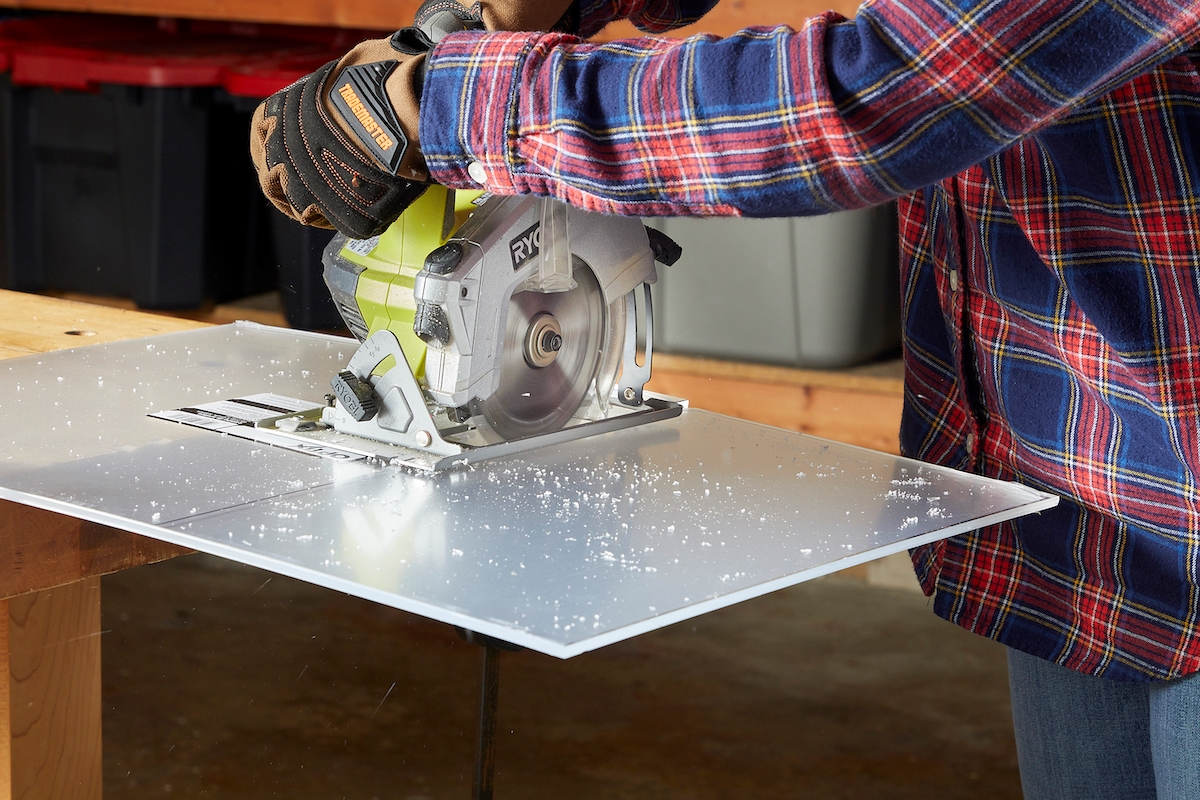
Step-by-step Guide: How To Cut Plexiglass With A Circular Saw
Follow these clear steps for a clean, safe cut:
1. Measure And Mark
- Use your measuring tape and a straight edge to measure where you want to cut.
- Mark the line clearly with a marker or grease pencil.
- Place masking tape over the line to minimize chipping.
2. Set Up The Plexiglass
- Place the plexiglass sheet on your work table, with the area to be cut hanging slightly off the edge.
- Support both sides fully with scrap wood or foam boards.
- Use clamps to hold the sheet firmly but gently.
3. Prepare The Circular Saw
- Check the blade for sharpness and correct installation.
- Adjust the blade depth to just below the sheet.
- If possible, set the saw to a slower speed.
4. Make The Cut
- Hold the saw with both hands.
- Line up the blade with your marked line.
- Turn on the saw and let it reach full speed before touching the sheet.
- Move slowly and steadily along the line. Don’t force the saw; let the blade do the work.
- Keep the base plate flat on the plexiglass at all times.
- Watch for melting or smoking. If it happens, pause and let the plastic cool for a few seconds.
5. Support The Cut-off Piece
- As you near the end of the cut, make sure the cut-off piece is supported.
- Have a helper hold it, or use extra scrap wood underneath.
- This prevents cracking or chipping at the finish.
6. Finish The Edge
- Remove masking tape and check the cut.
- If there are rough edges, sand lightly with 220-400 grit sandpaper.
- For a smoother finish, use a file or a deburring tool.
- Clean the sheet with a soft cloth.
Practical example: Imagine you are cutting a 1/4″ thick plexiglass panel for a window. With a fine-tooth 80T blade, masking tape, and steady movement, you’ll get a clean, clear edge without chips.
Troubleshooting Common Problems
Even with careful setup, issues can happen. Here’s how to deal with the most common ones:
Chipping And Cracking
- Cause: Using a blade with too few teeth, moving too fast, or not supporting the sheet well.
- Solution: Use a fine-tooth blade, slow down, and clamp the sheet properly.
Melting Edges
- Cause: Blade spinning too fast, too much friction, or a dull blade.
- Solution: Lower the saw speed, use a sharp blade, and pause if you see smoke or melting.
Blade Binding Or Sticking
- Cause: Forcing the saw, not supporting the sheet, or using the wrong blade.
- Solution: Let the saw work at its own pace, support both sides, and use a blade made for acrylic.
Uneven Cut Line
- Cause: Poor marking, rushing, or moving the saw off the line.
- Solution: Mark clearly, use masking tape, and keep the base plate steady.
Cloudy Or Rough Edges
- Cause: Dull blade, moving too slowly, or not sanding after cutting.
- Solution: Use a fresh blade, sand the edge, or use a flame-polishing tool for a crystal-clear finish.
Factors That Affect Cutting Quality
Several things influence how cleanly you can cut plexiglass with a circular saw. Understanding these helps you avoid problems.
- Sheet thickness: Thicker sheets are harder to cut cleanly and may need slower speeds or more support.
- Blade sharpness: A dull blade heats up quickly and causes melting.
- Feed rate: Moving too quickly causes chipping. Too slowly creates heat and melting.
- Support: Unsupported sheets vibrate, leading to rough or uneven cuts.
- Temperature: Warm conditions soften plexiglass, making melting more likely. Try to cut in a cool, shaded area.
Here’s a quick comparison of how different factors affect the cutting result:
| Factor | Effect on Cut | How to Optimize |
|---|---|---|
| Blade Sharpness | Smoother, cleaner cuts | Use new or sharpened blades |
| Feed Rate | Prevents chips/melting | Maintain steady, moderate speed |
| Support | Reduces vibration/chipping | Clamp and support both sides |
| Temperature | Less melting | Cut in cool environment |
Expert tip: For large or thick sheets, consider cutting in several passes, increasing blade depth slightly each time. This reduces the stress on the material and gives a cleaner finish.
Cleaning And Polishing The Cut Edge
After cutting, you may notice the edge looks a bit rough or cloudy. You can make it much clearer with a little extra work.
- Sand the edge with 220 grit sandpaper, then move to 400 grit for a smoother finish.
- Wet sanding (using water) can help reduce dust and create a clearer edge.
- Polish the edge with a plastic polish or a buffing wheel for a glass-like finish.
- For a truly clear edge, use a flame polisher (a special tool that carefully melts the edge smooth). This takes practice but can make the edge almost invisible.
Caution: Never use a regular open flame (like a lighter) to polish plexiglass. It can scorch or discolor the sheet.
Mistakes To Avoid When Cutting Plexiglass
Many beginners make simple mistakes that ruin their plexiglass sheets. Here are the most common errors and how to prevent them:
- Using the wrong blade: Always choose a fine-tooth, carbide-tipped blade made for plastics.
- Skipping the masking tape: Tape helps prevent chips and cracks. Don’t skip it.
- Rushing the cut: Move at a steady, moderate pace. Fast cuts chip the sheet, slow cuts melt it.
- Not supporting the sheet: Always support both sides near the cut line.
- Ignoring safety gear: Plexiglass shards and dust can cause serious injury. Use glasses, mask, and gloves.
- Forgetting to leave the protective film: Removing it before cutting leads to scratches.
If you make a bad cut, don’t throw away the sheet immediately. Often, you can sand or polish the edge to fix small chips or rough spots.
When Not To Use A Circular Saw
While a circular saw is great for straight cuts, it’s not the best tool for every job. Here’s when you should consider other options:
- Curved cuts or shapes: Use a jigsaw with a fine blade or a laser cutter.
- Thin sheets (under 1/8″): A scoring knife or utility knife is safer and gives a cleaner edge.
- Small, detailed pieces: Use a scroll saw or handsaw for better control.
If your project requires curves or tight angles, look for other cutting tools designed for precision work.

Comparing Cutting Methods For Plexiglass
How does using a circular saw compare to other cutting methods? Here’s a quick overview:
| Method | Best For | Pros | Cons |
|---|---|---|---|
| Circular Saw | Straight, long cuts | Fast, accurate, good for thick sheets | Not for curves, needs special blade |
| Jigsaw | Curves, irregular shapes | Flexible, good for shapes | Can chip edges, slower for long cuts |
| Scoring Knife | Thin sheets, straight cuts | Cheap, simple, no power tools | Not for thick sheets, more manual effort |
| Laser Cutter | Complex shapes, perfect edges | Very precise, polished edges | Expensive, needs experience |
Experience-based guide: For most DIY home projects with straight lines and sheets thicker than 1/8″, a circular saw with the right blade is the best balance between cost, speed, and quality.
Tips For Getting The Best Results
To take your plexiglass cutting to the next level, try these practical tips:
- Chill the plexiglass before cutting. Place it in a cool area for an hour to reduce melting risk.
- Use a blade lubricant (like a small amount of soapy water) on the blade for smoother cuts.
- Support the entire sheet, not just the area near the cut. This reduces vibration.
- Cut with the finish side up if possible, as the top is less likely to chip.
- Clean up immediately after cutting to avoid scratches from leftover dust.
- Practice on scraps before cutting your final piece.
Even experienced DIYers test their setup on spare pieces to dial in the perfect speed and pressure.
Advanced Techniques For Professionals
If you’re working on high-value projects or want a truly polished result, consider these advanced techniques:
- Scoring and snapping: For thinner sheets, score deeply with a plastic scoring tool, then snap over a sharp edge.
- Using a router: A router with a flush-trim bit can create perfectly smooth, straight edges after cutting.
- Flame polishing: Use a hydrogen torch for a glass-like edge, but practice on scraps first.
- Edge joining: For creating boxes or structures, use special acrylic glue for seamless joins after cutting.
Professionals often combine several methods: rough-cut with a circular saw, then finish with a router and polish. This creates museum-quality results.
Environmental And Health Considerations
Plexiglass dust is not only messy; it can be harmful if inhaled. Always cut in a well-ventilated area and clean up thoroughly.
- Dispose of scrap properly. Plexiglass is recyclable in some areas, but check your local rules.
- Avoid burning scraps. Burning plexiglass releases toxic fumes.
- Store unused sheets flat. This prevents warping and keeps them ready for future use.
For more on safe handling and recycling, visit the official Wikipedia PMMA page.
Frequently Asked Questions
What Blade Is Best For Cutting Plexiglass With A Circular Saw?
The best blade is a fine-tooth, carbide-tipped blade with at least 60 teeth for a 7-1/4″ saw. Blades designed specifically for plastics or acrylics, often with 80 or more teeth, give the smoothest results.
How Do I Prevent Plexiglass From Chipping While Cutting?
To prevent chipping, use masking tape along the cut line, choose a fine-tooth blade, and move the saw slowly and steadily. Also, support both sides of the sheet near the cut.
Can I Cut Curved Shapes In Plexiglass With A Circular Saw?
A circular saw is not suitable for curves. For curved or irregular shapes, use a jigsaw with a fine blade or a laser cutter.
How Thick Can Plexiglass Be For Cutting With A Circular Saw?
A circular saw can cut sheets up to 1/2″ thick or more, depending on the saw and blade. For very thick sheets, make multiple shallow passes and use strong support.
Do I Need To Sand The Edges After Cutting?
Yes, sanding the edges helps remove roughness or chips. Start with 220 grit and finish with 400 grit sandpaper. For a crystal-clear edge, polish with a buffing wheel or plastic polish.
Cutting plexiglass with a circular saw is easier than many people think. With the right setup, blade, and safety steps, you can create clean, accurate cuts for any project. Take your time, double-check your tools, and enjoy the satisfaction of professional-looking results.