When your lawn mower starts sputtering, stalling, or refusing to start, the carburetor is often the hidden culprit. Many people think cleaning a carburetor is a task for professionals. In reality, with some patience and the right steps, you can clean it yourself and restore your mower’s power.
A clean carburetor ensures your engine mixes fuel and air properly, giving you a smoother cut and saving you money on repairs. Let’s dive deep into the world of carburetor cleaning, breaking every step down in clear language—even if you’ve never opened an engine before.
Why A Clean Carburetor Is Essential
The carburetor is the “lungs” of your lawn mower. Its job is to blend the right amount of gasoline with air before sending it into the engine. When it gets dirty or clogged, you’ll notice:
- Hard starting
- Loss of power
- Engine running rough
- Black smoke from the exhaust
Tiny particles from fuel, old gas, or debris can block the small passages inside a carburetor. Over time, even a little buildup can cause big problems. Regular cleaning prevents these issues, extending the life of your mower and saving you the frustration of a poorly running engine.
A dirty carburetor can also make your mower use more fuel than it should. This happens because the engine struggles to pull in enough air, and too much gasoline ends up in the mix. Not only do you spend more on gas, but you also get more pollution and smoke from your mower.
In some cases, your mower may fail local emission checks if you live in an area with rules about engine smoke.
Another issue is that a clogged carburetor can damage other parts of your mower. If the engine runs too lean (not enough fuel) or too rich (too much fuel), it can overheat, or carbon can build up on the spark plug and valves.
This means a small cleaning job can prevent bigger and more expensive repairs later.
Signs Your Lawn Mower Carburetor Needs Cleaning
Watch for these warning signals:
- Trouble starting: You pull the cord again and again, but the engine won’t fire up.
- Stalling: The engine starts, but then dies within seconds or minutes.
- Surging or hunting: The engine speed goes up and down on its own.
- Black smoke: Thick smoke signals too much fuel and not enough air.
- Poor cutting performance: The engine lacks power, causing uneven or rough mowing.
Sometimes, people think they need a new spark plug or a new mower. But in many cases, the carburetor just needs a good cleaning.
Less obvious signs include a “popping” noise from the exhaust or a strong gasoline smell around the mower, even when it is not running. These can mean the carburetor is leaking or fuel is not burning properly. Also, if your mower hesitates or slows down when you hit thicker grass, the carburetor could be struggling to deliver the right mix.
Beginners may miss that a mower that “idles high” or “won’t idle” can also point to carburetor issues. It’s not always about starting – pay attention to how your mower sounds and runs at all speeds.
Tools And Materials Needed
Before you start, gather these items:
- Socket set or wrenches (usually 8mm, 10mm, or 13mm)
- Screwdrivers (flat and Phillips head)
- Needle-nose pliers
- Carburetor cleaner spray (look for a brand made for small engines)
- Clean rags or paper towels
- Small brush (like an old toothbrush)
- Compressed air (optional, but very useful)
- Small container (for soaking parts)
- Replacement gaskets or O-rings (if your mower’s manual suggests)
- Gloves and safety glasses
- Fuel line clamp or locking pliers
Having these tools ready saves time and reduces stress, especially if a screw is hard to reach or a gasket falls out.
A few extra items can make the job easier. A small magnetic tray keeps tiny bolts and nuts from rolling away. If you have a smartphone, use it to take close-up photos as you go along. A headlamp or flashlight helps you see inside the engine area.
And if your mower is old, you may want a can of penetrating oil (like WD-40) to loosen stuck bolts.
If you don’t have compressed air, a plastic drinking straw can help you blow through small parts to check for blockages.
Safety Precautions
Never skip safety:
- Work outdoors or in a well-ventilated area. Gasoline fumes are dangerous.
- Wear gloves to protect your skin from chemicals and sharp edges.
- Use safety glasses—carburetor cleaner can splash.
- Keep fire sources away. No smoking or open flames.
A clean workspace prevents lost screws and keeps your mower in one piece.
Also, avoid wearing loose clothing or jewelry that could catch on engine parts. If you get gasoline or carburetor cleaner on your skin, wash it off right away. Keep a bucket of water or a fire extinguisher nearby, just in case.
Remember, some carburetor cleaner sprays are flammable—always read the label before use.
Children and pets should stay away from your work area. If you spill gasoline, clean it up immediately and let the area dry before working.
Step-by-step Guide: How To Clean A Lawn Mower Carburetor
Let’s break down the cleaning process from start to finish.
1. Prepare The Mower
- Disconnect the spark plug wire. This prevents accidental starting.
- Turn off the fuel valve, if your mower has one. If not, use a clamp or locking pliers to pinch the fuel line.
- Drain the fuel tank (optional, but helps avoid spills).
If your mower has a fuel shutoff valve, turn it to “off. ” If you don’t see one, gently squeeze the fuel line with the clamp. Draining the fuel tank is wise if you plan to tip the mower or if the gas is old and stale.
To drain, simply use a siphon or remove the fuel line from the tank and let the gas flow into a container.
Always work on a flat surface. Placing a rag under the mower catches drips and makes cleanup easier.
2. Locate And Remove The Carburetor
Most lawn mower carburetors sit behind the air filter. Here’s how to get to them:
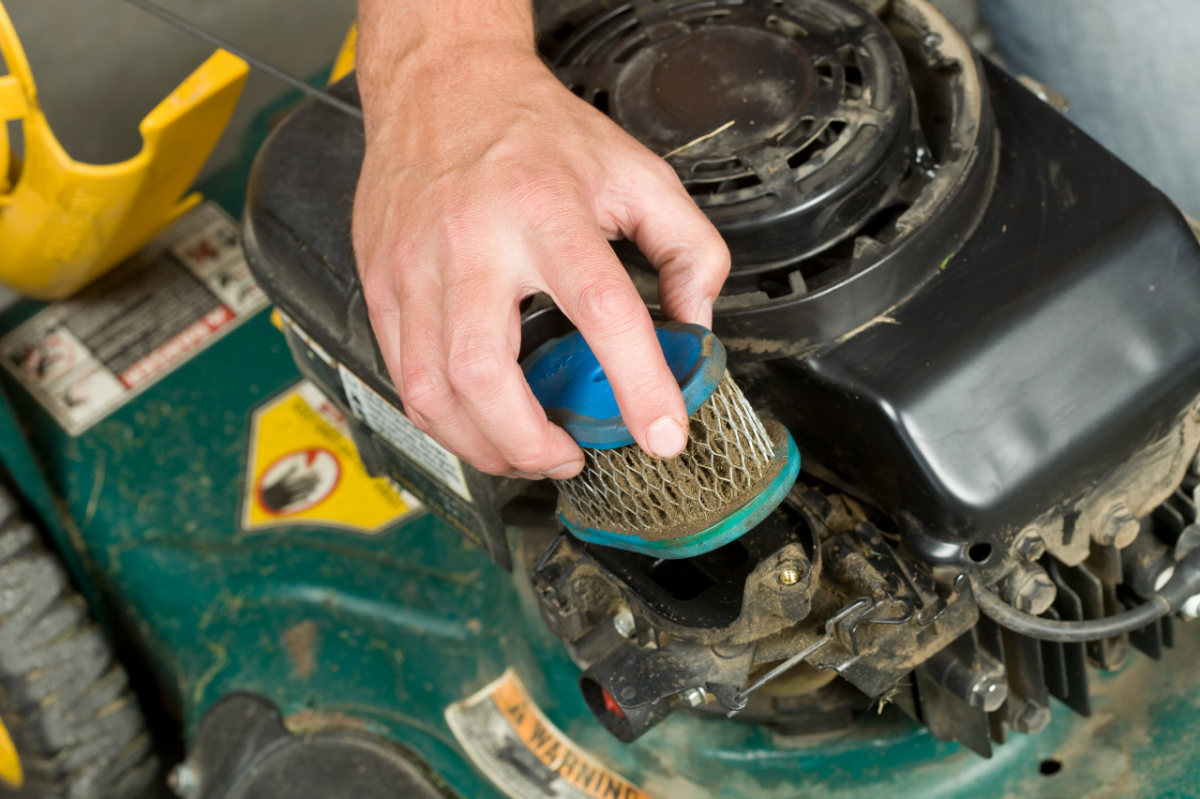
- Remove the air filter cover and the filter itself.
- Unscrew and remove the air filter base.
- Find the carburetor, which is usually attached to the engine with 2-3 bolts.
- Disconnect the throttle and choke linkage rods. Take a photo for reference so you remember how they fit.
- Carefully remove the fuel line from the carburetor. Have a rag handy to catch drips.
- Remove the mounting bolts and gently pull the carburetor away.
Tip: Place small parts in a container so nothing gets lost.
Sometimes, the gasket between the carburetor and engine block can stick, so gently wiggle the carburetor to break it free. If you see springs or a governor arm, take extra care not to stretch or bend them. If your mower is very dirty, brush off loose grass and dirt before opening anything.
This prevents debris from falling inside the engine.
3. Disassemble The Carburetor
- Remove the bowl (bottom part, held by a bolt or screw).
- Take out the float and float pin.
- Remove the needle valve (it controls fuel flow).
- Unscrew any visible jets (tiny brass tubes).
- Take out any gaskets carefully. If they’re torn or worn, replace them.
Non-obvious insight: Take photos at each step. Many beginners forget how the parts fit together.
Go slowly, as some carburetor parts are very small and delicate. Lay out parts in order as you remove them. If your mower has a spring-loaded bowl nut (common on some brands), remove it slowly to avoid losing the spring.
If you find black sludge, greenish deposits, or sticky “varnish,” this is fuel residue. It’s the main reason your carburetor isn’t working right.
4. Clean Each Part
- Spray all parts and inside surfaces with carburetor cleaner. Focus on holes and passages.
- Use a small brush to remove stubborn dirt or varnish.
- Push a thin wire through jets and passages to clear blockages (a bread twist-tie with the plastic removed works well).
- Blow compressed air through every hole. If you don’t have an air compressor, a can of computer duster works too.
- Wipe everything dry with a clean rag.
Don’t soak plastic or rubber parts in cleaner for long—they can swell or crack.
Be sure to clean the tiny holes in the jets and the central tube of the carburetor. These passages are often just the width of a pin. If even a little dirt remains, it can block fuel flow. For heavy varnish, let the metal parts soak for 10–15 minutes in cleaner, then scrub again.
Pro tip: Hold the carburetor up to the light and look through each passage. If you can see light at the other end, it’s clear.
5. Inspect For Damage
- Check the float for leaks (it should not have fuel inside).
- Look for cracks, corrosion, or worn gaskets.
- Replace anything damaged. Most mower shops sell inexpensive carburetor rebuild kits.
If the float is metal, shake it next to your ear—if you hear sloshing, it has a leak. If it’s plastic, check for cracks or swelling. Metal parts should be shiny and smooth; if you see white, powdery corrosion, scrub it off or replace the part.
If gaskets are hard or crumbly, get new ones. A good seal is needed for the carburetor to work.
Some carburetors have a small rubber O-ring where the bowl meets the body. This often stretches or tears during cleaning, so it’s wise to have a spare.
6. Reassemble The Carburetor
- Put jets, needle valve, float, and pin back in their places.
- Install new gaskets if needed.
- Attach the bowl and tighten its screw/bolt.
- Reconnect linkage rods and fuel line (use your reference photos).
- Bolt the carburetor to the engine.
- Replace the air filter and cover.
Reassembly is the reverse of disassembly, but go slowly. Make sure all rods and springs are in their correct holes or notches. Do not overtighten screws—snug is enough. If you use too much force, you can strip threads or crack the carburetor body.
If you have leftover parts, double-check your photos. Everything should fit easily; do not force parts together.
7. Test The Mower
- Turn on the fuel valve.
- Reconnect the spark plug wire.
- Prime the engine if your mower has a primer bulb.
- Start the mower. It may take a few pulls to refill the carburetor.
- Listen for smooth running. If it surges, double-check for air leaks or missed jets.
Practical tip: If your mower still runs poorly, check the spark plug and fuel filter too.
Let the mower warm up for a few minutes. Try mowing a small patch of grass to see if the engine responds to changes in load. If you hear hissing or see fuel leaks, turn off the mower and check your assembly.
If you notice any parts vibrating loose, stop the engine and tighten them. It’s common to need a small adjustment after the first run.
Cleaning Without Removing The Carburetor
Sometimes, you can clean a lightly clogged carburetor without full removal:
- Remove the air filter.
- Spray carburetor cleaner directly into the throat (opening).
- Start the engine. Let it run while spraying short bursts.
- If the engine smooths out, you’ve likely cleared a minor blockage.
This shortcut works for small problems. For stubborn clogs, full disassembly is best.
Extra insight: This method is helpful after winter storage or if you notice a quick drop in performance. However, it won’t remove deep varnish or clean tiny jets—think of it as a “quick fix,” not a full solution.
How Often Should You Clean Your Carburetor?
- Once per mowing season is ideal for most homeowners.
- If you use old fuel or mow in dusty conditions, clean more often.
- If your mower sits unused for months, varnish and gunk build up faster.
Regular cleaning prevents tough problems and keeps your mower reliable.
If you mow very large areas, or if your mower is used by several people, check the carburetor every few months. It’s better to clean before problems begin rather than waiting for a breakdown.
Common Mistakes And How To Avoid Them
Many beginners make these errors:
- Losing small parts: Lay them out in order or photograph each step.
- Forgetting linkage order: Take clear photos before removal.
- Overtightening bolts: Use gentle hand pressure—most parts are soft metal.
- Skipping new gaskets: Old, cracked gaskets cause air leaks and poor running.
- Using too much carburetor cleaner: Excess spray can damage plastic and rubber.
Learning from these mistakes can save hours of frustration.
Another mistake is trying to force dirty jets clean with sharp objects like needles or nails—this can scratch or damage them. Use soft wire only. And don’t forget to check the fuel line for cracks or blockages; sometimes the problem is not the carburetor, but how fuel gets to it.
Comparison: Cleaning Vs. Replacing A Carburetor
Sometimes, cleaning may not fix every problem. Here’s a quick comparison:
| Factor | Cleaning | Replacing |
|---|---|---|
| Cost | Low (usually under $10 for cleaner and gaskets) | Medium ($20–$60 for new carburetor) |
| Time | 1–2 hours | 30–60 minutes |
| Skill required | Moderate (disassembly and cleaning) | Basic (swap old for new) |
| Result | Original carburetor, often as good as new | Brand new part, but must match engine model |
Non-obvious insight: Sometimes, cheaper aftermarket carburetors don’t fit perfectly, causing more trouble than cleaning the old one.
Also, original carburetors are often made to tighter tolerances. Cleaning and keeping the original part can be more reliable in the long run, especially for older mowers.
What To Do If Cleaning Doesn’t Work
If your mower still runs poorly after a full cleaning:
- Double-check all gaskets and linkages.
- Try cleaning a second time.
- Replace the carburetor if it’s badly corroded or cracked.
Also, check:
- Spark plug
- Fuel filter
- Air filter
- Ignition coil
A small engine shop can help if you’re still stuck.
Sometimes, a simple issue like a stuck choke or clogged vent hole can cause trouble. Don’t overlook these. If you hear a clicking or ticking sound, the problem might be electrical, not with the carburetor.

How To Keep Your Carburetor Clean Longer
Prevention is easier than repair. Follow these tips:
- Use fresh gasoline. Old fuel causes varnish and blockages.
- Add fuel stabilizer if storing the mower for more than a month.
- Run the mower dry at the end of the season.
- Change the air filter regularly to keep dust out.
- Check the fuel filter every spring.
Pro tip: Store your mower in a dry place. Moisture can lead to rust and sticky carburetor parts.
If you live in an area with high humidity, add a cover or tarp over your mower to keep moisture away. Avoid storing the mower with a full tank of gas, unless you’ve added stabilizer. Running the engine dry until it stops ensures no fuel is left in the carburetor to turn into varnish.
Environmental And Health Considerations
Carburetor cleaner contains strong chemicals. Use them safely:
- Don’t pour leftover cleaner or old fuel on the ground.
- Store chemicals out of children’s reach.
- Dispose of rags and old fuel at a local hazardous waste center.
Fact: Gasoline and cleaner vapors are harmful to breathe. Always work outdoors or in a very well-ventilated area.
Also, avoid touching your face or eating while working with engine parts. After finishing, wash your hands with soap and water. Do not reuse containers that held fuel or cleaner for food or drink.

When To Call A Professional
Most homeowners can clean a carburetor with patience. But call a pro if:
- You see heavy corrosion or damage inside the carburetor.
- Gaskets are missing and you can’t find replacements.
- Your mower is under warranty—DIY work may void it.
A small engine shop can usually clean or rebuild a carburetor for $40–$100.
If you are uncomfortable with disassembly or if your mower has complex linkages or electronic controls, a professional will save you time and possible mistakes. Don’t hesitate to ask questions at your local mower shop—they often give advice for free.
Real-world Example: Fixing A Stubborn Push Mower
John, a homeowner, noticed his mower would only run for 10 seconds before stalling. He checked the spark plug and air filter—both were fine. After removing the carburetor, he found yellow varnish blocking the main jet. Cleaning with spray and compressed air solved the problem.
The mower ran smoothly for the rest of the season.
Lesson: Even if you have little experience, careful cleaning can solve most carburetor issues.
Another example: Maria, a first-time mower owner, struggled with surging engine speed. She found the carburetor bowl full of water (from mowing wet grass and storing outside). After cleaning and drying, and adding fresh fuel, her mower worked like new. This shows how even beginners can fix common carburetor problems with care and patience.
Key Carburetor Parts You Should Know
Understanding what each part does makes cleaning easier.
| Part | Function |
|---|---|
| Float | Controls fuel level in the bowl |
| Needle valve | Opens/closes to let fuel in |
| Main jet | Regulates fuel flow at high speed |
| Idle jet | Regulates fuel at low speed |
| Choke | Restricts air to enrich the mixture for starting |
| Throttle | Controls engine speed by adjusting air/fuel mix |
| Bowl | Holds fuel ready for the engine |
Knowing these parts helps you spot and fix problems faster.
Extra insight: Sometimes, a stuck float or clogged idle jet causes “mystery” problems that look like electrical issues. Checking each part carefully during cleaning saves guesswork.
Key Differences: Carburetor Types
Most lawn mowers use one of these carburetor types:
| Type | Features | Common in |
|---|---|---|
| Float-type | Has a float bowl, easily serviced | Push mowers |
| Diaphragm-type | Uses a rubber diaphragm, fewer parts | Some older or commercial mowers |
| Primer bulb | No float, uses a bulb to draw fuel | Small engines, trimmers |
Tip: Cleaning steps are similar, but float-type carburetors are the most common and easiest to service.
Diaphragm carburetors are often found on mowers that can be used at different angles, like trimmers or edgers, because they don’t rely on gravity. Primer bulb types are simple but sometimes the bulb itself cracks and needs replacing.
Where To Find More Help
For diagrams, part numbers, and troubleshooting, check your mower’s manual or visit the manufacturer’s website. For more detailed guides and videos, Wikipedia provides a strong technical overview.
Local hardware stores often have staff who can answer quick questions, and many small engine forums online have step-by-step photos for popular mower brands.
Frequently Asked Questions
How Long Does It Take To Clean A Lawn Mower Carburetor?
Cleaning usually takes between 1 and 2 hours for beginners. Disassembly, cleaning, and careful reassembly take time, especially the first try.
If you’re new, set aside extra time to avoid feeling rushed. The process gets faster with practice.
Can I Use Wd-40 Instead Of Carburetor Cleaner?
While WD-40 can loosen grime, it’s not as effective as dedicated carburetor cleaner. Use a product made for small engines for best results.
Some people try brake cleaner—it works in a pinch, but carburetor cleaner is safer for rubber and plastic inside small engines.
What Happens If I Lose A Small Carburetor Part?
Many small engine shops sell rebuild kits with replacement jets, gaskets, and pins. Take your old part with you to match sizes.
If a spring or clip pops away, use a magnet to search the floor. Don’t try to run the mower without all parts in place.
Why Does Old Gasoline Cause Carburetor Problems?
Old gasoline breaks down and forms sticky varnish that blocks jets and passages. Always use fresh fuel and add stabilizer if storing for months.
Even a few weeks in a hot garage can turn gas “bad. ” If you’re not sure, drain and refill.
Do I Have To Remove The Carburetor Every Time I Clean It?
No. For light clogs, you can spray cleaner into the carburetor without full removal. For deep cleaning, however, removal is best.
If your mower sits unused for long periods, a full cleaning once per year keeps it reliable.
Cleaning your lawn mower carburetor might seem challenging at first, but with these steps, you’ll find it’s very doable—even for beginners. Regular care not only saves money but also keeps your mower running smoothly, letting you enjoy a well-kept lawn all season.