Testing electrical outlets in your home is not just about safety—it’s also about peace of mind. Faulty outlets can cause fires, electrical shocks, or damage to your electronics. Learning how to test an outlet with a multimeter gives you the power to quickly spot problems before they become dangerous.
Even if you have never used a multimeter before, you can follow a clear, step-by-step process to check outlets with confidence. This guide will cover every detail you need, from understanding the tool to interpreting your results, so you can handle this basic home electrical task with ease.
Why Test Outlets With A Multimeter?
Many people only notice outlet problems when something stops working. But waiting for a failure is risky. Outlets can have hidden issues like loose wiring, incorrect voltage, or no ground connection. Testing with a multimeter helps you:
- Prevent electrical fires by detecting wiring faults
- Protect devices from damage due to voltage issues
- Ensure safety for your family, especially children and the elderly
- Confirm correct wiring after DIY repairs or renovations
A multimeter is more accurate than plug-in testers. It gives exact voltage readings and can check for both live and neutral faults. This is important because even if an outlet looks fine, it could still be unsafe.
What Is A Multimeter?
A multimeter is a handheld tool that measures voltage, current, and resistance. It comes in two main types:
- Analog multimeter: Has a needle and scale
- Digital multimeter (DMM): Shows readings on a digital screen
Most people use digital multimeters because they are easier to read and more reliable for beginners. Multimeters have two probes—one black (negative/COM) and one red (positive)—that you insert into the outlet slots.
Safety First: Precautions Before Testing Outlets
Electricity is dangerous if not handled carefully. Before you start, follow these safety tips:
- Understand your limits: If you are unsure, call a licensed electrician.
- Inspect your multimeter: Make sure it’s rated for home AC voltage (typically 600V or higher).
- Check the probes: Ensure they are not damaged or cracked.
- Wear rubber-soled shoes: This reduces your risk of shock.
- Keep hands dry: Moisture increases electrical conductivity.
- Remove metal jewelry: Rings and bracelets can conduct electricity.
- Work in good light: You must see clearly to avoid mistakes.
Never test an outlet with wet hands or in a wet environment. Always double-check your multimeter settings before use.
Understanding Outlet Basics
Before you start testing, it’s important to know how a standard outlet is wired. In the United States, a typical 120V outlet has three slots:
- Hot (live): Usually the smaller slot (right side)
- Neutral: Larger slot (left side)
- Ground: Rounded hole below the slots
In other countries, outlet shapes and voltages may differ, but the principle is similar. Always check your local wiring standards before testing.
Here’s a simple diagram of a North American outlet:
[ o ]
[ | | ]
G N H
(Ground, Neutral, Hot)
What You Need To Test An Outlet
Gather these items before starting:
- Digital multimeter (DMM)
- Multimeter probes (included with DMM)
- Flashlight (if the area is dark)
- Pen and paper to record readings
Optional, but useful:
- Outlet tester (to double-check results)
- Protective gloves for extra safety
Setting Up Your Multimeter
Correct setup is key. Follow these steps:
- Insert probes: Plug the black probe into the “COM” port and the red probe into the “VΩ” or “V” port.
- Set to AC voltage: Turn the dial to “ACV” or a symbol like “V~”. For most home outlets, set the range to 200V or 600V. Always choose a setting higher than the expected voltage.
- Turn on the multimeter: Ensure the display is working.
Digital multimeters often have auto-ranging. If yours does, you do not need to choose a voltage range.

Step-by-step Guide: How To Test Outlet With Multimeter
Let’s break down the process into clear steps, with details for each part. This section will focus on the most common 120V outlet, but tips for other voltages are included later.
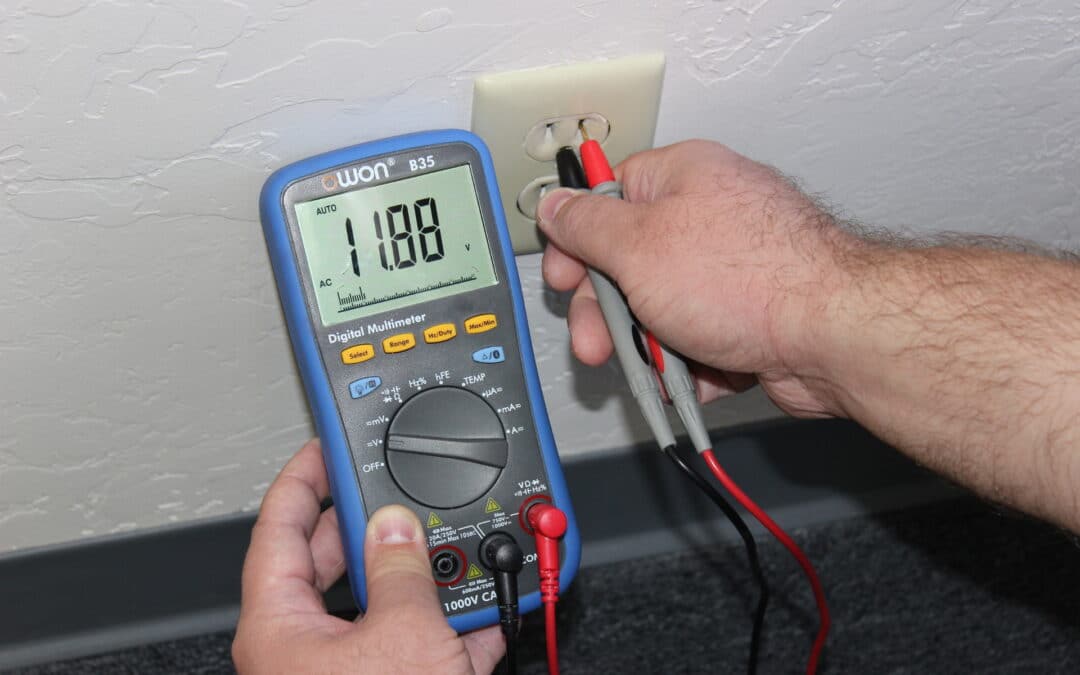
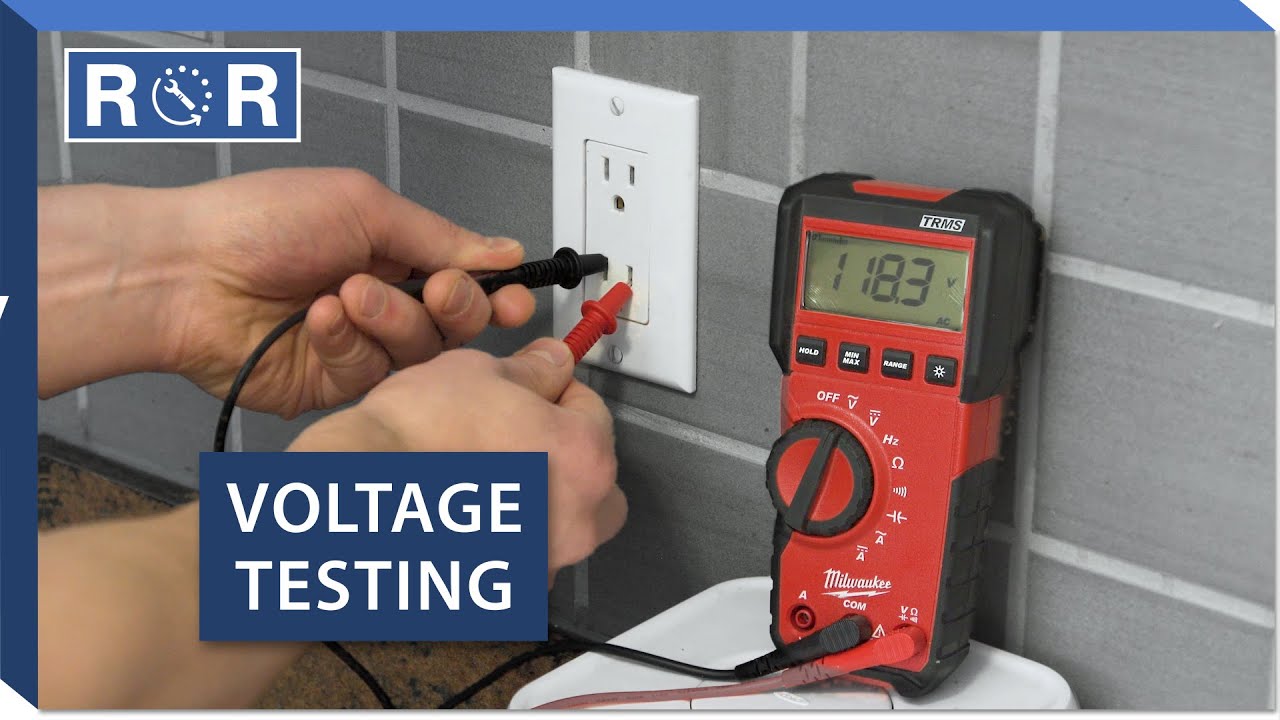
1. Test For Power (hot-to-neutral)
This checks if the outlet is live and provides the correct voltage.
- Insert the black probe into the neutral slot (larger hole).
- Insert the red probe into the hot slot (smaller hole).
- Read the display. For a standard US outlet, you should see 110–125 volts.
If the reading is much lower or zero, the outlet may not be working. High readings (over 130V) are also a problem.
2. Test Hot-to-ground
This checks if the ground is properly connected.
- Keep the black probe in the ground slot (rounded hole).
- Keep the red probe in the hot slot (smaller hole).
- The reading should be the same as hot-to-neutral (110–125 volts).
If you get a much lower reading, the ground wire may be loose or missing.
3. Test Neutral-to-ground
This checks for correct neutral wiring.
- Place the black probe in the ground slot.
- Place the red probe in the neutral slot.
- The reading should be very close to zero (less than 2 volts).
A higher reading means the outlet is not wired correctly or there is a problem with the neutral.
4. Optional: Test Gfci Outlets
If your outlet has “Test” and “Reset” buttons, it is a GFCI outlet (Ground Fault Circuit Interrupter). Test it as above, but also:
- Press the “Test” button. Power should turn off (multimeter shows zero).
- Press the “Reset” button to restore power.
If the outlet does not cut power when tested, it may not protect you from shock.
5. Repeat For All Outlets
Check every outlet in the room, especially those in kitchens, bathrooms, and outdoors. These areas have the highest risk for electrical faults.
What Do The Multimeter Readings Mean?
Reading your multimeter is more than just looking for numbers. Here’s a quick guide to interpreting results:
| Test | Expected Reading | Possible Problems |
|---|---|---|
| Hot-to-Neutral | 110–125V (US) | 0V = No power; >130V = Overvoltage; <100V = Undervoltage |
| Hot-to-Ground | 110–125V (US) | 0V = No ground; Low voltage = Bad ground connection |
| Neutral-to-Ground | 0–2V | >2V = Neutral not grounded; High voltage = Wiring fault |
Non-obvious insight: Many beginners ignore slight voltage on neutral-to-ground, but even small readings (above 2V) can indicate hidden problems, such as shared neutrals or overloaded circuits.
Testing Outlets In Different Countries
Voltage and wiring standards vary around the world. Here’s how to adjust your testing:
- Europe: Most outlets are 220–240V. Expect higher readings.
- UK: Three-pin outlets, also 230V.
- Asia/Africa: Check local voltage before testing.
Set your multimeter to the correct range. Never use a meter rated for 120V in a 240V outlet.
Here’s a quick comparison of outlet voltages by country:
| Country | Typical Outlet Voltage | Outlet Type |
|---|---|---|
| United States | 120V | A/B |
| United Kingdom | 230V | G |
| Germany | 230V | C/F |
| Australia | 230V | I |
| Japan | 100V | A/B |
Tip: If traveling or moving, use a plug adapter that matches the outlet type and voltage. Never force a plug into the wrong type of outlet.
Common Problems You Can Detect
Knowing what to look for helps you fix problems early. Here are some issues you may find:
1. Open Ground
- Hot-to-ground voltage is much lower than hot-to-neutral.
- Outlet lacks a proper ground connection.
- Risk: Higher chance of shock, especially with metal appliances.
2. Open Neutral
- Hot-to-neutral reads 0V or very low, but hot-to-ground is normal.
- Devices may not work, or lights may be dim.
- Risk: Overheating, damage to electronics.
3. Reversed Hot And Neutral
- Hot-to-neutral works, but neutral-to-ground shows high voltage.
- Risk: Shocks when touching “off” appliances; fire risk.
4. No Power
- All readings are zero.
- Check circuit breakers or fuses first.
- Risk: Outlet is dead; may need rewiring.
5. Overvoltage
- Readings above 130V (US) or above local standard.
- Risk: Can damage electronics, cause fires.
6. Undervoltage
- Readings below 100V (US).
- Causes devices to run poorly or not at all.
- Risk: Motors and electronics can overheat.
Non-obvious insight: Sometimes, outlets work but still have reversed hot and neutral wires. Plug-in testers might miss this, but a multimeter will catch the error if you test all slot combinations.
Troubleshooting: What To Do If Readings Are Not Normal
If your readings are off, follow these steps:
- Check other outlets: Is the problem only at one outlet? If yes, the wiring to that outlet may be faulty.
- Check the circuit breaker: If many outlets are dead, a breaker may have tripped.
- Look for loose wires: Turn off power at the breaker, remove the outlet cover, and inspect for loose or disconnected wires.
- Test with another device: Plug in a lamp or phone charger to confirm the outlet is not working.
- Call an electrician: If you find reversed wires, missing ground, or cannot find the cause, contact a professional.
Never try to repair live wiring unless you are trained and qualified.
Testing Other Types Of Outlets
Gfci Outlets
- Essential in bathrooms, kitchens, and outdoors.
- Protects against electric shock.
- Test using both the built-in button and your multimeter.
240v Outlets
- Used for ovens, dryers, and large appliances.
- Expect readings of 220–240V.
- Probe between both hot slots and then each hot to ground.
Usb Power Outlets
- Some modern outlets include USB ports.
- To test, set your multimeter to DC voltage and probe the USB contacts.
- Expect 5V for standard USB ports.
Smart Outlets
- Can be tested like regular outlets.
- Some may have built-in diagnostics you can check via an app.
How Often Should You Test Outlets?
Regular checks prevent surprises. Good practice includes:
- Every 6–12 months: For outlets in kitchens, bathrooms, and outdoors.
- After renovations: Always test outlets after any electrical work.
- If you notice problems: Like flickering lights, warm outlets, or buzzing sounds.
Testing often finds problems before they become dangerous.
Tips For Beginners
- Practice with a battery: Try testing a 9V battery first to get used to the multimeter.
- Label your outlets: If you find a problem, mark the outlet to avoid future use.
- Keep a record: Write down your readings for each room.
- Don’t rush: Take your time to avoid mistakes.
- Check your home’s wiring diagram: If available, it can help you trace problems.
Choosing The Right Multimeter
Not all multimeters are created equal. Here’s what matters most:
- Safety rating: Look for CAT II or CAT III for home use.
- Auto-ranging: Makes it easier for beginners.
- Large display: Easier to read results.
- Sturdy build: Dropping the meter should not break it.
- Clear markings: Dial and ports should be easy to understand.
Avoid very cheap models—they may not be accurate or safe.
Here’s a quick comparison of features:
| Feature | Basic Multimeter | Advanced Multimeter |
|---|---|---|
| Auto-ranging | No | Yes |
| Backlit display | No | Yes |
| Safety rating | CAT I | CAT II/III |
| Price range | $10–$20 | $40–$100+ |
Mistakes To Avoid When Testing Outlets
Even careful people make errors when using a multimeter. Some of the most common mistakes are:
- Setting the meter to DC instead of AC: AC is used for outlets, DC is for batteries.
- Touching both probes at once: Inserting both probes with one hand reduces shock risk.
- Testing with damaged probes: Replace frayed or cracked probes immediately.
- Forgetting to reset the meter: Always turn off and reset before storing.
- Assuming all outlets are the same: Test each one, as wiring can differ even in the same room.
Tip: Always double-check your dial setting before inserting probes into an outlet.
Real-world Example: Diagnosing A Faulty Outlet
Imagine your living room lamp suddenly stops working. Here’s how you would use a multimeter to find the problem:
- Test the lamp in another outlet: It works, so the lamp is fine.
- Set your multimeter to 200V AC.
- Insert probes into the outlet: Hot-to-neutral reads 0V.
- Test hot-to-ground: Also 0V.
- Check circuit breaker: Not tripped.
- Check nearby outlets: All working.
- Turn off power, remove cover: Find a loose wire on the outlet.
- Reattach wire, restore power, retest: Now hot-to-neutral reads 120V.
- Lamp works again.
This systematic approach saves time and avoids guesswork.
When To Call A Professional
Not all problems can be solved with a multimeter. If you find any of these, call an electrician:
- Burn marks or smells at the outlet
- Outlets are warm or hot to touch
- You see sparks when plugging or unplugging devices
- You find aluminum wiring (requires special handling)
- Unusual readings you cannot explain
Working with electricity is risky. When in doubt, get expert help.
Additional Resources
If you want to learn more about safe electrical work, check out this guide from The U.S. Consumer Product Safety Commission.
Frequently Asked Questions
What Does It Mean If My Outlet Shows No Voltage?
If your multimeter shows 0V when testing hot-to-neutral, it usually means the outlet has no power. This could be due to a tripped breaker, a blown fuse, or a disconnected wire. Check the breaker panel first. If everything looks normal, the outlet wiring itself may be damaged.
Can I Test A 240v Outlet With The Same Multimeter?
Most digital multimeters can handle up to 600V, but always check your model. Set it to AC voltage and use the correct range. When testing 240V outlets, be extra careful—these carry more dangerous currents than regular outlets.
Why Does My Neutral-to-ground Reading Show Some Voltage?
A small reading (under 2V) is normal because of electrical noise. Higher readings may indicate a poor ground connection, shared neutrals, or incorrect wiring. Persistent high readings should be checked by an electrician.
Do I Need To Turn Off The Power Before Testing An Outlet?
No, you must leave the power on to measure voltage. However, if you need to inspect wires or change the outlet, always turn off the power at the circuit breaker to avoid shocks.
Is A Multimeter Better Than A Plug-in Outlet Tester?
A multimeter is more versatile. It shows exact voltage and can test for wiring errors that plug-in testers may miss, such as reversed polarity or missing ground. For best results, use both tools together when possible.
With the right knowledge and a little practice, you can use a multimeter to test any outlet in your home safely and accurately. This skill helps you protect your family, your electronics, and your peace of mind. Stay safe, test regularly, and never hesitate to get professional help if something doesn’t look right.