Sanding drywall is a step that can make or break the look of your finished walls. If you want smooth, paint-ready surfaces, the right sanding method is important. Many people wonder: Can you use an orbital sander on drywall? The answer is not as simple as yes or no. While orbital sanders can be used on drywall, there are special techniques, risks, and tips you need to know. This article covers everything you should understand before reaching for your orbital sander, including when to use it, how to get the best results, and common mistakes to avoid. Let’s get started so your next drywall project has a professional finish.
What Is An Orbital Sander?
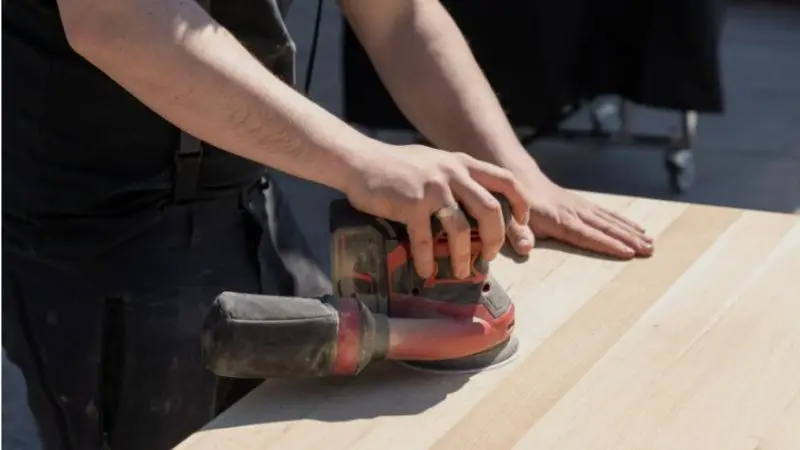
An orbital sander is a power tool that uses a round sanding pad, moving in tiny circles (orbits), to smooth surfaces. It’s widely used for woodworking, furniture, and, sometimes, for drywall. There are two main types: the random orbital sander, which moves in both circles and orbits, and the regular orbital sander, which moves in only one direction. The random version is more common for finishing work because it leaves fewer swirl marks.
Orbital sanders are popular because they are easy to control and can cover large areas quickly. However, when it comes to drywall, the tool’s power and speed can be both a benefit and a risk.
How Drywall Sanding Works
Drywall sanding is the process of smoothing out joint compound—the white mud used to cover seams and screws between drywall sheets. The goal is to create an even surface for painting or wallpapering. Traditionally, people use hand sanders or pole sanders with fine-grit sandpaper for this job.
Drywall dust is very fine and can be messy. The surface itself is softer than wood, so it’s easy to damage if you use the wrong tool or too much pressure.
Can You Use An Orbital Sander On Drywall?
The short answer: Yes, you can use an orbital sander on drywall, but it’s not always the best choice for every situation. Orbital sanders are powerful. If used carelessly, they can gouge or scratch the drywall, ruining the smooth finish you want.
Let’s look at when it makes sense to use an orbital sander—and when to avoid it.
When Is An Orbital Sander A Good Choice?
- Large, Flat Areas: If you have big, flat sections of drywall, such as ceilings or wide walls, an orbital sander can speed up the process.
- Heavy Build-Up: Sometimes, joint compound is applied too thickly, or there are large ridges. An orbital sander can quickly knock these down.
- Renovations or Repairs: If you’re sanding old painted drywall to remove texture or smooth out patches, the tool can help.
When Should You Avoid It?
- Corners and Edges: Orbital sanders are not precise enough for corners or tight spots. Hand sanding is safer here.
- Thin or Delicate Areas: If the drywall or compound layer is thin, a power sander can easily break through to the paper or even damage the board.
- Final Finishing: For the last sanding before painting, hand sanding gives more control and a smoother result.
Key Benefits Of Using An Orbital Sander On Drywall
If used correctly, an orbital sander can save time and effort. Here are the main benefits:
- Speed: Covers large areas much faster than hand sanding.
- Consistency: Provides a uniform finish if you use the right grit and technique.
- Less Effort: Reduces physical strain, especially on big projects.
However, these benefits only come with careful use.
Main Risks And Drawbacks
Before you plug in your sander, consider these key risks:
- Surface Damage: Too much pressure or a coarse grit can leave swirl marks, gouges, or even holes.
- Dust Explosion: Orbital sanders create a lot of dust. Without good dust collection, your workspace can quickly become a mess, and breathing drywall dust is unhealthy.
- Over-Sanding: It’s easy to remove too much material, especially near seams and corners.
Choosing The Right Orbital Sander For Drywall
Not all orbital sanders are equal. The type you choose affects your results.
| Type | Best For | Pros | Cons |
|---|---|---|---|
| Random Orbital Sander | Large, flat drywall surfaces | Less likely to leave swirl marks, good dust collection | Can be heavy, not good for edges |
| Standard Orbital Sander | Quick smoothing of rough spots | Lightweight, easy to handle | May leave visible sanding marks |
| Detail Sander | Small areas, corners | Precise, good for edges | Slow for large areas |
For drywall, a random orbital sander is usually best, especially if it has a dust collection system.
Choosing The Right Sandpaper Grit
The grit of your sandpaper is critical. Grit means how rough or smooth the paper is. Lower numbers are rougher; higher numbers are finer.
- 80–100 Grit: Very coarse. Only use if there are big bumps or lots of compound to remove.
- 120–150 Grit: Good for general drywall sanding. Removes material quickly but can leave scratches if not careful.
- 180–220 Grit: Best for final smoothing before painting. Gives a smooth surface with less risk of damage.
A common mistake is starting with grit that is too coarse. Always test in a small area first.
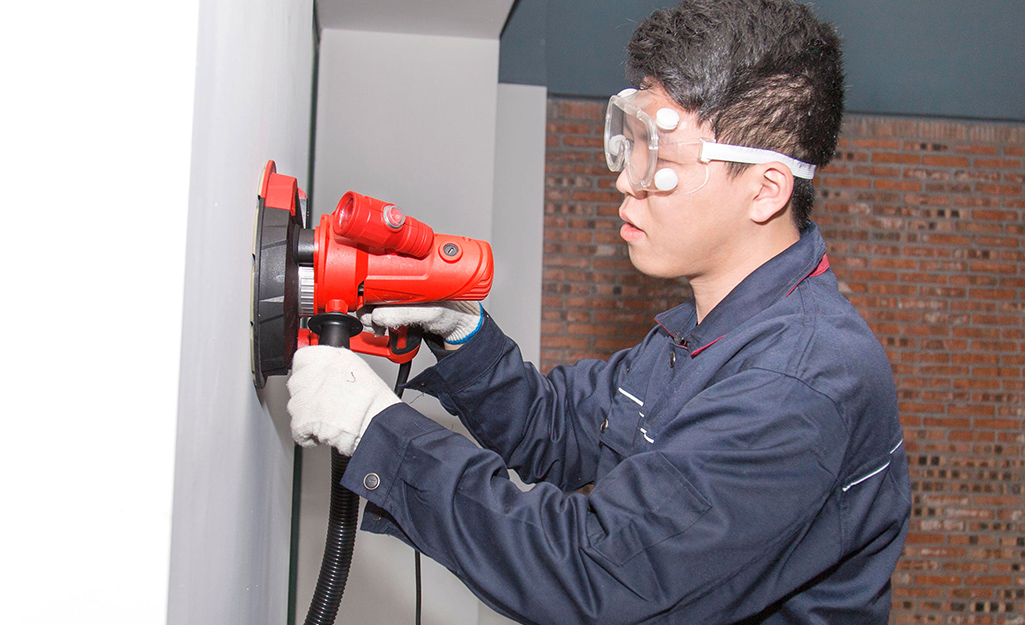
Essential Safety Gear For Drywall Sanding
Drywall dust can irritate your lungs, eyes, and skin. Always use these safety items:
- Dust Mask or Respirator: Protects your lungs from fine dust particles.
- Safety Glasses or Goggles: Prevents dust from getting in your eyes.
- Hearing Protection: Orbital sanders can be loud, especially in small rooms.
- Protective Clothing: Long sleeves keep dust off your skin.
If possible, use a sander with a built-in dust collection system and seal off your work area to contain dust.
How To Use An Orbital Sander On Drywall: Step-by-step
Getting a smooth finish with an orbital sander takes more than just turning it on. Follow these steps for best results.
1. Prepare Your Workspace
- Remove or cover furniture.
- Seal doorways and vents with plastic sheeting to control dust.
- Lay down drop cloths or plastic on the floor.
2. Choose And Attach The Right Sandpaper
- Select the correct grit for your task.
- Attach sandpaper firmly to the sander’s pad.
- Make sure the holes in the paper align with the dust extraction holes on the sander.
3. Wear Protective Gear
- Put on your dust mask, goggles, and ear protection before starting.
4. Start Sanding
- Hold the sander with both hands for control.
- Turn it on before touching the wall to avoid gouging.
- Move the sander gently in overlapping passes.
- Keep the tool flat against the drywall—do not tilt or press down hard.
- Let the sander’s weight and movement do the work.
5. Check Your Progress Often
- Stop every few minutes to check your work.
- Feel the surface with your hand to spot rough patches.
- Shine a bright light at an angle across the wall to reveal flaws.
6. Switch To Finer Grit For Final Passes
- Once the big bumps are gone, change to a finer grit for a smooth finish.
7. Sand Edges And Corners By Hand
- Use a sanding sponge or block for corners and near ceilings or trim.
- Be gentle to avoid damaging the paper surface.
8. Clean Up Thoroughly
- Vacuum the walls and floor with a shop vac or use a damp cloth to remove dust.
- Dispose of dust safely—do not sweep, as this stirs it into the air.
Common Mistakes To Avoid
Even experienced DIYers make errors when using an orbital sander on drywall. Avoid these pitfalls:
- Using Too Much Pressure: Pressing down can create low spots or gouges. Always let the tool do the work.
- Skipping Grits: Jumping from coarse to fine grit too quickly can leave scratches that show up after painting.
- Over-Sanding: Removing too much material can expose the paper or even damage the drywall board.
- Ignoring Dust: Not using a dust collection system or mask can lead to health problems and a messy home.
- Not Checking Work Frequently: If you don’t stop to check, you may miss areas or over-sand, leading to uneven surfaces.
Comparing Orbital Sanders Vs. Traditional Drywall Sanders
You might wonder if an orbital sander is better than traditional drywall sanding tools. Each has pros and cons.
| Tool | Speed | Control | Dust | Best Use |
|---|---|---|---|---|
| Orbital Sander | Fast | Moderate | High (unless with dust collection) | Large, flat surfaces |
| Hand Sander | Slow | High | Low | Detailed or delicate areas |
| Pole Sander | Moderate | Moderate | Medium | Ceilings, high walls |
| Drywall Sander (with vacuum) | Very fast | High | Very low | Professional projects |
The biggest difference is dust. Many drywall sanders connect to a vacuum, which keeps the air cleaner. Orbital sanders can be adapted for this, but not all models are compatible.
Practical Tips For Better Results
To get a professional finish, try these proven tips:
- Sand in Good Light: Use a strong work light, aiming it at a low angle to spot shadows and bumps.
- Mark Trouble Spots: Use a pencil to circle problem areas, so you don’t miss them when sanding.
- Vacuum as You Go: If your sander has a dust bag or vacuum port, empty it often to keep suction strong.
- Prime Before Final Sanding: Sometimes, priming the wall before a last quick sand helps highlight tiny flaws you can fix before painting.
Non-obvious Insights For Beginners
Most new DIYers miss these important details:
- Pad Cleanliness Matters: Dirty or clogged sanding pads don’t just slow you down—they can leave streaks or uneven spots. Replace or clean pads often.
- Joint Compound Is Softer Than You Think: Sanding too long in one spot can wear through the compound quickly, even with fine grit. Move the sander constantly.
- Check for Static: Drywall dust can create static electricity, causing dust to stick to walls or your clothes. Use a slightly damp (not wet) cloth for the final wipe-down to remove this film.
Real-world Example: When An Orbital Sander Saves Time
Imagine you just finished installing new drywall in a basement. The walls are flat and you have wide seams covered in joint compound. You use a random orbital sander with 150-grit paper and a vacuum attachment. In an hour, you finish what would have taken several hours by hand. You switch to 220-grit for a final pass, then check your work with a bright light. The result: smooth walls, ready to prime and paint.
But in the corners and around outlets, you hand-sand to avoid damage. This hybrid approach—using the orbital on big areas and hand sanding on details—is the method professionals often use.
Should You Buy A Special Drywall Sander Instead?
There are sanders made just for drywall, often with long handles and built-in vacuums. They work very well for large jobs, but are more expensive and harder to store. For most home projects, a standard orbital sander is enough—if you follow the tips above.
However, if you plan to sand multiple rooms or do drywall work often, investing in a drywall-specific sander could make your work easier and cleaner.
Health Risks: Why Dust Control Matters
Drywall dust is more than just messy—it can be harmful. According to the CDC, breathing drywall dust over time can cause coughing, throat irritation, and even long-term lung problems. Some joint compounds also contain silica, which is dangerous if inhaled.
Always use a good-quality mask and try to keep dust to a minimum. Clean up completely after sanding before letting kids or pets back into the area.
Cost: Is It Worth Using An Orbital Sander?
Orbital sanders are not expensive, with basic models starting around $40–$60 USD. Sandpaper discs cost a few dollars per pack. If you already own a sander for woodworking or furniture, you can use it on drywall too.
Drywall sanders with vacuum attachments are more costly—often $150 or more—but save time on big jobs and keep your workspace cleaner.
Environmental Considerations
Drywall dust is not toxic, but it should not be dumped into drains or left outside. It can clog plumbing or harm wildlife. Always collect dust in bags and dispose of it with your regular household trash, following your city’s guidelines.

Expert Advice: When To Call A Professional
If you have a very large area to sand, or if you’re unsure about your skills, hiring a drywall professional is a good idea. They have specialized tools and can finish walls quickly, with less mess. For complex jobs, such as curved walls or detailed ceilings, their experience can save you time and frustration.
Frequently Asked Questions
What Grit Sandpaper Should I Use With An Orbital Sander On Drywall?
For most drywall sanding, start with 120–150 grit sandpaper. Use finer 180–220 grit for your final pass before painting. Only use coarse grit like 80 if you have large ridges or heavy build-up, and use it carefully to avoid damaging the drywall.
Does Sanding Drywall With An Orbital Sander Create A Lot Of Dust?
Yes, orbital sanders create a lot of dust when used on drywall. Always use a sander with a dust bag or vacuum attachment if possible. Wear a dust mask and goggles, and seal off your work area to keep dust from spreading.
Can I Use An Orbital Sander For Sanding Drywall Corners?
No, orbital sanders are not good for corners or tight spaces. The round pad cannot reach into edges, and using the edge of the sander can damage the drywall. Use a sanding sponge or hand sander for corners and small details.
Is Hand Sanding Better Than Using An Orbital Sander On Drywall?
Hand sanding gives you more control and is less likely to damage delicate areas. However, it is slower and more tiring, especially on large surfaces. Many people use both methods—orbital for big areas, hand sanding for corners and final smoothing.
What Are The Main Mistakes To Avoid When Using An Orbital Sander On Drywall?
The biggest mistakes are using too much pressure, choosing the wrong grit, over-sanding, and not controlling dust. Always check your work often, use the right sandpaper, and let the sander’s weight do the work. Don’t forget to protect yourself from dust.
Using an orbital sander on drywall can save you time and effort, but it is not a one-size-fits-all solution. With the right approach, you can get professional results while avoiding common pitfalls. Remember to protect your health, use the right tools, and check your work often.
That way, your next drywall project will look its best—smooth, even, and ready for paint.