Using an orbital sander can completely change how you finish wood, metal, or even walls. Whether you’re fixing up old furniture, smoothing a door for painting, or handling a DIY project, this tool can save you hours and deliver a super-smooth surface. But many people feel nervous about using power tools like orbital sanders, thinking they are complicated or easy to mess up. The truth is, with the right guidance, anyone can get great results and avoid common mistakes.
In this article, you’ll discover how to use an orbital sander safely and effectively. You’ll learn which sander to pick, how to prepare for sanding, every step of the sanding process, and the smart tips professionals use for a perfect finish.
If you’re ready to get better results on your next project, let’s dive in.
What Is An Orbital Sander?
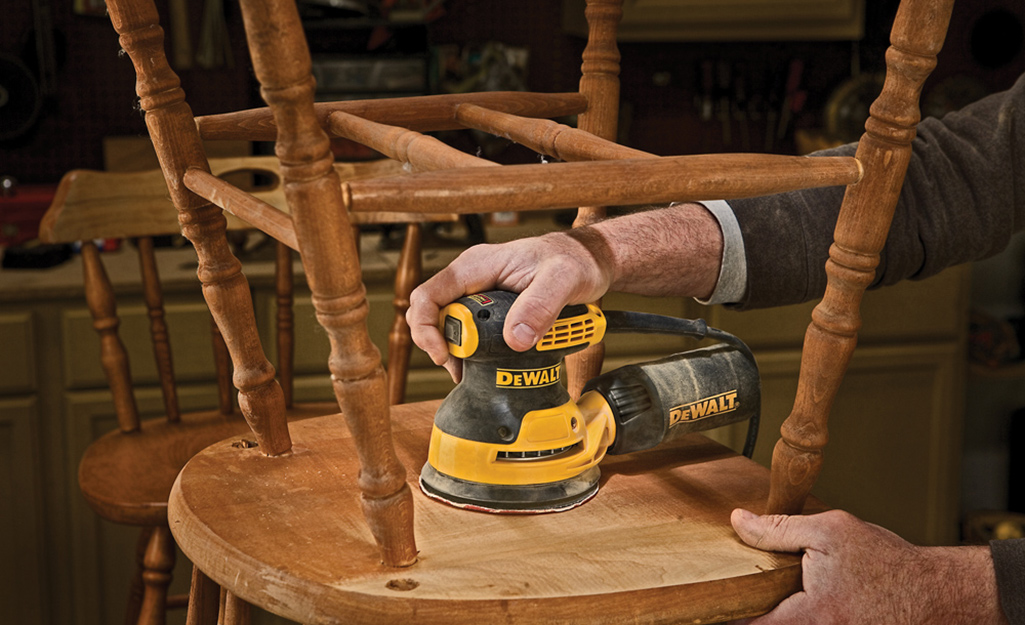
An orbital sander is a handheld power tool for smoothing surfaces. It uses a round or square pad that moves in small circles (orbits), which reduces scratch marks and helps achieve an even finish. Unlike belt sanders or sheet sanders, orbital sanders are gentle enough for most jobs but powerful enough to remove old paint, varnish, or rough spots.
There are two main types:
- Random orbit sanders – The pad moves in circles and spins at the same time, creating a random pattern. This is best for a super-smooth finish.
- Finishing (sheet) orbital sanders – The pad moves in small orbits but does not spin. These are good for fine finishing and detail work.
Most DIYers and professionals prefer random orbit sanders for versatility.
Why Use An Orbital Sander?
People choose orbital sanders for several reasons:
- Smooth results – The random orbit movement prevents deep scratches and swirl marks.
- Versatility – Works on wood, metal, and even painted surfaces.
- Ease of use – Lightweight and easy to control, even for beginners.
- Dust collection – Many models have built-in dust bags or attach to vacuums.
- Speed – Sand large areas faster than sanding by hand.
A smooth surface helps paint and finish last longer and look better. For most home projects, an orbital sander is the go-to tool.
Choosing The Right Orbital Sander
Picking the right sander depends on your needs, budget, and comfort level. Here’s what matters:
Power Source
- Corded – Offers consistent power. Good for long sessions or big jobs.
- Cordless – Easier to move, but battery life is limited. Best for small tasks.
Pad Size
- 5-inch pads are the most common, balancing speed and control.
- 6-inch pads cover larger areas faster but can be harder to handle on small surfaces.
Speed Control
Some sanders offer variable speed dials. This lets you adjust the speed for delicate tasks or faster removal.
Dust Collection
Look for models with a dust bag or a port to connect to a vacuum. Less dust means cleaner air and a better finish.
Weight And Grip
Pick a sander that feels comfortable in your hand. Heavier sanders are tiring to use for a long time.
Price Range
Orbital sanders range from $30 for basic models to $200+ for professional brands. For most DIYers, a reliable mid-range model is perfect.
Here’s a quick comparison of popular models:
| Model | Type | Pad Size | Speed Control | Dust Collection | Price Range |
|---|---|---|---|---|---|
| Bosch ROS20VSC | Random Orbit | 5″ | Yes | Bag | $70-$90 |
| DeWalt DWE6423K | Random Orbit | 5″ | Yes | Bag/Port | $80-$100 |
| Makita BO5041K | Random Orbit | 5″ | Yes | Bag | $90-$120 |
| Black+Decker BDERO100 | Random Orbit | 5″ | No | Bag | $30-$50 |
Non-obvious insight: Don’t assume expensive means better. The best sander is one that feels right in your hand and matches your project size.
Preparing Your Work Area
Good results start before you even plug in your sander.
- Clear the space – Remove clutter and cover nearby objects with drop cloths.
- Work in a ventilated area – Dust can be harmful. Open windows or use a fan.
- Check your material – Make sure the surface is dry, clean, and free of nails or screws that could damage the pad.
- Wear safety gear – Use safety glasses, a dust mask (or respirator), and hearing protection.
- Gather supplies – Have sandpaper discs of different grits, a brush or vacuum for cleaning, and a damp cloth for wiping down the surface.
Pro tip: If you sand outdoors, watch the weather. Dampness or wind can ruin your work or blow dust everywhere.

Understanding Sandpaper Grit
Sandpaper is rated by “grit” – the size of the abrasive particles.
- Lower numbers (40-80) – Coarse. Removes material fast. Good for stripping paint or smoothing rough wood.
- Medium (100-150) – Good for general smoothing.
- Fine (180-220) – Used for final sanding before painting or staining.
- Extra fine (320+) – For sanding between coats of finish.
Choosing the right grit matters. Starting too fine means you’ll work longer with less effect. Starting too coarse can leave deep scratches.
Here’s a basic progression for most wood projects:
- Start with 80 or 100 grit to smooth rough surfaces or remove finish.
- Move to 150 grit for general smoothing.
- Finish with 220 grit for a paint- or stain-ready surface.
Non-obvious insight: Always clean the surface between grit changes. Dust left behind can scratch as you sand finer.
Attaching Sandpaper To The Sander
Most orbital sanders use round, hook-and-loop (Velcro) sandpaper discs. Some use adhesive-backed discs.
- Unplug the sander or remove the battery before changing discs.
- Align the holes – The holes in the sandpaper must match the holes in the sander’s pad. These allow dust to be sucked away.
- Press firmly – Stick the disc onto the pad, making sure it’s flat and centered.
- Check for damage – Never use torn or wrinkled sandpaper.
If your sander has a pad that’s worn or won’t grip discs, replace the pad.
Step-by-step: How To Use An Orbital Sander
Now it’s time to get hands-on.
1. Safety First
- Wear eye protection, a dust mask, and ear plugs.
- Tie back long hair and avoid loose clothing.
- Make sure the workpiece is secure. Clamp it down if necessary.
2. Start Smoothly
- Plug in the sander or insert a charged battery.
- Hold the sander with one or two hands, using the main handle and possibly the front knob.
- Keep a light, even grip. Let the tool’s weight do the work.
- Turn the sander on before it touches the surface. This prevents gouges or swirl marks.
3. Sand In Slow, Even Strokes
- Move the sander in overlapping passes, about 1 inch apart.
- Go with the wood grain, especially for the final pass. This hides small scratches.
- Don’t push down hard. Too much pressure can slow the pad, cause uneven sanding, or wear out the sander.
- Keep the sander flat. Tilting it can dig edges into the surface.
4. Work In Sections
- For large surfaces, divide the area into sections and work slowly across each.
- Wipe or vacuum dust after each section to check your progress.
- Change sandpaper as soon as it becomes clogged or worn.
5. Progress Through Grits
- After your first pass, clean the surface.
- Attach the next finer grit and repeat.
- End with your finest grit for the smoothest finish.
- For projects like furniture or cabinets, you might sand up to 320 grit.
6. Pay Attention To Edges And Corners
- Most orbital sanders do best on flat, open surfaces.
- For edges, move slowly and keep the pad flat.
- For corners, you may need to finish by hand or use a detail sander.
7. Clean Up Thoroughly
- Vacuum the surface and surrounding area.
- Wipe with a damp (not wet) cloth to remove fine dust.
- Empty or clean the sander’s dust bag or filter.
Common Mistakes And How To Avoid Them
Even experienced DIYers make errors. Here’s what to watch out for:
- Using the wrong grit – Too coarse can leave scratches; too fine wastes time.
- Pressing too hard – This damages the surface and wears out the tool.
- Sanding too fast – Rushing causes uneven results.
- Skipping grits – Never jump from very coarse to very fine. Step up gradually.
- Letting the sander spin in place – Always keep it moving, even when starting or stopping.
- Not cleaning between grits – Dust left behind acts like a coarser grit.
- Ignoring dust collection – Dust can ruin your finish and is bad for your lungs.
Non-obvious insight: Always check your work in good light. Small scratches or swirl marks are much easier to fix now than after painting or staining.
Advanced Tips For The Best Finish
Want a finish that looks professional? Try these techniques:
- Use a sanding block for final passes. After orbital sanding, a quick hand-sand with the grain ensures a perfect surface.
- Mist the surface with water. For wood, a light spray raises the grain. Sand again with fine grit for ultra-smoothness.
- Sand between coats. For paint or varnish, lightly sand with 320+ grit between coats for a flawless result.
- Keep extra pads and sandpaper. Worn-out pads can ruin your work and are easy to swap.
- Let the sander stop while off the workpiece. Don’t lift while spinning – this can leave marks.
Cleaning And Maintenance
A well-maintained sander lasts longer and works better.
- Empty the dust bag after every use. Built-up dust can block airflow.
- Wipe down the sander. Use a dry cloth to remove dust and debris.
- Check the power cord or battery. Look for cuts or wear.
- Inspect the pad. If it’s torn or won’t hold discs, replace it.
- Store in a dry place. Moisture can rust parts.
Non-obvious insight: Lubricate moving parts as the manual suggests. This keeps the sander running smoothly for years.

When Not To Use An Orbital Sander
There are times when another tool is better.
- For heavy material removal (like leveling a table edge), a belt sander is faster.
- For detailed corners or carvings, use a detail sander or sand by hand.
- For metal polishing, use the right attachment and sandpaper. Not all orbital sanders are suitable for metal.
Safety Reminders
Orbital sanders are safer than many power tools, but care is still needed.
- Never sand lead paint unless you have special training and equipment.
- Avoid sanding near flammable materials. Sparks can occur with metal or old paint.
- Unplug when changing discs or making repairs.
- Keep fingers clear of the moving pad.
For more on power tool safety, check the OSHA Hand and Power Tools guide.
Real-world Examples
Let’s look at a few common uses:
Refinishing A Tabletop
- Remove old finish with 80-grit.
- Smooth with 150-grit.
- Finish with 220-grit.
- Wipe clean, then paint or stain.
Smoothing A Door Before Painting
- Start with 120-grit to remove brush marks.
- Use 180-grit for a final pass.
- Clean and paint.
Preparing A Metal Surface
- Use a special sandpaper for metal (ask at your hardware store).
- Start at 120-grit and move to 240-grit.
- Wipe off any residue.
Orbital Sander Vs. Other Sanders
Understanding the differences helps you choose the right tool.
| Type | Strengths | Weaknesses | Best For |
|---|---|---|---|
| Orbital Sander | Gentle, smooth finish, versatile | Slower material removal | Finishing, general sanding |
| Belt Sander | Fast removal, large areas | Can be aggressive, harder to control | Leveling, heavy stock removal |
| Detail Sander | Gets into corners, small spots | Slow, not for big jobs | Edges, detail work |
| Sheet Sander | Uses cheap sandpaper, good for fine finish | May leave swirl marks | Furniture, flat surfaces |
Choosing The Right Accessories
Accessories can make your orbital sander even more useful.
- Vacuum hose adapters – For cleaner work.
- Soft and hard pads – Swap pads for different surfaces.
- Sanding pads for paint – Special discs for removing paint or varnish.
- Detail attachments – Some sanders offer triangle or finger pads for tight spaces.
Troubleshooting
If your sander isn’t working right:
- Pad won’t spin – Check for too much pressure or a worn pad.
- Lots of dust – Make sure the bag/filter is clear and holes align.
- Deep scratches – Use finer grit, clean the surface, or reduce pressure.
- Sander vibrates too much – Check for a damaged pad or loose screws.
Don’t ignore these issues—they can quickly affect your results.
Frequently Asked Questions
How Long Does Sandpaper Last On An Orbital Sander?
Sandpaper life depends on the material, grit, and pressure used. For wood, expect 15-30 minutes of sanding before changing discs. If you notice less material removal, clogging, or visible wear, replace the disc.
Can I Use An Orbital Sander On Metal Or Plastic?
Yes, with the right sandpaper. Use discs labeled for metal or plastic. Go slow and check often to avoid overheating or melting the surface.
How Do I Avoid Swirl Marks?
Use a clean disc, don’t press too hard, keep the sander moving, and always finish with a fine grit. Wipe the surface between grits to remove any particles.
What’s The Difference Between Orbital And Random Orbital Sanders?
A standard orbital sander moves in small circles. A random orbital sander also spins the pad, creating a random pattern that reduces visible scratches. Most people prefer random orbital sanders for smoother results.
Is It Safe To Sand Lead Paint?
No. Lead paint is hazardous. If you suspect lead paint, do not sand it. Seek professional help and follow safety guidelines.
Learning how to use an orbital sander can make your DIY life easier and your results better. Take your time, follow the steps, and don’t skip the details. Even if you’re new to power tools, a bit of practice will give you smooth, professional-looking surfaces on your next project.