When you want to organize your space and add a modern touch, the Ikea pegboard system is a game changer. It’s popular for good reasons: flexible design, smart storage, and easy upgrades. But for many people, hanging an Ikea pegboard feels more complicated than it should be. Maybe you worry about drilling into walls, finding the right tools, or making sure it’s straight. The good news? With the right steps, even beginners can do it themselves and get a clean, professional look.
This guide walks you through every detail of hanging an Ikea pegboard—from picking the perfect spot to adding accessories. You’ll learn not just the “how,” but also the “why” behind each move. Along the way, you’ll find tips that most people only discover after making mistakes. Whether you’re setting up a craft corner, a kitchen wall, or your first home office, this article gives you the confidence to do it right the first time.
Understanding Ikea Pegboard: What Makes It Special?
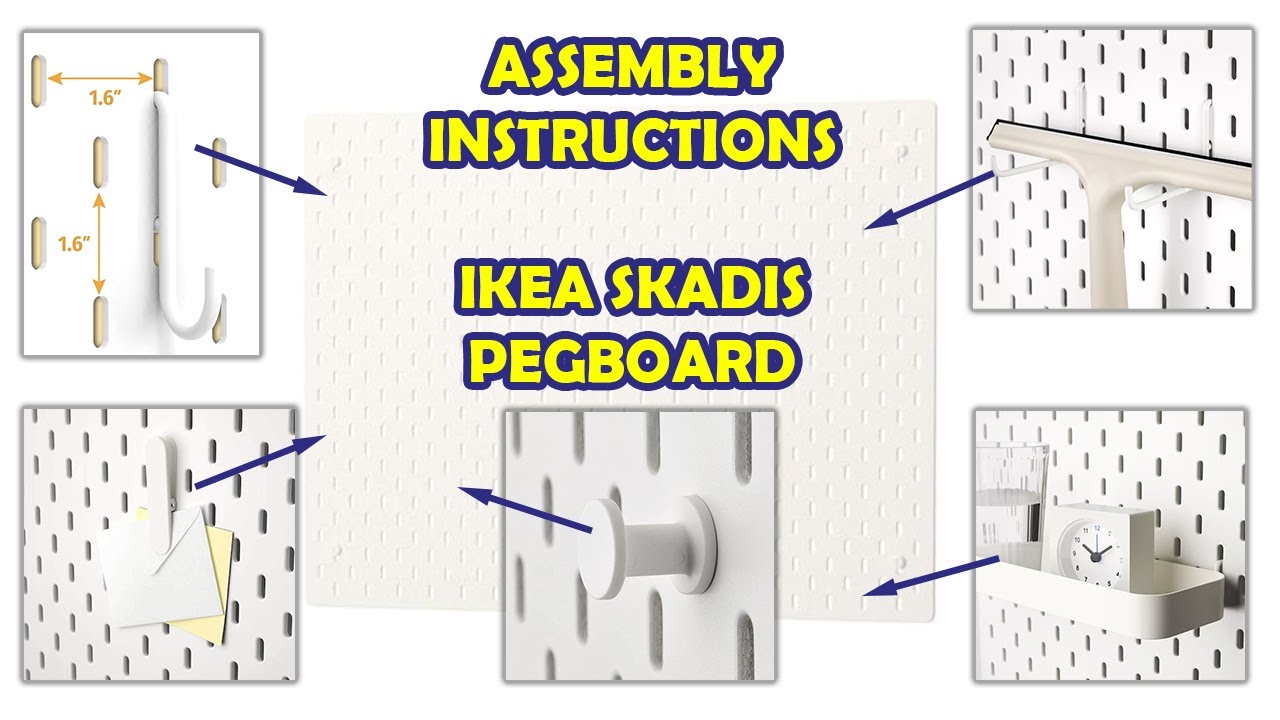
Before you start, it’s helpful to know why Ikea pegboard—especially the SKÅDIS series—is different from other wall organizers. Ikea’s pegboards use a lightweight fiberboard with many holes and a smart wall-mounting system. The holes are evenly spaced and designed to fit special Ikea hooks, shelves, bins, and other add-ons.
What Makes The System Stand Out?
- Customizable layout: Move accessories around anytime.
- Clean look: No visible screws on the front.
- Sturdy: Holds light to medium-weight items securely.
- Expandable: Link several boards together for a larger area.
One thing beginners often miss: The mounting rails Ikea provides are key for safety and flexibility. Don’t skip them—they spread the weight and protect your wall.
Choosing The Right Spot For Your Pegboard
Not every wall is the same, and where you hang your pegboard changes how useful it is. Take time to pick the best location for your needs. Here’s how to make a smart choice:
- Purpose: What will you store? Tools, craft supplies, kitchen items, or something else? Choose a spot near where you’ll use those things.
- Wall type: Is your wall drywall, concrete, brick, or wood? This affects what hardware you’ll use and how strong the mounting will be.
- Obstacles: Check for light switches, outlets, windows, or pipes behind the wall. Use a stud finder and look for clues to avoid drilling into anything dangerous.
- Height and reach: Hang the pegboard so you can easily reach all parts. For most people, the center should be about eye level—roughly 150 cm (59 inches) from the floor.
Pro tip: Tape the pegboard template (or the real board) to the wall with painter’s tape. Step back and see if you like the placement before drilling any holes.

What You Need: Tools And Materials
Gathering all your tools and materials before you start saves time and stress. Ikea provides some parts, but you’ll often need a few extra items depending on your wall.
From the Ikea box:
- 1 or more Ikea pegboard panels (usually SKÅDIS)
- Mounting rails/brackets (included)
- Screws (sometimes included)
You supply:
- Drill and appropriate drill bits (masonry bit for brick/concrete, wood bit for studs)
- Screwdriver
- Spirit level (for straight lines)
- Measuring tape
- Pencil
- Wall anchors/plugs (if not drilling into wood studs)
- Stud finder (for drywall installations)
- Painter’s tape (optional, for marking positions)
Why does this matter? Using the right anchors for your wall type is critical. Too weak, and the board falls. Too strong, and you could damage pipes or wiring.
Comparing Ikea Pegboard Sizes And Accessories
Ikea offers the SKÅDIS pegboard in different sizes and colors. Picking the right size and add-ons helps you get the most from your wall.
Here’s a quick comparison:
| Pegboard Size | Dimensions (cm) | Best For |
|---|---|---|
| Small | 36 x 56 | Tight spaces, above desks |
| Medium | 56 x 56 | Kitchen, crafts, entryways |
| Large | 76 x 56 | Workshops, garages, offices |
| Combined | Multiple panels | Custom layouts, large storage walls |
Popular accessories:
- Shelves (for jars, small boxes)
- Hooks (for tools, scissors, bags)
- Baskets (for loose items)
- Elastic cords (for holding papers, fabric)
Beginner’s mistake: Overloading your pegboard with accessories. Start simple, then add more as you use the system.
Step-by-step: How To Hang Ikea Pegboard
Now, let’s get into the main process. Follow these steps for a secure and neat installation, whether you’re mounting on drywall, concrete, or wood.
1. Plan The Layout
First, decide exactly where the pegboard will go. Use your measuring tape and pencil to lightly mark the top edge and sides on the wall. Check with your spirit level to make sure your marks are level and straight.
If using more than one pegboard, leave a small gap (about 2 mm) between panels for easy alignment and to allow the boards to expand or contract with humidity.
2. Mark The Mounting Points
Ikea’s system uses mounting rails that go on the wall first. Hold the rail against your marks, and use the pencil to mark where the screw holes will be.
Key tip: If you’re using wall anchors, make sure your marks are between wall studs (for anchors) or directly on studs (for wood screws). Use a stud finder to check.
3. Drill Holes In The Wall
Select the right drill bit for your wall type:
- Drywall: Standard drill bit for pilot holes
- Brick or concrete: Masonry bit (usually 6 mm)
- Wood studs: Wood drill bit
Drill at the pencil marks, going deep enough for your wall anchors or screws.
4. Insert Wall Anchors (if Needed)
For drywall or masonry, gently tap in the correct size wall anchors. These hold the screws tight and stop the pegboard from falling.
5. Attach The Mounting Rails
Hold the rail in place and use your screwdriver to drive screws into the anchors or studs. Double-check with your spirit level that the rail is perfectly straight before tightening all the way.
Why it matters: If your rail is crooked, your pegboard will look off-balance and accessories may slide or hang unevenly.
6. Hang The Pegboard Panel
Now, line up the pegboard with the rails. Ikea’s design lets the board “click” or rest on the rails without visible screws on the front. Gently press the board into place.
If you’re installing multiple panels, repeat the steps above for each section.
7. Secure The Corners (if Needed)
Some installations—especially larger boards—require extra corner screws or clips. Check your Ikea instructions. Add these if needed for stability, but don’t overtighten (it can crack the board).
8. Add Accessories And Organize
Once the board is up, start adding hooks, shelves, and baskets. Arrange them based on what you use most. Step back and adjust for the best look and function.
Insider tip: Place heavier items near the mounting rails for better support. Don’t hang heavy tools from the very edges.
Wall Types: Adapting To Your Home
Not all walls are the same. Here’s how to adapt your installation for different wall materials.
Drywall
- Use a stud finder to locate wooden studs.
- If you hit a stud, use a wood screw—no anchor needed.
- If not, use quality wall anchors rated for at least 10 kg (22 lbs).
- Avoid hanging very heavy items on drywall alone.
Brick Or Concrete
- Use a masonry drill bit.
- Use strong plastic or metal anchors.
- Wear eye protection (bits can break off tiny chips).
- Always vacuum dust before mounting.
Wood Paneling
- Drill small pilot holes.
- Use wood screws.
- Check for any hidden wires or pipes first.
Tiled Surfaces
- Use a tile bit to avoid cracking tiles.
- Drill slowly and carefully.
- Use short anchors to avoid hitting the wall behind.
Beginner’s insight: Don’t use only short screws or nails. Ikea’s system depends on the rails and proper anchors for strength.
Comparing Wall Anchors And Screws
The right hardware makes a huge difference in safety and durability. Here’s a quick look at common types:
| Anchor/Screw Type | Best For | Weight Support |
|---|---|---|
| Plastic wall plugs | Drywall, light loads | Up to 10 kg |
| Metal wall anchors | Concrete, brick, heavy loads | Up to 25 kg |
| Wood screws (no anchor) | Wood studs | Up to 30 kg |
| Toggle bolts | Drywall, large items | Up to 20 kg |
Pro tip: Always use the anchor or screw type that matches both your wall and your storage needs. If in doubt, ask a hardware store assistant or check the anchor’s packaging.
Mistakes To Avoid When Hanging Ikea Pegboard
Even with good instructions, some mistakes can ruin the result. Here are common errors and how to avoid them:
- Skipping the wall anchors: Screwing directly into drywall is never strong enough.
- Not using a level: A crooked pegboard looks bad and works poorly.
- Overloading the board: Stick to Ikea’s weight limits (usually 5-7 kg per panel).
- Drilling near wires or pipes: Use a detector or check building plans if unsure.
- Not checking for alignment with accessories: Place a shelf or hook on the board before finalizing the rail position, to ensure everything lines up.
- Forgetting expansion: Leave a little room around the board so it doesn’t warp with humidity changes.
Non-obvious insight: Walls are rarely perfectly flat. If your pegboard “wobbles” after mounting, use small rubber bumpers behind the corners to even it out.
Customizing Your Pegboard For Different Rooms
The beauty of the Ikea pegboard is how easily it adapts to any space. Here’s how to get the most from it in popular rooms:
Kitchen
- Use baskets for spices or utensils.
- Add a magnetic strip for knives (only if the pegboard is well-anchored).
- Hang mugs, measuring cups, or even small pans.
Craft Room
- Organize scissors, ribbons, and small boxes.
- Use elastic cords for fabric or paper rolls.
- Add a shelf for glue, tape, or markers.
Home Office
- Use hooks for headphones, cables, or keys.
- Mount a small whiteboard or notepad holder.
- Add mini shelves for sticky notes or chargers.
Garage Or Workshop
- Store hand tools safely and visibly.
- Hang power tools (if not too heavy—check limits).
- Use baskets for screws, nails, or small parts.
Advanced tip: Combine several panels in a grid for a large custom workspace. Use different colors for style.
How To Move Or Remove An Ikea Pegboard
Sometimes, you’ll want to relocate your pegboard. Here’s how to do it without damaging your wall or the board.
- Remove all accessories and shelves first.
- Unscrew the mounting rails gently.
- Pull out wall anchors (if any). If they’re stuck, use pliers.
- Fill the old holes with wall filler and sand smooth.
- Paint over for a clean finish.
When re-hanging, repeat the full mounting process in the new spot. Avoid reusing old anchors—they may be loose.
Non-obvious insight: When removing from drywall, twist anchors out slowly to avoid enlarging the hole.
Safety Tips For Hanging Pegboards
Safety is often ignored but is very important, especially for beginners. Here’s what you need to keep in mind:
- Wear safety glasses when drilling.
- Don’t stand on unstable chairs or surfaces—use a proper ladder.
- Turn off power in the room if drilling near outlets or switches.
- Keep children and pets away from your work area.
- After mounting, check that the board is firm before adding heavy items.
Beginner’s insight: If the pegboard feels loose after mounting, remove it and check your anchors. Never hang heavy items unless the board is solid.
Cleaning And Maintaining Your Ikea Pegboard
A clean pegboard looks better and lasts longer. Here’s how to keep it in top shape:
- Wipe with a dry or damp cloth weekly to remove dust.
- For kitchen boards, use mild soap and water for sticky spots, but avoid soaking.
- Don’t hang wet items—fiberboard can swell.
- If you see chips or scratches, touch up with matching paint.
Pro tip: Move accessories occasionally. This prevents marks and lets you try new layouts.
When To Get Help
Most people can hang an Ikea pegboard alone, but some situations call for expert help:
- Very large installations (multiple boards or over 2 meters wide)
- Brick or concrete walls if you don’t have the right drill or bits
- Uncertainty about hidden wires or pipes
- Need for perfect alignment (for example, in a professional office)
If you feel unsure, a handyman can finish the job in under an hour, usually for a modest fee.
Real-world Example: A Home Office Transformation
Let’s look at a quick case study. Maria, a graphic designer, wanted to organize her small home office.
- She chose a 76 x 56 cm Ikea pegboard.
- The wall was drywall, so she used a stud finder and found one stud for the left side. For the right side, she used high-quality wall anchors.
- She installed two shelves for notebooks and a basket for pens.
- After one month, she added more hooks as her needs changed.
Result: Her desk is clear, she finds supplies faster, and the clean look makes her workspace feel bigger and more creative.
Cost And Value: Is It Worth It?
Ikea pegboard panels are affordable, usually costing between $15-$25 per panel, with accessories ranging from $3 to $15 each. Even with some extra tools or anchors, a complete wall setup is often under $100.
When you compare it to custom carpentry or other wall systems, the value is clear:
| System | Average Cost | Flexibility |
|---|---|---|
| Ikea Pegboard | $60-$100 | High |
| Custom Wood Panel | $150-$300 | Medium |
| Metal Pegboard | $80-$200 | Medium |
| Adhesive Hooks | $10-$40 | Low |
Expert opinion: For renters, students, or anyone who likes to change their space, the Ikea pegboard is an unbeatable mix of price, looks, and flexibility.
Frequently Asked Questions
How Much Weight Can An Ikea Pegboard Hold?
Most Ikea pegboards (like SKÅDIS) are rated for about 5-7 kg (11-15 lbs) per panel if properly mounted. Always spread weight evenly and use the correct wall anchors. For heavier loads, mount directly into studs.
Can I Hang An Ikea Pegboard Without Drilling?
Ikea does not officially recommend using adhesive or no-drill solutions for pegboards, as they may not support the weight. However, there are third-party adhesive rail systems on the market. Use them only for very light items, and always check the product’s weight rating.
What Accessories Work With Ikea Pegboard?
Ikea makes many SKÅDIS accessories: hooks, shelves, baskets, containers, and elastic cords. Other Ikea series usually don’t fit, and standard hardware-store pegboard hooks may not work, as the holes are a unique size.
Can I Paint Or Customize My Ikea Pegboard?
Yes, you can paint the fiberboard with water-based paint for a custom look. Sand lightly first, and let dry fully before hanging. You can also cover the board with decorative paper or vinyl, but make sure holes remain clear.
Where Can I Find More Ideas For Organizing With Pegboards?
For creative layouts and inspiration, check Ikea’s own website or the Ikea Ideas page, which has real-life examples and styling tips.
Hanging an Ikea pegboard can transform your space with minimal cost and effort. With the right tools and careful planning, you’ll enjoy a flexible, organized wall for years to come. Don’t rush—measure twice, drill once, and enjoy your new, clutter-free life.