Many homeowners believe you need a nail gun to install baseboards. This isn’t true. You can achieve strong, beautiful results with basic hand tools and a bit of care. In fact, installing baseboards without a nail gun is a practical DIY project that can save you money and make your home look more finished.
You don’t need special skills, just patience and the right method.
This guide will walk you through every step of the process. You’ll learn how to plan, measure, cut, attach, and finish baseboards using simple tools like a hammer, nail set, wood glue, and even construction adhesive. Along the way, you’ll discover tips that help you avoid common problems like split wood, uneven corners, and gaps.
By the end, you’ll know how to get professional-looking baseboards without power tools or expensive gadgets.
Why Install Baseboards Without A Nail Gun?
Some people wonder why they should skip the nail gun. There are several good reasons.
- Cost savings: Nail guns can be expensive. A basic finish nailer can cost $100 or more, plus you need an air compressor or batteries. By using hand tools, you reduce your costs, which is especially helpful for small projects or tight budgets.
- Safety: Nail guns can be dangerous, especially for beginners. Hand nailing gives you more control and less risk of injury.
- Accessibility: Not everyone owns or wants to rent a nail gun. Hand tools are easier to find and use.
- Quiet work: Manual installation is much quieter. This is important if you have kids, pets, or neighbors nearby.
For these reasons, many DIYers prefer installing baseboards the traditional way. With the right technique, your results will look just as good.
Tools And Materials You’ll Need
Before you start, gather everything you need. Working with the correct tools makes the job smoother and prevents mistakes.
Essential tools:
- Hammer: A standard 16-ounce claw hammer works well.
- Nail set: Lets you drive nails below the wood surface.
- Measuring tape: For accurate lengths.
- Miter saw or miter box with hand saw: For angled and straight cuts.
- Utility knife: To score caulk or trim edges.
- Level: Ensures straight baseboards.
- Pencil: For marking measurements.
- Putty knife: To apply wood filler or spackle.
Materials:
- Baseboard molding: Choose style and size to match your space.
- Finish nails: Usually 1.5″ to 2.5″ long. 18-gauge is standard.
- Wood glue or construction adhesive: For extra hold.
- Wood filler or spackle: For covering nail holes.
- Paint or stain: To finish your baseboards.
- Caulk: Paintable, for sealing gaps at the top and in corners.
Optional but helpful:
- Stud finder: To locate wall studs for nailing.
- Speed square: For clean cuts.
- Sandpaper: To smooth rough edges.
- Work gloves and safety glasses: For protection.

Credit: www.youtube.com
Planning And Measuring For Success
Preparation is key. Good planning prevents wasted materials and poor results.
Measure Your Walls
Start by measuring each wall where you’ll install baseboards. Write down the length of every section. Add 10% extra to your total for mistakes and waste.
For example, if your room’s walls add up to 50 feet, buy at least 55 feet of baseboard.
Choose The Right Baseboard
Baseboards come in different styles and materials:
- MDF (medium-density fiberboard): Affordable, smooth, and easy to paint. Not ideal for wet areas.
- Pine or hardwood: Strong and can be stained or painted. More expensive but durable.
- PVC or polystyrene: Good for bathrooms or basements. Won’t rot or warp.
Pick a style that matches your home. Taller, thicker baseboards look good in larger rooms. Simple styles suit modern homes; detailed profiles fit older houses.
Plan Your Cuts
Sketch your room on paper. Mark where each baseboard will start and end. Plan how you’ll handle corners and doorways. This helps you avoid awkward joints in visible areas.
Pro tip: Always start installing baseboards on the longest, straightest wall. This makes seams less noticeable.
Cutting Baseboards: How To Get Clean Joints
Accurate cuts are vital for good-looking baseboards. Take your time with this step.
Types Of Cuts
- Straight cuts: For ends that butt against door frames or walls.
- Miter cuts (angled): For outside corners (usually 45 degrees).
- Coped cuts: For inside corners. One piece has a straight cut; the other is shaped to fit against it.
How To Cut Baseboards By Hand
- Mark your cuts with a pencil and speed square.
- Use a miter box and hand saw for angled or straight cuts. Hold the baseboard firmly and saw slowly for smooth edges.
- Test fit pieces before attaching. Minor gaps can be fixed with caulk, but major mistakes require recutting.
Coping Inside Corners
Coping is a traditional way to fit baseboards in inside corners. It looks better than mitering because walls are rarely perfectly square.
- Cut the first board with a straight 90-degree cut.
- Install this piece tight against the wall.
- Cut the second piece with a 45-degree miter.
- Use a coping saw to trim along the profile of the cut, following the curve.
- Fit the coped piece against the installed board. Adjust with sandpaper if needed.
Coping takes patience, but results are worth it. If you prefer, you can use a simple butt joint and fill small gaps with caulk, but pros recommend coping for a seamless look.
Dealing With Uneven Floors Or Walls
Old houses often have uneven floors or wavy walls. Hold the baseboard in place and mark any gaps with a pencil. Use a utility knife or sandpaper to trim away high spots. For big gaps, fill with caulk after installation.
Non-obvious insight: Always dry-fit every piece before nailing. This lets you find problems early—before you make permanent mistakes.
Attaching Baseboards Without A Nail Gun
The main challenge is securing the baseboard so it sits flush and stays tight over time. You have several methods to choose from.
Using Hammer And Finish Nails
This is the classic approach and works for most walls.
- Position the baseboard against the wall. Use a level to make sure it’s straight.
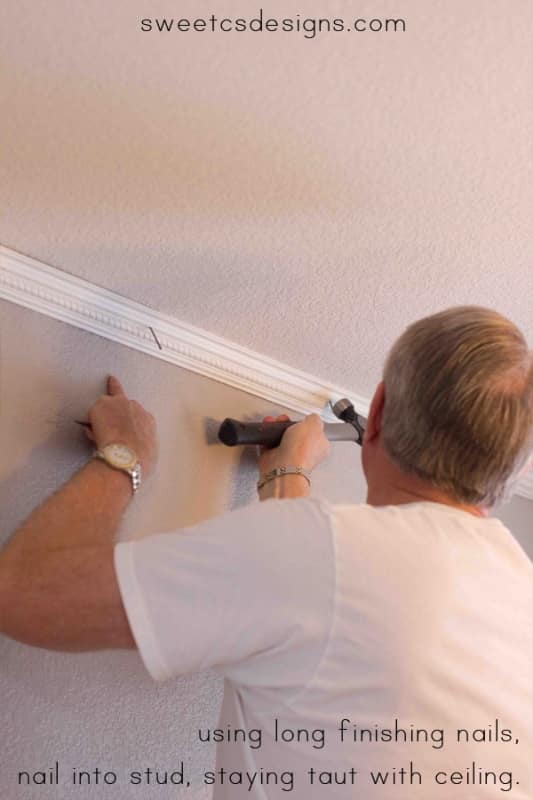
- Mark stud locations on the wall with a pencil. If you have a stud finder, use it. If not, knock on the wall to listen for solid spots.
- Drive finish nails (18-gauge, 1.5″–2.5″) through the baseboard into each stud. Space nails about every 16–18 inches. Place nails near the top and bottom edges.
- Use a nail set to sink the nail heads below the surface of the wood. Hold the nail set against the nail and tap it gently with your hammer.
- Check for movement. If the baseboard flexes, add more nails.
Pro tip: Angle some nails slightly to reduce the chance of the board pulling away over time.
Using Construction Adhesive
For walls where studs are hard to find or surfaces are crumbly (like old plaster), you can use adhesive.
- Apply a zigzag bead of construction adhesive to the back of the baseboard.
- Press the baseboard firmly against the wall. Hold for a few seconds.
- Secure with a few nails or painter’s tape while the adhesive cures (usually 24 hours).
Adhesive alone works for some lightweight baseboards, but combining glue with nails gives the strongest hold.
Using Wood Glue For Joints
For inside corners, outside corners, and at seams where two baseboards meet, apply a small amount of wood glue before nailing. Wipe away any excess glue with a damp cloth.
This reduces gaps and strengthens the joint.
What If You Hit A Stud?
If you drive a nail and it bends, you’ve probably missed a stud or hit a knot. Pull the nail out, fill the hole with wood filler, and try again an inch away.
Alternative Fasteners
In rare cases (like concrete or brick walls), nails won’t hold. Use construction adhesive only, or try masonry nails and pre-drill small holes with a masonry bit.
Non-obvious insight: If your baseboard is very thin or the wall is very hard, use shorter nails to avoid splitting the wood or bending the nail.
Filling Nail Holes, Gaps, And Seams
After installing, you’ll see nail holes, small gaps, and seams. Filling and finishing these makes your work look professional.
Filling Nail Holes
- Use wood filler or spackle. Choose a product that’s paintable.
- Apply a small amount over each nail hole with a putty knife. Press it in, scrape off excess.
- Let it dry (usually 30–60 minutes).
- Sand smooth with fine-grit sandpaper.
Caulking Gaps
- Apply a thin bead of paintable caulk along the top edge of the baseboard, where it meets the wall.
- Smooth the caulk with a damp finger or caulk tool.
- Fill any gaps in corners or seams the same way.
- Wipe away excess for a neat finish.
Sanding And Cleaning
After filler and caulk dry, lightly sand all areas until smooth. Wipe down the baseboard with a damp cloth to remove dust before painting.
Pro tip: Use a flashlight held close to the baseboard to spot missed nail holes or rough spots.
Painting Or Staining Baseboards
Finishing baseboards is the last step. You can paint or stain before or after installation, but most DIYers do the final coat after nailing and filling.
Painting Baseboards
- Choose a semi-gloss or satin paint. These finishes are durable and easy to clean.
- Use painter’s tape to protect the floor and wall above the baseboard.
- Apply paint with a quality brush in long, even strokes. Two thin coats look better than one thick one.
- Let paint dry completely before removing tape.
Staining Baseboards
If you want a wood look, stain the baseboards before installation. Touch up any cut ends after nailing. Finish with a clear sealer for protection.
Non-obvious insight: If you’re painting walls too, always paint the baseboards last. This prevents wall paint from splattering onto your freshly finished trim.
Common Mistakes And How To Avoid Them
Even experienced DIYers make errors. Here’s how to avoid the most frequent problems:
- Cutting baseboards too short: Always measure twice and cut once. If in doubt, cut a bit long and trim down.
- Nailing into drywall only: Baseboards will eventually pull away. Use a stud finder or adhesive for extra security.
- Skipping caulk: Gaps look bad and collect dust. Always caulk the top edge and corners.
- Using too much filler: Overfilling makes sanding harder. Use just enough to cover the hole.
- Painting before sanding: Paint highlights rough spots. Sand all filled areas smooth first.
- Not checking for pipes or wires: In kitchens and bathrooms, be careful where you nail. Avoid plumbing and electrical lines.
- Installing out of order: Always do floors before baseboards, and baseboards before painting walls for the cleanest finish.
Credit: sweetcsdesigns.com
When To Use Adhesive Vs. Nails
You may wonder when to use construction adhesive instead of nails. The best method depends on your wall type, baseboard material, and desired hold.
Here’s a quick comparison:
| Method | Best For | Strength | Drawbacks |
|---|---|---|---|
| Hammer & Finish Nails | Stud walls, wood or MDF baseboards | Very strong if nailed into studs | Can split thin trim, needs filler for holes |
| Construction Adhesive | Brick, concrete, or hard-to-nail walls | Strong after curing, especially with nails | Hard to remove baseboard later, messy if overused |
| Nails + Adhesive | Extra strength, uneven walls | Strongest hold, fewer gaps | Requires both tools/materials |
For most DIYers, a combination of nails and adhesive gives the best result. Use adhesive on tricky walls and nails wherever you can find studs.
How To Tackle Tricky Areas
Baseboard installation is easy on long, straight walls. But most rooms have obstacles—doors, radiators, cabinets, or uneven corners. Here’s how to handle them.
Around Doorways
- Butt the baseboard tightly against the door casing.
- Use a straight cut.
- If the door frame sticks out, notch the baseboard with a coping saw for a snug fit.
Behind Radiators Or Pipes
- Measure the gap behind the radiator or pipe.
- Cut a notch or drill a hole in the baseboard so it fits around the obstacle.
- Use construction adhesive if you can’t swing a hammer in the tight space.
Uneven Or Out-of-square Corners
- Test fit both pieces before nailing.
- If there’s a gap, fill with caulk after installation.
- For large gaps, scribe the baseboard with a pencil, then sand or trim to fit.
Meeting Other Trim
Where baseboards meet window or door trim, cut the baseboard at a 90-degree angle for a clean look. Caulk the seam for a seamless finish.
Seams In Long Walls
When your wall is longer than your baseboard piece, use a scarf joint: cut both ends at a 45-degree angle so they overlap. This is less visible than a straight butt joint.
Pros And Cons Of Installing Baseboards By Hand
If you’re still deciding whether to use a nail gun, it helps to see the benefits and trade-offs.
| Hand Nailing | Nail Gun |
|---|---|
| Lower cost, no special tools | Faster installation |
| Quieter, safer for beginners | Cleaner nail holes |
| More control, less risk of over-driving nails | Easier on large projects |
| Slower, requires more effort | Expensive tools, risk of damage |
For small projects, hand nailing is practical and budget-friendly. For whole-house trim, a nail gun can save time but isn’t required.
Tips For A Professional Finish
- Work in good light: You’ll spot gaps and rough spots before painting.
- Keep your saw blade sharp: Dull blades cause splintered edges.
- Pre-drill nail holes in hardwood baseboards to avoid splitting.
- Wipe off excess glue or caulk immediately. Dried drips are hard to remove.
- Take breaks: Rushing leads to mistakes.
- Label pieces: When cutting several boards at once, label each piece so you don’t mix them up.
- Check for level: Use a 4-foot level to make sure baseboards are straight, especially on long walls.
Troubleshooting: Fixing Common Problems
Even with careful work, issues can happen. Here’s how to fix the most common ones:
- Loose baseboards: Add more nails into studs or use adhesive.
- Visible gaps at the top: Fill with paintable caulk.
- Split wood: Fill minor splits with wood filler and sand; for major splits, replace the board.
- Nail pops: Tap the nail back in with a nail set and fill the hole.
- Uneven paint finish: Lightly sand and apply a second coat.
Experience-based tip: If you have a stubborn gap between the baseboard and wall, stuff a thin strip of cardboard behind the baseboard before nailing. This brings the board flush for caulking.
The Environmental Impact: Choosing Materials Wisely
Many people don’t realize baseboard material affects both appearance and the planet. MDF is made from recycled wood fibers, making it more eco-friendly than solid hardwood. However, it’s not as durable in wet spaces.
Wood baseboards can last for decades and are easy to repair. Look for FSC-certified wood (Forest Stewardship Council) if you want a sustainable option.
PVC baseboards are waterproof but made from plastic. If you choose them, use only what you need and recycle offcuts if possible.
For more on the environmental impact of building materials, see the EPA’s sustainable construction guide.

Credit: www.cabanastateofmind.com
Frequently Asked Questions
How Do I Avoid Splitting The Baseboard When Nailing?
Use finish nails and a hammer with gentle taps. If your baseboard is hardwood, pre-drill small pilot holes. Always nail at least 1/2 inch away from the edge. This prevents cracks and keeps your trim looking neat.
Can I Use Only Construction Adhesive To Install Baseboards?
Yes, you can use construction adhesive alone, especially on concrete or brick walls. But for the strongest hold, combine adhesive with a few finish nails or use painter’s tape to hold boards while the glue sets.
How Do I Handle Inside Corners Without A Coping Saw?
If you don’t have a coping saw, you can use a miter saw to cut both pieces at a 45-degree angle. Caulk any small gaps after installation. This method is faster, but coping creates a tighter, more professional joint.
Should I Paint Baseboards Before Or After Installing Them?
You can prime and paint baseboards before installation, but most people do final touch-ups after nailing and filling holes. This ensures a smooth, seamless finish, especially after caulking and sanding.
What’s The Best Way To Clean Baseboards After Painting?
Wait until the paint is fully dry. Then, use a damp microfiber cloth to wipe away dust and paint drips. For tough spots, a little mild soap can help. Avoid harsh cleaners that could damage the finish.
Installing baseboards without a nail gun is completely doable for most homeowners. With careful measuring, clean cuts, and the right tools, you’ll create a polished, finished look in any room. Take your time, follow these steps, and you’ll be proud of your results for years to come.