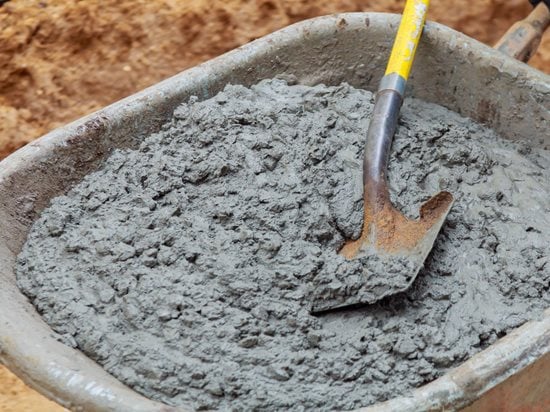
Mixing concrete may look simple, but the quality of your mix can make or break your project. Whether you are building a patio, setting fence posts, or pouring a foundation, the way you prepare your concrete mix affects strength, durability, and finish.
Using a concrete mixer can save you time and effort, but only if you use it the right way. Many people make mistakes that lead to weak or inconsistent concrete. If you want your concrete to last for years, understanding the correct mixing steps, the right ratios, and how to avoid common pitfalls is essential.
Let’s look at how to mix concrete in a mixer—from understanding the basics to mastering advanced tips. You will learn how to choose ingredients, use the mixer safely, and achieve the perfect consistency every time.
Understanding Concrete And Its Ingredients
Before you start mixing, it helps to know what concrete is made of. Concrete is a blend of cement, sand, gravel (aggregate), and water. Each ingredient has a specific purpose, and the right balance is crucial.
- Cement acts as the binder. It holds everything together when mixed with water.
- Sand fills the gaps between the gravel and gives smoothness.
- Gravel (or crushed stone) provides strength and bulk.
- Water activates the cement and starts the chemical reaction that makes concrete hard.
The most common concrete mix ratio for general use is 1 part cement : 2 parts sand : 3 parts gravel, with enough water to achieve a workable consistency. However, this ratio can change depending on your project.
Why The Right Ratio Matters
Using too much water makes the mix weak, while too little makes it hard to work with. If you use the wrong amount of sand or gravel, the concrete can crack or become brittle. For most home projects, sticking to recommended ratios is the safest choice.
If you are unsure, always check the instructions on your cement bag.
Different Types Of Mixers
Concrete mixers come in several shapes and sizes. For most small to medium jobs, a portable electric drum mixer is the best option. Larger projects use bigger mixers, but the mixing process remains similar.
Common Mixer Types
| Type | Capacity | Best For | Notes |
|---|---|---|---|
| Handheld Mixer | 10-50 liters | Small DIY tasks | Portable, limited volume |
| Portable Drum Mixer | 50-150 liters | Patios, footings, general use | Easy to move, common for home projects |
| Truck Mixer | Up to 10,000 liters | Large construction sites | Not for home use, delivers ready-mix |
For most people, the portable drum mixer is ideal. It is easy to use, clean, and store.
Preparing To Mix: Planning And Safety
Mixing concrete is not just about adding ingredients. Preparation is key to a safe and successful job.
Safety First
Concrete contains chemicals that can irritate your skin and eyes. Dust from cement can also harm your lungs. Always wear:
- Gloves (preferably rubber or nitrile)
- Safety goggles
- Dust mask or respirator
- Long sleeves and pants
- Sturdy boots
Wet concrete is heavy and can be hard to move. Clear your workspace, keep pets and children away, and check that your mixer is on a stable, level surface.
Tools And Materials Checklist
Before you start, gather everything you need:
- Concrete mixer (clean and checked for damage)
- Shovel for moving and mixing
- Buckets or wheelbarrow for measuring and transporting
- Measuring containers (for accurate ratios)
- Water supply (hose or large bucket)
- Cement, sand, gravel (pre-measured or ready-mix bags)
- Mixing stick or trowel (for checking consistency)
Having everything ready saves time and prevents mistakes.
Calculating Quantities
One of the most common mistakes is mixing too much or too little concrete. Measure your area and calculate the volume you need. For small slabs or posts, this can be done using:
Volume (cubic meters) = Length × Width × Depth
For example, a slab 2 meters long, 1 meter wide, and 0.1 meters thick needs:
2 × 1 × 0. 1 = 0. 2 cubic meters of concrete
Each mixer load has a maximum capacity. Do not overfill, or the mixer will not work correctly.
Step-by-step: How To Mix Concrete In A Mixer
Now, let’s break down the process into clear steps. Following these will help you get strong, even concrete every time.
1. Set Up The Mixer
Place your mixer on a flat, firm surface close to where you need the concrete. Plug in the mixer and check that the drum turns freely. If using a petrol mixer, fill with fuel and check oil.
2. Add Water First (but Not All)
Start the mixer running before adding ingredients. Pour in about half the total water required. Adding some water first helps prevent dry cement from sticking to the drum.
3. Add Cement
With the drum turning, pour in the measured cement. Let it mix with the water for a few turns.
4. Add Sand
Next, add the sand slowly. Allow it to mix until you see a smooth, creamy paste.
5. Add Gravel (aggregate)
Add the gravel in stages, not all at once. This helps the mixer turn easily and prevents clogging.
6. Add Remaining Water Gradually
Add the rest of the water in small amounts. Watch the mix: you want it to be workable, but not runny. Too much water weakens concrete.
7. Mix Thoroughly
Let the mixer run for at least 2-3 minutes after all ingredients are in. The mix should look uniform, with no dry patches or pools of water. If you see unmixed material, scrape the sides with a shovel.
8. Check Consistency
A good test is the slump test. Fill a bucket with concrete, lift the bucket, and watch how the mix settles. It should hold its shape but slump slightly. If it runs, it’s too wet; if it stays stiff, add a little water.
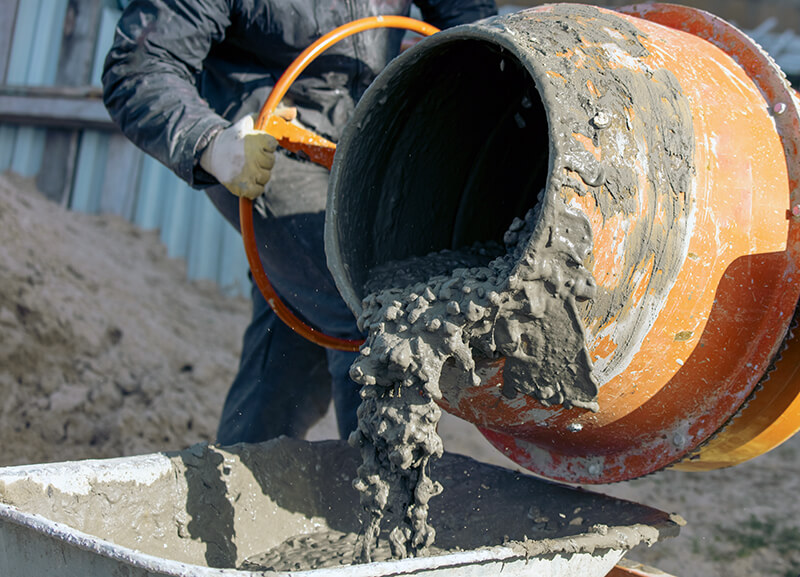
9. Discharge The Mix
Tilt the drum and pour the concrete into a wheelbarrow or directly where needed. Work quickly—concrete starts to set within 30-60 minutes.
10. Clean The Mixer Immediately
After pouring, add water and a small amount of gravel to the drum, then run the mixer to clean off any residue. Rinse thoroughly. Dried concrete is very hard to remove.
Mixing Ratios And Adjustments
Getting the right mix is critical. Here are some common mix ratios for different projects:
| Project Type | Cement | Sand | Gravel | Water | Notes |
|---|---|---|---|---|---|
| General purpose | 1 part | 2 parts | 3 parts | 0.5 part | Good for slabs, steps |
| High strength | 1 part | 1.5 parts | 2.5 parts | 0.5 part | For footings, structural work |
| Fence posts | 1 part | 2.5 parts | 3.5 parts | 0.55 part | Extra gravel for stability |
Adjusting For Weather
- Hot weather: Water evaporates faster. Mix smaller batches, work quickly, and shade your work area if possible.
- Cold weather: Concrete sets slowly. Use warm water and avoid pouring if temperatures are below 5°C (40°F).
Using Ready-mix Bags
For small jobs, you can use ready-mixed concrete bags. Just add water as instructed. Use the mixer as above, but follow the bag’s instructions for water amount.
Tips For Better Results
Professional concrete workers have learned some tricks over time. Here are practical tips that can make a real difference:
1. Pre-wet The Drum
Before starting, add a little water and spin the drum. This keeps dry ingredients from sticking.
2. Don’t Overload The Mixer
Stay within the mixer’s capacity. Too much material leads to poor mixing and may burn out the motor.
3. Add Water Gradually
It’s easy to add more water, but hard to take it out. Always add small amounts and check consistency.
4. Use Clean Water
Dirty water can weaken concrete. Always use clean, fresh water.
5. Mix Long Enough
Under-mixing leaves dry spots, while over-mixing can make the concrete too runny. Aim for 2-3 minutes after the last ingredient is added.
6. Check For Lumps
Lumps mean unmixed cement, which leads to weak spots. Scrape the drum sides if needed.
7. Clean Immediately After Use
Even a thin layer of hardened concrete is hard to remove. Clean the drum, paddles, and exterior after every batch.
8. Keep Tools Clean
Concrete sticks to shovels, buckets, and wheelbarrows too. Wash everything before the mix dries.
9. Store Ingredients Properly
Keep cement dry and covered. Wet cement bags are ruined and can’t be used.
10. Use Admixtures Carefully
If you use additives (like plasticizers or retarders), follow manufacturer instructions exactly. Adding too much can ruin your mix.
Common Mistakes (and How To Avoid Them)
Even experienced DIYers make errors. Here are the top mistakes and how you can avoid them:
Adding All Water At Once
Dumping in all the water at the start makes it easy to end up with a soupy, weak mix. Always add water slowly and adjust as you go.
Incorrect Ratios
Guessing the amounts of cement, sand, and gravel leads to weak or inconsistent concrete. Measure carefully.
Not Mixing Long Enough
Short mixing times leave dry pockets or unmixed material. Always let the mixer run after adding all ingredients.
Using Dirty Tools Or Mixer
Old concrete or dirt in the drum can contaminate your new mix and weaken it. Start with clean equipment.
Letting Concrete Sit Too Long
Mixed concrete starts to harden quickly. Only mix what you can use in 30-45 minutes.
Ignoring Safety
Cement dust and wet concrete are hazardous. Always use gloves and eye protection.
Not Cleaning Up
Dried concrete can break mixers, shovels, and buckets. Clean up immediately after use.
Troubleshooting: Fixing Bad Mixes
Sometimes, things go wrong. Here’s how to handle common problems:
Mix Is Too Dry
If the mix is crumbly and hard to move, add small amounts of water and mix again. Avoid over-watering.
Mix Is Too Wet
If the mix is runny and won’t hold shape, add a little more cement and sand in the same ratio as before. Mix thoroughly.
Lumps Or Unmixed Material
Stop the mixer, scrape down the drum sides, and mix again. If lumps remain, you may need to start a new batch.
Mixer Won’t Turn
Turn off the machine, unplug it, and check for clogs or overload. Clear out excess material before restarting.
Concrete Setting Too Fast
Work in the shade, use cooler water, and mix smaller batches. In hot weather, concrete sets more quickly.
Comparing Hand-mixing Vs. Machine Mixing
You might wonder if a mixer is really necessary. Here’s a direct comparison:
| Aspect | Hand Mixing | Mixer |
|---|---|---|
| Time Required | Slow (10-15 min per batch) | Fast (2-4 min per batch) |
| Effort | High (physical labor) | Low (machine does work) |
| Consistency | Often uneven | More uniform |
| Batch Size | Small | Medium to large |
| Best For | Very small jobs | Most projects |
As you can see, a mixer is faster, easier, and gives better results for all but the smallest jobs.
Safety Reminders When Using A Mixer
Concrete mixers are powerful machines. Always follow these safety tips:
- Never put your hands or tools into a moving drum.
- Turn off and unplug the mixer before cleaning or adjusting.
- Use extension cords rated for outdoor, heavy-duty use.
- Watch for trip hazards—keep cables and hoses tidy.
- Don’t leave the mixer running unattended.
If you are new to using a mixer, read the manual carefully before starting.
How To Store And Care For Your Mixer
A well-maintained mixer will last for many years. Here’s how to keep it in good shape:
- Clean it after every use.
- Check for loose bolts, worn paddles, or damaged wires.
- Store it indoors or cover it to protect from rain and sun.
- Oil moving parts if recommended by the manufacturer.
- Inspect cables and plugs for damage.
Proper care prevents breakdowns and ensures your mixer is ready when you need it.
What Beginners Often Miss
Some details seem small but make a big difference:
- Measuring by volume, not weight: Most DIYers measure ingredients in buckets or shovels, not by weight. Be consistent with your measuring tool for every batch.
- Understanding set time: Concrete is only workable for a short time. Plan your work so you are ready to place and finish the mix as soon as it’s ready.
- Ambient temperature effect: Both hot and cold weather change how concrete sets. Beginners often ignore this and end up with poor results.
When To Call A Professional
Mixing concrete in a mixer is perfect for small patios, paths, and repairs. For large slabs, structural work, or special finishes, hiring a professional can save time and money. If your project needs more than a few cubic meters, or if you are unsure about the mix, consider getting advice from an expert or ordering ready-mix concrete.
Frequently Asked Questions
How Much Concrete Does A Standard Mixer Hold?
Most portable drum mixers used for home projects hold between 90 and 150 liters (about 2.5 to 4 cubic feet) of mixed concrete. Always check your mixer’s capacity to avoid overloading.
Can I Mix Mortar Or Plaster In A Concrete Mixer?
Yes, you can use a concrete mixer for mortar, plaster, or render. Clean the drum thoroughly before and after, and use the correct ratios for those materials.
What If I Add Too Much Water To My Mix?
Excess water makes concrete weaker and more likely to crack. If the mix is too wet, add more cement and sand in the same ratio and mix again. Avoid using overly wet concrete for important jobs.
How Long Can I Keep Mixed Concrete In The Mixer?
Concrete begins to set within 30 to 60 minutes. Try to pour and finish your concrete within this time. Never leave concrete sitting in the mixer for long, or it will harden and damage the machine.
Where Can I Find More Information About Concrete Mixing?
For more detailed technical guides, you can visit the Wikipedia page on concrete mixers. This resource offers in-depth information and history about concrete mixing equipment.
Final Thoughts
Learning how to mix concrete in a mixer is a valuable skill for home improvement and construction. With careful preparation, the right ratios, and attention to detail, you can achieve strong, durable concrete every time. Remember to work safely, measure ingredients carefully, and clean up as soon as you finish.
The extra effort pays off with better results and less frustration. As you gain experience, you’ll find mixing concrete becomes faster and more predictable. Whether you are building a garden path or a new wall, the right mix is the foundation for success.