Organizing tools can be a real challenge, especially when your workspace gets cluttered and you can never find what you need. If you’ve ever wasted time looking for a screwdriver or misplaced your favorite wrench, you know the frustration. The good news? A pegboard can transform any garage, shed, or workshop from messy to efficient. With the right setup, you’ll see every tool at a glance, grab exactly what you want, and clean up in seconds. But how do you get from a blank board to a perfectly organized wall? This guide explains everything about how to organize tools on pegboard, from planning and installation to smart arrangement and long-term upkeep.
Why Use A Pegboard For Tool Organization?
Pegboards have been used in workshops for over a century, and for good reason. They offer a flexible, affordable, and highly visible way to keep tools tidy. Unlike drawers or boxes, a pegboard lets you see every tool at once.
You can change the layout anytime, add hooks for new tools, and even color-code for more clarity.
Some key benefits of pegboard tool organization include:
- Easy access: Tools are right in front of you, not buried in a box.
- Customizable: Move hooks and holders as your collection changes.
- Space-saving: Use vertical wall space, freeing up work surfaces.
- Visual inventory: Instantly see if something is missing.
- Motivation: A tidy space encourages you to work more.
A study by the National Association of Productivity & Organizing Professionals found that people waste an average of 2.5 days per year looking for lost items at home, with tools being among the top offenders. Using a pegboard can help cut that wasted time.
Choosing The Right Pegboard
Not all pegboards are created equal. Choosing the best one for your needs is the first step. Consider the following factors:
Material Types
There are three main types of pegboards:
| Pegboard Type | Pros | Cons |
|---|---|---|
| Masonite (Hardboard) | Low cost, easy to find, light weight | Not waterproof, can warp or break with heavy tools |
| Metal (Steel or Aluminum) | Very strong, durable, holds heavy tools, rust-resistant models available | More expensive, heavier, requires sturdy mounting |
| Plastic | Resistant to moisture, lightweight, flexible designs | Less strong than metal, can crack over time |
Pro tip: For heavy-duty tools or outdoor use, metal pegboard is best. For crafts or light hand tools, hardboard or plastic works well.
Hole Size And Spacing
Standard pegboards have either 1/8-inch or 1/4-inch holes. The spacing between holes is usually 1 inch apart. Most tool hooks and accessories are made to fit these sizes. For most home workshops, 1/4-inch holes are more versatile and support heavier hooks.
Pegboard Size
Measure your wall space before buying. Common sizes are 2×4 feet and 4×8 feet panels. Larger panels mean fewer seams, but small panels are easier to install and can fit odd spaces.
Color And Finish
A white or light-colored pegboard makes it easier to see your tools and spot dust or spiderwebs. Some metal pegboards come in bright colors, which can help with organizing by tool type or family member.
Planning Your Tool Layout
Before you start hanging tools, you need a plan. A good layout saves you time and avoids mistakes.
Assess Your Tool Collection
Lay out all your tools on a table or the floor. Group similar items together—screwdrivers, pliers, wrenches, power tools, etc. Check for duplicates or broken tools. You might find you own three hammers but only use one.
Prioritize Tools By Use
Put the most-used tools front and center. Less-used or seasonal items can go higher up or to the sides. For example, if you use a drill every week, place it at shoulder height. Gardening shears you use once a month can go on the edge or top row.
Sketch Your Design
Use graph paper or a digital tool to draw your pegboard and sketch where each tool will go. This simple step prevents holes in the wrong places and helps you buy the right number of hooks and holders.
Think About Safety
Sharp or heavy tools should be out of reach of children. Power tools with cords should hang so cords do not tangle or create tripping hazards.
Mounting Your Pegboard
Installation is key. A poorly mounted pegboard can fall, warp, or pull away from the wall.
Tools And Materials You’ll Need
- Pegboard panels (size to fit your wall)
- Furring strips (1×2-inch boards for spacing)
- Wood screws or wall anchors
- Level
- Drill or screwdriver
- Stud finder
- Tape measure
- Pencil
Step-by-step Installation
- Mark the Wall: Use a stud finder to locate wall studs. Mark the location lightly with a pencil.
- Install Furring Strips: Attach horizontal furring strips to the studs using wood screws. Strips should frame the area where the pegboard will go, plus one or two across the middle for support.
- Check for Level: Use a level to ensure strips are straight, especially if your wall is old or uneven.
- Attach the Pegboard: Place the pegboard on top of the strips. Secure it with screws through the pegboard holes into the furring strips.
- Test for Sturdiness: Press on the board in several spots to check for movement. If it wobbles, add more screws.
Why use furring strips? Pegboard hooks need space behind the board to fit through the holes and hold weight. Without furring strips, your hooks won’t fit and the board will flex or break.
Choosing Pegboard Accessories
The right accessories turn a blank pegboard into a super-organized tool wall. There are many options, so mix and match for your needs.
Types Of Pegboard Hooks
- Straight hooks: For hanging hammers, pliers, wrenches, and tape measures.
- Curved hooks: Good for screwdrivers, chisels, or small hand saws.
- Double-arm hooks: Hold larger tools like drills, extension cords, or garden shears.
- Spring clips: Securely grip tools with handles, such as pliers or scissors.
- Bins and baskets: Store small items like nails, screws, or tape.
- Tool holders: Custom-shaped racks for screwdrivers, pliers, or socket sets.
- Shelves: Hold power tools, cans, or toolboxes.
Specialty Accessories
Some companies make accessories for very specific items:
- Cordless drill holsters
- Spray can racks
- Paper towel holders
- Magnetic strips for metal bits
- Locking hooks for heavy or expensive tools
Accessory Materials
Look for metal hooks for strength, especially for heavy tools. Some plastic accessories are great for craft rooms but can snap under weight.
Arranging Tools For Maximum Efficiency
Now comes the fun part: actually hanging your tools. Here’s how to arrange them for the best results.
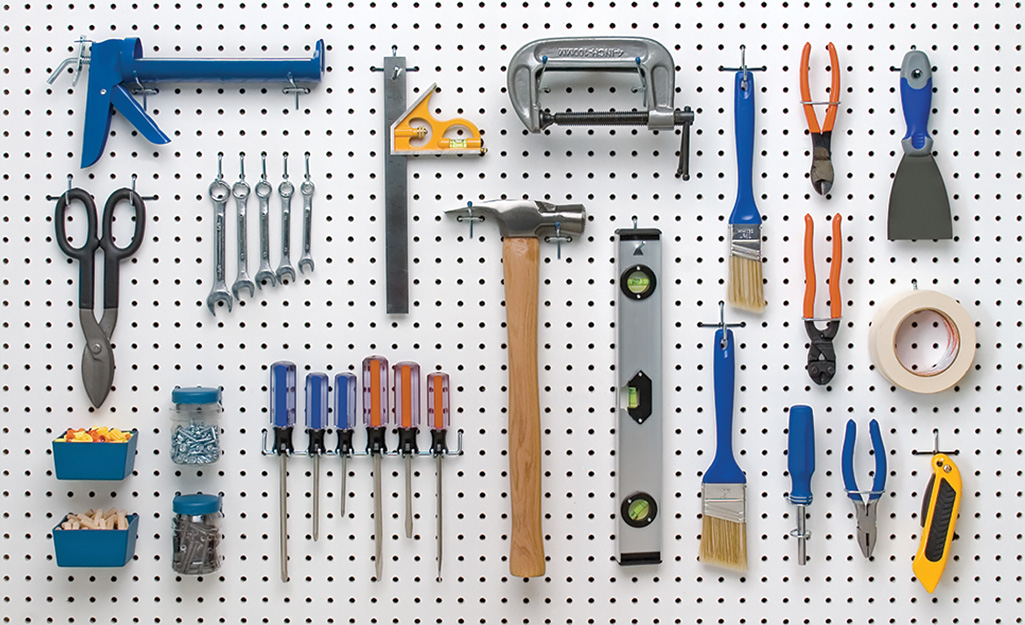
Group By Type And Size
Hang similar tools together. For example, line up all your screwdrivers side by side, from smallest to largest. This makes it easy to grab the right one without searching.
Use Outlines For Fast Cleanup
Draw or tape outlines around each tool on the pegboard. This classic trick, often seen in professional workshops, helps you (or anyone else) put every tool back in the right spot. It’s also an instant visual cue if something is missing.
Keep Heavy Tools Lower
Hang heavy items such as hammers, drills, or saws on the lower part of the board. This reduces strain on the board and prevents injuries if something falls.
Reserve The Center For Most-used Tools
Keep your most-used items in the middle, at eye and arm level. This is the “prime real estate” of your pegboard.
Store Sets Together
If you have sets (like wrenches or sockets), use a rack or holder that displays them in order. This makes it easy to see if one is missing and helps you keep the set together.
Use The Edges For Odd-shaped Tools
Bulky or awkward-shaped tools fit best on the sides or top of the board, where they won’t block access to other items.
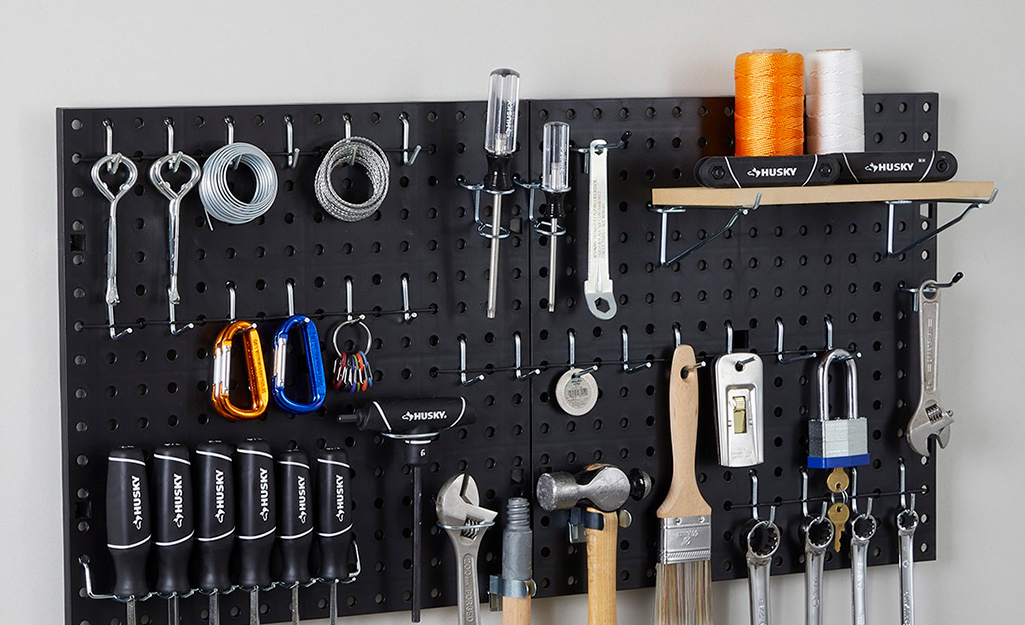
Example Layout For A General Workshop
| Area | Tools | Reason |
|---|---|---|
| Center (eye level) | Screwdrivers, pliers, tape measure | Most frequently used, easy to grab |
| Lower third | Hammers, hand saws, power drills | Heavier, safer if stored lower |
| Top row | Seasonal or rarely used tools | Out of the way, but still visible |
| Sides | Level, square, clamps | Long or awkward shapes fit best here |
Maintaining Your Pegboard System
A tidy pegboard doesn’t stay that way by itself. Regular maintenance keeps it useful and safe.
Regular Inspections
Check your pegboard every few months for:
- Loose hooks or screws
- Broken accessories
- Missing tools
- Dust and cobwebs
Tighten anything that’s loose, replace damaged parts, and clean off dust with a vacuum or damp cloth.
Update Tool Placement
As your tool collection grows or your projects change, update your layout. Don’t be afraid to move hooks around. The beauty of a pegboard is its flexibility.
Label Or Color-code Sections
Consider adding labels or colored tape to different zones. For example, a red section for electrical tools and blue for plumbing. This helps family members or coworkers find and return tools.
Safety Reminders
If you have children, double-check that sharp or dangerous tools remain out of reach. Consider locking bins for hazardous items.
Advanced Pegboard Organization Ideas
If you want to level up your pegboard, here are some creative and advanced ideas used by professionals.
Add Lighting
Mount LED strip lights above or below your pegboard to brighten the work area. Good lighting makes it easier to see small tools and reduces eye strain.
Use Double Pegboards
For big collections, mount two boards with a small gap between them. You can slide long tools (like levels or saws) between the boards for extra storage.
Integrate Charging Stations
If you use cordless power tools, add a shelf with a power strip for charging batteries directly on the pegboard.
Combine Pegboard With Other Storage
Mix pegboard with shelves, drawers, or cabinets below. Store fasteners and accessories in drawers, with the main tools on the board above.
Go Mobile
Mount your pegboard on a rolling frame. This “mobile tool wall” is perfect for moving your setup around a garage or workshop.
Digital Inventory
Take a photo of your pegboard layout after organizing. This “before” image helps you remember where each tool belongs and can be shared with family or team members.
Mistakes To Avoid When Organizing Tools On Pegboard
Even with the best intentions, there are some common mistakes that can make your system less effective.
- Overloading the Pegboard: Every board has a weight limit. Hanging very heavy tools or overstuffing one area can cause the board to warp or fall.
- Skipping Furring Strips: Not providing space behind the board for hooks is a top beginner mistake. Hooks won’t fit and can damage the wall.
- Random Tool Placement: Hanging tools wherever there’s space makes it hard to find what you need. Plan your layout first.
- Not Securing Hooks: Some hooks are loose and fall off when you grab a tool. Choose locking hooks or add zip ties to secure them.
- Ignoring Safety: Tools that stick out too far can cause injuries, especially for children or pets. Keep sharp or heavy tools low or locked up.
- Poor Lighting: If your pegboard is in a dark area, you won’t use it as much. Add lights if needed.
- No Maintenance: If you never update or clean your board, it will quickly get cluttered and less useful.
Insight: Many people don’t realize that pegboard can be painted to match your decor or even sealed for outdoor use. A coat of paint or polyurethane makes hardboard pegboard more durable and resistant to moisture.
Examples Of Organized Pegboard Setups
Looking for inspiration? Here are real-life examples that show how versatile pegboard can be.
Garage Workshop
A typical garage pegboard includes:
- Center: Everyday hand tools (screwdrivers, pliers, utility knife)
- Bottom: Power drill and circular saw on double hooks
- Top: Spare extension cords and caulking gun
- Sides: Measuring tape, square, level, clamps
- Bins: Screws, wall anchors, wire nuts
Garden Shed
For gardening, a pegboard might have:
- Center: Pruners, trowels, gloves
- Bottom: Small watering can, short hose
- Top: Plant markers, seed packets in baskets
- Sides: Rake, hoe (on double hooks or special holders)
- Bins: Plant ties, twine, spare nozzles
Craft Room
Crafters use pegboards to organize:
- Center: Scissors, rotary cutters, glue gun
- Top: Ribbons, washi tape, small bins for beads
- Sides: Rulers, cutting mats
- Bins: Buttons, thread, markers
Non-obvious tip: For crafts or electronics, consider adding a magnetic tool holder to your pegboard for holding tiny screws or metal parts while you work.
Cost And Value Of Pegboard Organization
Many people wonder if installing a pegboard is worth the effort and expense. Here’s what you need to know.
Typical Costs
- Hardboard panel (2×4 ft): $10–$20
- Metal panel (2×4 ft): $30–$60
- Hooks and accessories: $10–$50 (depends on quantity and type)
- Furring strips and screws: $10–$20
A basic setup for a small garage wall can cost as little as $40–$80. Larger or premium systems can go over $200.
Value Over Time
A well-organized tool wall:
- Saves you time every project
- Reduces lost or damaged tools
- Makes your workspace safer
- Adds value if you sell your home (organized garages are a selling point)
According to Family Handyman, organizing your tools can make you 30% more productive by cutting search and cleanup time.
Sustainability And Upcycling With Pegboard
Pegboard isn’t just for new builds. You can often find used panels at thrift stores or reuse old boards from another project. Painting and sealing old pegboard gives it new life.
Fun fact: Some artists and designers use painted pegboards as decorative walls, combining tool storage with artwork or family organization centers.
Frequently Asked Questions
What Is The Best Way To Keep Pegboard Hooks From Falling Out?
The most effective method is to use locking pegboard hooks or add small zip ties or hot glue to the back of the hook. This prevents the hook from coming loose when you remove a tool.
How Much Weight Can A Pegboard Hold?
It depends on the material and installation. Metal pegboards hold the most—often up to 100 pounds per square foot if mounted into studs. Hardboard usually supports about 20–25 pounds per square foot. Always check the manufacturer’s guidelines and avoid overloading.
Can I Cut Pegboard To Fit My Space?
Yes, pegboard can be easily cut with a jigsaw, circular saw, or even a hand saw. Measure carefully and wear safety goggles. Sand the edges after cutting to prevent splinters.
How Do I Clean And Maintain My Pegboard?
Dust with a soft cloth or vacuum every few months. For deep cleaning, wipe with a damp cloth and mild soap. Avoid soaking wood-based pegboard, as water can cause swelling or warping.
Are There Alternatives To Pegboard For Tool Organization?
Yes, alternatives include slatwall panels, magnetic strips, wall-mounted tool chests, and French cleat systems. Each has pros and cons, but pegboard is the most flexible and affordable for most home workshops.
Transforming a blank wall into a highly organized tool center with pegboard is easier than you might think. With a bit of planning and the right accessories, you’ll create a space that saves time, reduces stress, and makes every project more enjoyable.
Start small, keep it flexible, and soon you’ll wonder how you ever worked without it.