Sharpening drill bits is a skill every DIYer, mechanic, or woodworker should know. Over time, drill bits get dull. When this happens, drilling takes longer, holes look rough, and your drill works harder. Many people throw away dull bits. But you don’t have to.
With some care and practice, you can sharpen your drill bits using an angle grinder. This saves money, extends the life of your tools, and gives you better results. In this guide, I’ll walk you step-by-step through sharpening drill bits with an angle grinder—safely and effectively.
Why Sharpen Drill Bits?
Sharp drill bits cut cleaner holes, work faster, and put less stress on your drill. Dull bits can slip, overheat, or even break. Sharpening is not just about saving money. It’s also about safety and quality.
Here are a few benefits of sharpening your drill bits:
- Save money by reusing bits instead of buying new ones.
- Improved performance as sharp bits cut faster and cleaner.
- Safer drilling because sharp bits are less likely to slip or bind.
- Longer tool life for both your drill and bits.
Many people don’t realize how quickly a bit can become dull, especially when drilling through metal or hardwood. Even a small loss of sharpness makes a big difference in how the bit performs.
Understanding Drill Bit Anatomy
Before sharpening, you need to know the main parts of a twist drill bit:
- Point: The sharp tip that starts the hole.
- Cutting edges (lips): The two main edges that do most of the cutting.
- Chisel edge: The center part between the lips. It helps the bit start in the material.
- Flutes: Grooves that carry away chips and let air in.
- Land: The outer edge that guides the bit.
For effective sharpening, you must restore the correct angles, especially the point angle and the lip relief angle. If these are wrong, the bit won’t cut well.
Typical Drill Bit Angles
| Bit Type | Point Angle | Lip Relief Angle |
|---|---|---|
| General Purpose (HSS) | 118° | 10°–14° |
| Hard Materials (Metal) | 135° | 7°–9° |
| Wood Bits | 118° | 12°–15° |
Understanding these angles helps you get the bit sharp and ready for the material you want to drill.

Why Use An Angle Grinder?
Most people think of angle grinders as tools for cutting or grinding metal, not sharpening. But an angle grinder is fast, powerful, and easy to use for sharpening drill bits. It’s also more common in home workshops than a bench grinder or specialty sharpener.
Some reasons to use an angle grinder include:
- Versatility: You can use it for many jobs, not just sharpening.
- Portability: Easy to move and use anywhere.
- Speed: Removes material quickly.
- Cost: Most people already own one.
However, angle grinders are less precise than bench grinders. You must be careful to control the angle and avoid overheating the bit.
Safety First: Essential Precautions
Angle grinders are powerful and potentially dangerous. Before you begin, always put safety first.
- Wear safety goggles: Flying sparks and metal can hurt your eyes.
- Use hearing protection: Angle grinders are loud.
- Wear gloves: Protects hands from sparks and sharp edges.
- Secure your workspace: Make sure your grinder is stable.
- Keep flammable items away: Sparks can ignite things easily.
- Use a dust mask: Grinding makes fine metal dust.
- Check your grinder: Ensure the grinding disc is tight and in good condition.
Never skip these steps. Accidents happen fast with power tools.

Tools And Materials You’ll Need
Getting ready saves time and prevents mistakes. Here’s what you need:
- Angle grinder (preferably with a new grinding disc)
- Drill bits (dull or chipped)
- Safety goggles
- Work gloves
- Hearing protection
- Dust mask
- Permanent marker (for marking cutting edges)
- Vice or clamp (optional, for holding bits steady)
- Small cup of water (for cooling the bit)
- Ruler or angle gauge (for checking angles, optional)
Having everything ready makes the process smoother and safer.
Step-by-step Guide: How To Sharpen Drill Bits With Angle Grinder
Sharpening drill bits with an angle grinder is a skill you can learn with patience and practice. Here’s how to do it, step by step.
1. Inspect The Drill Bit
Before sharpening, look at your drill bit. Is it just dull, or is it chipped or broken? If the bit is badly damaged, sharpening may not help much. Minor chips, dullness, or slight unevenness are fixable.
Check the cutting edges. If both lips look about the same size and angle, you’ll get better results. If one side is much shorter, you’ll need to balance them during sharpening.
2. Mark The Cutting Edges
Use a permanent marker to color the cutting edges of the bit. This helps you see where you are grinding and avoid removing too much material. It’s a simple but powerful trick.
3. Set Up Your Angle Grinder
Place your angle grinder on a firm, flat surface. If your grinder has a guard, make sure it’s in place. Use a fine or medium grinding disc for metal. Plug in the grinder, but don’t start it yet.
If you have a vice or clamp, use it to hold the bit steady. Many people hold the bit by hand, but clamping can give you more control and safety.
4. Understand The Correct Angles
This is the most important step. Standard drill bits have a point angle of about 118°. The lip relief angle (the slope behind the cutting edge) is usually 10–14°. If you grind at the wrong angle, the bit may not cut, or it may wear out fast.
One simple trick is to use an angle gauge. But if you don’t have one, you can print a 118° angle guide from online, cut it out, and use it as a reference.
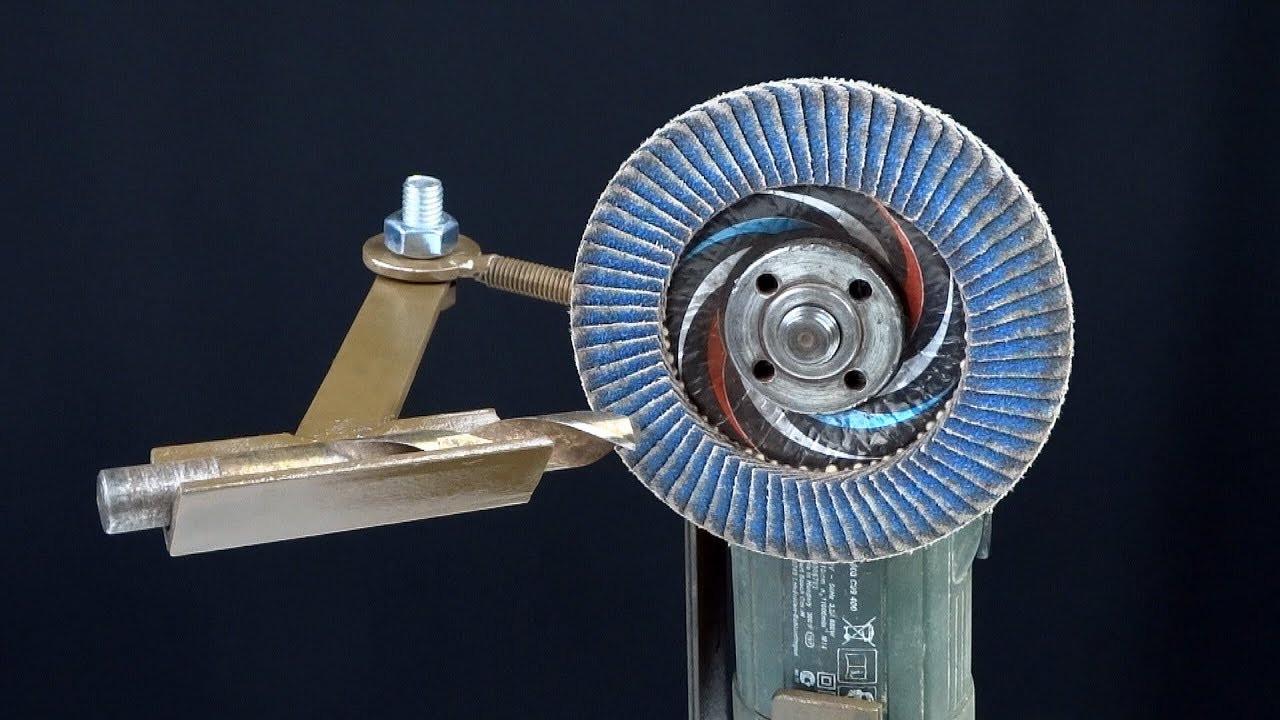
5. Hold The Drill Bit Properly
Hold the drill bit so the cutting edge you want to sharpen faces the grinding disc. The bit should be at a slight upward angle (about 60° to the face of the grinder). Only the tip and cutting edge should touch the disc.
Keep your fingers away from the spinning disc. Use a glove for extra grip.
6. Grind The First Cutting Edge
Turn on the angle grinder and let it reach full speed. Gently touch the cutting edge to the disc. Use light pressure—don’t force it. Move the bit smoothly across the disc, following the original angle.
Key points to remember:
- Keep the same angle as the original edge.
- Don’t overheat the bit. Every 2–3 seconds, dip it in water to cool it.
- Only remove a small amount at a time. It’s easy to take more off, but you can’t put it back.
If you marked the edge with a marker, check after a few passes to see if you’re grinding the right spot.
7. Sharpen The Second Cutting Edge
Once you finish the first edge, turn the bit 180° and repeat for the second edge. Try to remove the same amount from both sides. This keeps the point centered and balanced.
If one lip is longer, the bit will drill off-center. You can check the balance by holding the bit vertically and looking at the tip. Both cutting edges should look even.
8. Shape The Chisel Edge
The chisel edge is the small flat section at the very tip between the lips. It should be sharp but not too long. If the chisel edge is too wide, the bit will push rather than cut.
You can carefully touch the chisel edge to the disc for a split second, just to clean it up. Don’t overdo it.
9. Check Your Progress
After grinding both sides, inspect the bit:
- Are both cutting edges sharp and even?
- Is the point angle close to 118°?
- Is the chisel edge centered?
If not, repeat the sharpening in small steps. Patience is key.
10. Final Touches And Testing
Wipe off any dust. Test the sharpness by pressing the bit gently against your thumbnail at a 45° angle. A sharp bit will “bite” into your nail with light pressure.
For a final check, try drilling a hole in scrap wood or metal. If the bit cuts cleanly and easily, you did well.
Common Mistakes And How To Avoid Them
Even experienced people make mistakes when sharpening drill bits, especially with an angle grinder. Here are some common errors:
- Wrong angle: Sharpening at too steep or too shallow an angle ruins the bit. Always aim for the original angle.
- Uneven edges: If one lip is longer, the bit drills off-center. Balance is important.
- Overheating: Grinding too fast or not cooling the bit can make it lose hardness. Always dip in water.
- Removing too much material: Only grind a little at a time.
- Not cleaning the chisel edge: If it’s too blunt, the bit won’t start easily.
A good trick is to practice on old, cheap bits before sharpening your best ones.
Practical Tips For Better Results
Sharpening drill bits is not just about grinding metal. It’s about precision and practice. Here are some extra tips to help you get better:
- Use a fine grinding disc for smoother edges.
- Always mark the cutting edge before grinding.
- Hold the bit steady and avoid wobbly movements.
- Dip the bit in water often—heat is your enemy.
- Use a bright light so you can see clearly.
- Compare your sharpened bit to a new one for reference.
- Don’t expect perfection on your first try—skill comes with practice.
One thing beginners miss: Many bits fail not from dullness, but from uneven lips. Always check both sides and adjust as needed.
Sharpening Different Types Of Drill Bits
Not all drill bits are the same. Some require special care.
High-speed Steel (hss) Bits
These are the most common bits for wood and metal. They are easy to sharpen with an angle grinder. Just be careful not to overheat them, or they lose their hardness.
Cobalt And Carbide Bits
Cobalt bits are harder and last longer, but they are brittle. Carbide bits are even harder and often used for masonry. Both can be sharpened, but you need a diamond wheel or special disc. Grinding these bits with a regular disc can damage them.
Masonry Bits
Masonry bits have a carbide tip. You can touch up the steel, but sharpening the carbide requires a diamond disc. For most people, it’s easier to replace than sharpen these bits.
Specialty Bits
Step bits, spade bits, and auger bits all have unique shapes. Some can be touched up with an angle grinder, but they often require special jigs or files.
Angle Grinder Vs. Other Sharpening Methods
You might wonder how an angle grinder compares to other ways to sharpen drill bits. Let’s look at a few options.
| Method | Precision | Speed | Skill Level | Cost |
|---|---|---|---|---|
| Angle Grinder | Medium | Fast | Medium | Low |
| Bench Grinder | High | Medium | Medium | Medium |
| Drill Bit Sharpener | Very High | Fast | Low | High |
| Hand File | Low | Slow | High | Low |
The angle grinder is a good choice if you want something quick, cheap, and already available in most workshops. But for perfect results, a dedicated sharpener is best.
How To Maintain Sharpened Drill Bits
After sharpening, you want your bits to stay sharp as long as possible. Here’s how to extend their life:
- Use the right speed on your drill. Too fast creates heat and dulls the bit.
- Apply steady pressure—don’t force the bit.
- Use cutting oil when drilling metal. It keeps the bit cool.
- Store bits properly in a case or rack to avoid banging them together.
- Clean bits after use to remove debris and oil.
A well-maintained bit can last through many jobs before needing to be sharpened again.
Signs That Your Drill Bit Needs Sharpening
It’s not always obvious when a bit is dull. Here are some signs:
- The bit squeaks or makes a high-pitched noise.
- Drilling takes much longer than before.
- The hole looks rough or burned.
- The bit slips or “walks” on the surface.
- You see smoke or smell burning.
- The bit feels blunt or rounded at the tip.
If you notice any of these, it’s time to sharpen your bit.
Advanced Tips For Experienced Users
If you’ve sharpened a few bits already and want to improve, try these advanced techniques:
- Split-point modification: You can grind a small notch in the chisel edge to make the bit start easier and reduce walking. This is tricky but makes a big difference.
- Custom angles: For hard metals, try sharpening to 135°. For soft wood, a sharper point (100°) can work better.
- Jigs and guides: Build a simple guide to hold the bit at the right angle every time. Some people use a block of wood with a V-groove cut at 59° (half of 118°).
One non-obvious insight: The sharper the bit, the more critical it is to use proper drilling speed and pressure. A freshly sharpened bit can dull quickly if abused.
When To Replace Instead Of Sharpen
Not every drill bit can be saved. Here are situations where sharpening isn’t worth it:
- The bit is snapped or missing a large chunk.
- The flutes are worn or twisted.
- The bit is bent or warped.
- Repeated sharpening has shortened the bit too much.
For these, it’s safer and more effective to buy a new bit. But you’ll be surprised how many bits can be saved with careful sharpening.
Credit: binictools.com
Quick Reference: Sharpening Checklist
Here’s a fast reminder for the next time you sharpen a drill bit:
- Inspect the bit for damage.
- Mark the cutting edge.
- Set up your angle grinder safely.
- Hold the bit at the correct angle.
- Grind the first edge lightly, cooling in water.
- Grind the second edge to match.
- Touch up the chisel edge if needed.
- Check angles and sharpness.
- Test on wood or metal.
- Store the bit safely.
Keep this checklist in your workshop for easy reference.
Real-world Example: Saving A Workshop Set
A local woodworking shop had a set of 25 drill bits. After a busy season, more than half were dull or chipped. Instead of throwing them away, the owner used an angle grinder and the steps above. After a few hours of careful work, 20 bits were sharp and back in use.
The shop saved over $50 and learned a new skill.
Many hobbyists miss this opportunity to save money and reduce waste. With practice, you can do the same.
Environmental Benefits Of Sharpening Drill Bits
Sharpening your drill bits is also good for the planet. Manufacturing new bits uses energy, metals, and packaging. By reusing and sharpening, you lower your carbon footprint and keep waste out of landfills.
In the United States alone, over 100 million drill bits are sold each year. If more people sharpened and reused bits, it could save thousands of tons of metal annually.
For more on recycling and tool maintenance, see Wikipedia’s drill bit article.
Frequently Asked Questions
How Often Should I Sharpen My Drill Bits?
The frequency depends on how much you use them and the materials you drill. For heavy use on metal, you may need to sharpen after every few projects. For wood or light use, every few months may be enough. If drilling feels slow or rough, it’s time to sharpen.
Can I Sharpen Small Drill Bits With An Angle Grinder?
Yes, but it’s more difficult. Small bits are harder to hold steady and easier to overheat. Use a light touch, cool often in water, and consider using a clamp or jig for extra control.
What Kind Of Grinding Disc Should I Use?
Use a fine or medium grit grinding disc designed for metal. Avoid coarse discs, which remove too much material too quickly. For carbide bits, use a diamond wheel.
Is It Safe To Sharpen Drill Bits At Home?
Yes, if you follow safety rules—wear goggles, gloves, and hearing protection, and keep your workspace clean. Always cool the bit and work slowly. Practice on old bits first.
Will Sharpening A Bit Change Its Size?
Repeated sharpening will slowly reduce the length and diameter of the bit. But if you use light pressure and only sharpen when needed, this change is small. Over time, very short or thin bits should be replaced.
Sharpening drill bits with an angle grinder is a practical, money-saving skill. With patience, the right technique, and attention to safety, you can keep your bits sharp and your projects running smoothly. Try it on your next dull bit—you’ll be surprised how easy it can be.