A basin wrench is one of those tools that sits quietly in a plumber’s toolbox, often overlooked until you have to remove or install a faucet under a sink. Then you realize: no other tool can do what a basin wrench does. If you have ever struggled with hard-to-reach nuts behind a kitchen or bathroom sink, you know the frustration. The space is tight, your hands barely fit, and traditional wrenches just don’t work. Here’s where a basin wrench becomes not just helpful, but essential.
Many homeowners and even some new plumbers avoid tasks under the sink because they seem too complicated. But with the right technique and the proper tool, most faucet installations or repairs are actually simple. In this guide, you’ll learn exactly how to use a basin wrench, understand its unique features, and pick up expert tips that even some pros miss.
Whether you’re fixing a leak, replacing an old faucet, or just want to know more about this tool, this detailed article will walk you through every step and answer common questions along the way.
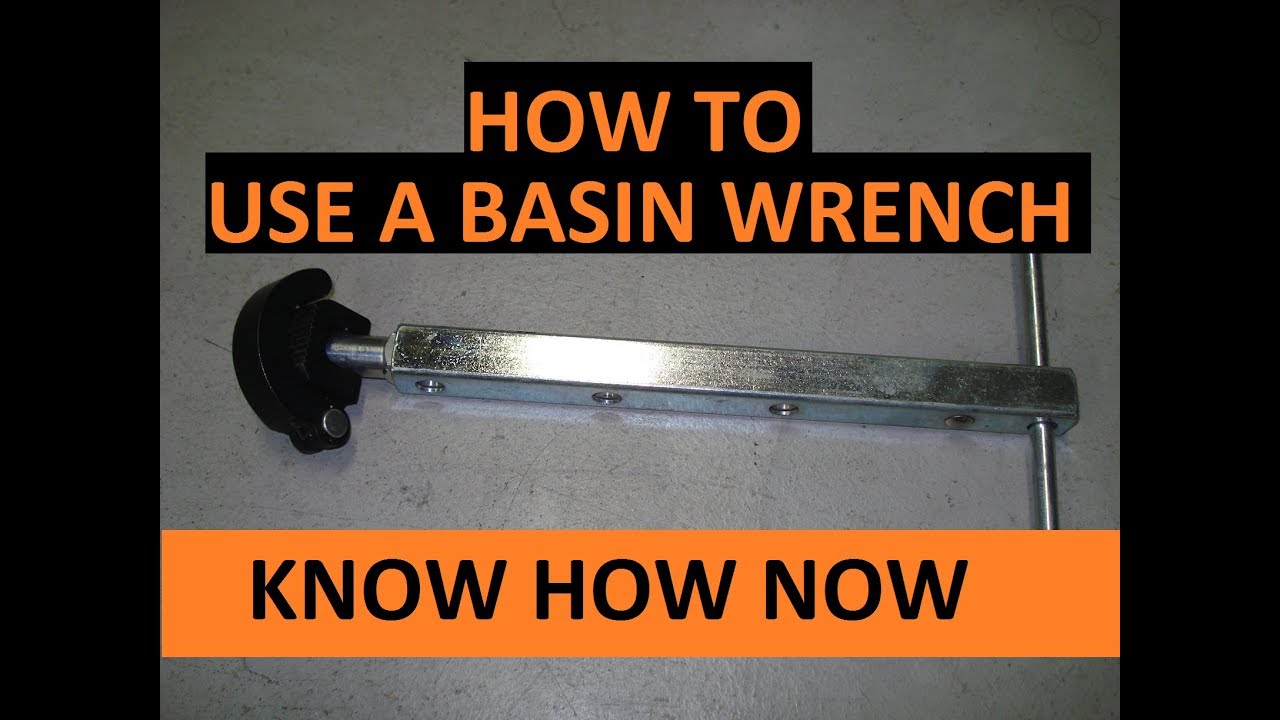
What Is A Basin Wrench?
A basin wrench is a plumbing tool designed specifically for loosening and tightening nuts that hold faucets in place, especially in the narrow space under sinks. It has a long shaft, a pivoting jaw at one end, and a T-shaped handle at the other. The jaw grips the nut, while the long handle lets you reach deep behind basins where your hands or regular wrenches can’t go.
Unlike standard wrenches, a basin wrench’s head can rotate to grip nuts in both clockwise and counterclockwise directions. This means you can use it to loosen or tighten nuts, depending on the job.
Key features:
- Long shaft: Reaches deep, tight spaces
- Pivoting jaw: Grips nuts at different angles
- T-handle: Offers strong leverage
Why Not Use A Regular Wrench?
Regular wrenches are bulky, and their handles get in the way under sinks. The nuts securing faucets are often tucked behind pipes and up against the sink basin. A basin wrench’s thin, long design and pivoting head allow it to fit into these impossible spaces, making it the only practical tool for the job.
When Do You Need A Basin Wrench?
A basin wrench is not an everyday tool, but when you need it, nothing else will do. Here are common situations where it becomes necessary:
- Replacing a faucet: The nuts holding the faucet are behind the sink, where you cannot reach with your hand.
- Fixing a leaking faucet base: Sometimes, the leak is due to a loose mounting nut.
- Installing new plumbing fixtures: You need to secure or remove nuts in tight spots.
- Tightening supply line connections: These connections are often deep behind the basin.
Many beginners try using adjustable wrenches, channel locks, or even pliers for these jobs, only to find they cannot get the right angle or grip. This can damage the nut, the fixture, or even the sink itself.
Parts Of A Basin Wrench
Understanding the parts of a basin wrench will make it easier to use.
| Part | Description | Function |
|---|---|---|
| Long Shaft | Metal rod, usually 10-17 inches | Reaches behind and under sinks |
| Pivoting Jaw | Spring-loaded, moves 180 degrees | Grips nuts at various angles |
| T-Handle | Perpendicular bar at end | Gives leverage for turning |
| Jaw Teeth | Serrated edges | Prevents slipping on nuts |
| Adjustable Head (on some models) | Can be rotated and locked | Makes the tool fit different sizes |
Some basin wrenches also have telescoping shafts, letting you adjust the length for even deeper sinks.
Types Of Basin Wrenches
Not all basin wrenches are the same. Choosing the right type can make your work easier and safer.
Standard Basin Wrench
This is the most common type. It has a fixed-length shaft and a pivoting jaw. Suitable for most home sinks.
Telescoping Basin Wrench
The shaft can extend, allowing you to reach further or work in very deep sinks. Telescoping models are useful if you work on different types of sinks or commercial fixtures.
Ratcheting Basin Wrench
Some advanced models have a ratcheting mechanism, so you don’t need to remove and reposition the tool every time you turn the nut. This saves time and effort, especially in very tight spaces.
Universal Basin Wrench
These wrenches can adjust to fit a wider variety of nut sizes. They are helpful if you work on both old and new plumbing, as nut sizes can vary.
Here’s a comparison of key features:
| Type | Best For | Key Feature | Price Range (USD) |
|---|---|---|---|
| Standard | Homeowners | Simple, reliable | $10–$20 |
| Telescoping | Deep sinks, professionals | Adjustable length | $15–$30 |
| Ratcheting | Frequent use, tight spaces | Quick operation | $25–$50 |
| Universal | Mixed plumbing | Fits many nut sizes | $20–$40 |
How To Choose The Right Basin Wrench
Choosing the right basin wrench depends on your needs and the type of sinks you work with. Here are some tips to help you decide:
- Measure the space: If your sink is deep or has a tall cabinet underneath, a telescoping wrench is better.
- Check nut size: Most faucet nuts are standard, but some older or imported fixtures have unique sizes. A universal model helps in these cases.
- Frequency of use: If you’re a homeowner doing one job, a standard model is fine. For plumbers or frequent use, invest in a ratcheting or telescoping type.
- Build quality: Look for strong steel construction and well-fitted jaws. Cheap tools can slip or break, causing injury or damage.
- Handle comfort: A cushioned or wider handle makes it easier to apply force, especially if the nut is stuck.
Common mistake: Many people choose the cheapest tool, only to find it bends or loses its grip under pressure. Invest a bit more for quality—it pays off in safety and reliability.
Step-by-step: How To Use A Basin Wrench
Now let’s get practical. Here’s a detailed guide on using a basin wrench for removing or installing faucet nuts.
1. Prepare The Workspace
- Clear the area: Remove items from under the sink. Place a towel or bucket to catch any water drips.
- Turn off water supply: Always shut off the hot and cold valves under the sink before starting.
- Disconnect supply lines: Use an adjustable wrench to unscrew water supply lines from the faucet. Have a towel ready for any remaining water.
2. Position Yourself
- Get comfortable. Most people lie on their back or side under the sink. Make sure you have enough light. A headlamp or clip-on light helps.
3. Select The Right Basin Wrench
- Choose a wrench that fits your space and nut size. Adjust the length if using a telescoping model.
- Set the pivoting jaw to the correct angle—usually, the jaw should open facing the nut.
4. Attach The Basin Wrench To The Nut
- Slide the wrench’s jaw up to the mounting nut behind the faucet.
- The jaw’s teeth should grip the nut’s edges securely.
- The wrench’s shaft should point straight down or at a comfortable angle for turning.
5. Turn The Wrench
- To loosen: Turn the handle counterclockwise.
- To tighten: Turn the handle clockwise.
- The jaw’s spring action should keep it gripping as you turn. If the wrench slips, reposition it for a better grip.
Pro tip: If the nut is stuck, spray a bit of penetrating oil and wait a few minutes before trying again.
6. Remove Or Install The Faucet
- Once the nut is loose, you can finish unscrewing it by hand.
- For installation, reverse the process: Thread the new nut by hand, then use the basin wrench to tighten it.
7. Reconnect And Test
- Reattach the water supply lines.
- Turn the water back on and check for leaks.
Practical Example
Let’s say you’re replacing a kitchen faucet. After disconnecting the water, you crawl under the sink. The mounting nuts are hidden behind the basin, impossible to reach with pliers. You set the basin wrench so its jaw faces the nut, slide it up, and use the T-handle for leverage.
The nut loosens with a satisfying snap. You remove it by hand and lift out the old faucet. Installing the new faucet is just as easy—thanks to the basin wrench.

Tips For Safe And Effective Use
Most people can use a basin wrench after a few tries, but these tips will help you avoid common mistakes and work more efficiently.
- Use two hands when possible: Hold the shaft steady with one hand and turn the handle with the other.
- Don’t force it: If the nut won’t budge, don’t use excessive force. You risk breaking the nut or damaging pipes.
- Check the jaw’s grip: Make sure the jaw is fully engaged on the nut’s edges.
- Watch for obstructions: Pipes and hoses can block your movement. Adjust the wrench angle or reposition your body.
- Use penetrating oil: For corroded or stuck nuts, a little oil does wonders.
- Wear gloves: Protect your hands from sharp edges and improve your grip.
- Keep the tool clean: Wipe the jaw and shaft after use to prevent rust and keep the mechanism smooth.
Non-obvious insight: Many beginners forget to check for sharp burrs or leftover plumber’s putty under old sinks. Clean the area first to avoid injury or tool damage.
Common Problems And How To Solve Them
Even with the right tool, you might face some challenges. Here’s how to handle them.
Nut Won’t Budge
- Try more penetrating oil.
- Tap the nut lightly with a small hammer to break corrosion.
- Use a longer basin wrench for extra leverage.
Wrench Slips Off Nut
- Clean the nut’s surface—grease or old putty can cause slipping.
- Check the jaw teeth for wear.
- Make sure the jaw is set at the correct angle.
Not Enough Space To Turn Handle
- Use a shorter or telescoping wrench.
- Try repositioning the wrench or yourself.
- Remove other pipes or hoses if possible.
Jaw Gets Stuck
- Lubricate the pivot point.
- Check for bent or damaged parts.
- Replace the wrench if it’s old or worn out.
Stripped Nut
- If the nut is stripped, try gripping it from a different angle.
- Use a locking pliers if the basin wrench cannot grip.
- In worst cases, you may need to cut off the nut with a hacksaw or rotary tool.
Expert tip: Always check the nut and surrounding area before starting. Sometimes, mineral buildup or corrosion is so bad that replacement is the only solution.
Cleaning And Maintenance
A well-maintained basin wrench will last for years and work smoothly every time. Here’s how to care for it:
- Wipe after use: Remove water, oil, and debris from the jaw and shaft.
- Lubricate moving parts: Use a few drops of light machine oil on the pivot and ratchet (if present).
- Store dry: Keep the wrench in a dry place to prevent rust.
- Check for wear: Inspect the jaw teeth and handle for damage before each use.
- Sharpen jaw teeth: If the grip weakens, use a small file to sharpen the teeth.
Neglecting maintenance is a common beginner’s mistake. A rusty or sticky wrench is more likely to slip, making your job harder and less safe.
Alternatives To A Basin Wrench
Sometimes, a basin wrench just won’t fit or isn’t available. Here are some alternatives and when (or why) they might work:
- Adjustable pliers: Good for accessible nuts, but too bulky for tight spaces.
- Socket wrench with deep socket: Works if there’s enough clearance above the nut.
- Crowfoot wrench: Attaches to a ratchet handle; useful for certain angles.
- Universal faucet tool: Specially designed for newer plastic nuts; not as strong for metal ones.
However, none of these alternatives match the reach and grip of a true basin wrench for traditional faucet nuts. In most cases, the basin wrench is the only practical solution.
:max_bytes(150000):strip_icc()/SPR-how-to-use-a-basin-wrench-2718720-step-03-d6851359278f44cdb435e22c5d4bdfe8.jpg)
Safety Precautions
Working under sinks involves some risks, especially if you’re not used to plumbing tasks. Follow these safety guidelines:
- Always turn off water: Prevents flooding and water damage.
- Disconnect electrical devices: If you’re working near garbage disposals or outlets, unplug them first.
- Use protective gloves: Shields hands from sharp metal or chemicals.
- Secure your position: Avoid awkward positions that can lead to back strain or falls.
- Check for mold: If you see black spots or smell musty odors, wear a mask and consider professional help.
Less obvious advice: Always check the tool’s condition before use. A cracked handle or loose jaw can break under pressure, causing injury.
Advanced Tips: Pro-level Use
Even professionals learn new tricks with a basin wrench. Here are two insights many beginners and even some pros miss:
- Use with an extension bar: Some basin wrenches have a hole in the handle where you can insert a metal rod for extra leverage. This is useful for stuck or rusted nuts.
- Jaw orientation matters: The jaw can be flipped to grip either side of the nut. If the wrench keeps slipping, try rotating the jaw to the other side.
Pro insight: For faucets with plastic nuts, avoid overtightening with a basin wrench. Hand-tighten first, then use the wrench gently. Plastic nuts crack easily.
Real-world Example: Basin Wrench In Action
Let’s look at a specific scenario—a homeowner wants to replace a leaking bathroom faucet. The old mounting nut is rusted and hidden behind pipes. After turning off the water and clearing the area, the homeowner tries an adjustable wrench but can’t get a grip.
Switching to a telescoping basin wrench, they adjust the jaw, slide the tool behind the basin, and grip the nut. After a few firm turns, the nut loosens. The new faucet goes in with the same tool, saving time and avoiding damage to the sink.
This story highlights why the basin wrench is a must-have for anyone doing sink plumbing, whether for a one-time DIY fix or regular maintenance.
Comparing Popular Basin Wrench Brands
There are many brands on the market, each with different features and price points. Here’s a quick comparison of some popular options:
| Brand | Model | Type | Key Feature | Typical Price (USD) |
|---|---|---|---|---|
| RIDGID | 31175 | Telescoping | Swivel head, heavy-duty | $30–$40 |
| TEKTON | 23002 | Standard | Budget-friendly, reliable | $15–$20 |
| Superior Tool | 03825 | Universal | Fits many nut sizes | $20–$25 |
| Klein Tools | 10-Inch | Standard | Comfort grip, strong teeth | $20–$30 |
| General Tools | 140XL | Ratcheting | Quick operation | $35–$50 |
When choosing a brand, look for user reviews and consider what features matter most for your specific plumbing needs.
Environmental Impact: Why Maintenance Matters
Old, leaking faucets waste thousands of gallons of water each year. According to the U. S. Environmental Protection Agency, a single leaky faucet can waste over 3,000 gallons annually. Using a basin wrench to fix leaks quickly not only saves water and money but also helps protect the environment.
Proper maintenance of your tools also means less waste. A well-cared-for basin wrench can last decades, reducing the need for replacements and minimizing your carbon footprint.
Frequently Asked Questions
What Size Nuts Can A Basin Wrench Handle?
Most basin wrenches are designed for nuts between 3/8-inch and 1-1/4-inch diameter. Universal models or those with adjustable jaws can handle a wider range. Always check the wrench’s specifications before use.
Can I Use A Basin Wrench For Other Plumbing Tasks?
Yes, you can use a basin wrench for any task that involves hard-to-reach nuts, such as supply line connections behind toilets or under sinks. However, it is not suitable for large pipe fittings or nuts that are easily accessible.
How Do I Know If My Faucet Nut Is Too Tight For A Basin Wrench?
If you cannot loosen the nut even after applying steady pressure and using penetrating oil, it may be seized due to corrosion. In this case, try a longer wrench for more leverage, or use a different tool, like locking pliers.
If all else fails, the nut may need to be cut off.
Is A Basin Wrench Easy For Beginners To Use?
Yes, basin wrenches are designed to be user-friendly. Most people can master them after a few tries. The key is to position the jaw correctly and use slow, steady turns. Practice on a spare nut before working under a sink if you’re unsure.
Where Can I Learn More About Plumbing Tools And Techniques?
For more in-depth guides and resources on plumbing tools, you can visit the Wikipedia Basin Wrench page. It offers technical details, history, and links to additional plumbing resources.
A basin wrench is a simple tool that solves a complex problem, making faucet repair or installation possible for anyone willing to try. With the right technique, some patience, and a few safety precautions, you can save time, money, and stress on your next plumbing project.
Don’t let those hidden nuts under your sink intimidate you—now you know exactly how to use a basin wrench like a pro.