A belt sander is one of the most powerful and versatile tools for smoothing wood, removing paint, or shaping materials quickly. If you want to get great results, you need to know how to use it safely and correctly. Many beginners find belt sanders intimidating because they’re heavy, noisy, and can remove a lot of material very fast.
But with the right techniques, a belt sander can save hours of hard work and give you professional-level finishes. This guide will show you everything you need to know—step by step—so you can use a belt sander with confidence.
What Is A Belt Sander?
A belt sander is a power tool that uses a loop of sandpaper (the belt) stretched over two rotating drums. As the drums spin, the belt moves in a continuous loop at high speed. This action sands down wood, metal, or plastic surfaces quickly and evenly. Belt sanders come in different sizes and types, from small handheld models to large stationary machines.
Belt sanders are mainly used for:
- Smoothing rough surfaces
- Removing old finishes or paint
- Leveling uneven boards
- Shaping edges or rounding corners
You’ll often find them in furniture making, carpentry, home renovation, and even metalworking.
Types Of Belt Sanders
Choosing the right type is important for your project. Here’s a look at the main types:
Handheld Belt Sanders
These are portable and can be moved over the workpiece. They’re best for:
- Large flat surfaces (like tabletops or doors)
- Floors
- Outdoor projects
Stationary (bench) Belt Sanders
In these, the sander is fixed, and you move the material against the belt. They’re commonly used for:
- Small parts
- Shaping or rounding edges
- Fine finishing
Narrow Vs. Wide Belt Sanders
Narrow belt sanders (belts 2-3 inches wide) are good for detail work or working in tight spaces. Wide belt sanders (belts 4+ inches wide) cover more area and are better for big, flat surfaces.
Power And Speed
Power is measured in amps (for corded models) or volts (for battery models). More power means faster material removal, but also more risk if you’re not careful. Speed is measured in feet per minute (FPM) or meters per second (m/s).
Most belt sanders run at 700-1200 FPM.
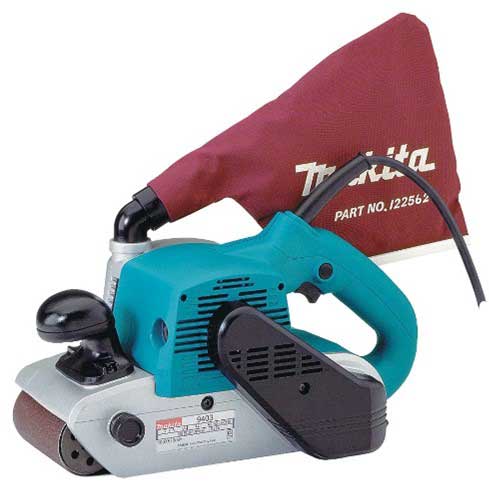
Key Parts Of A Belt Sander
Understanding the main parts helps you use and maintain your sander:
- Front and rear drums: Guide the sanding belt.
- Sanding belt: The abrasive loop that does the sanding.
- Tracking knob: Adjusts the belt to keep it centered.
- Tension lever: Releases belt tension for changing belts.
- Dust bag/port: Collects sanding dust.
- Handle and trigger: For holding and controlling the sander.
Choosing The Right Sandpaper Belt
Not all sandpaper belts are the same. Using the wrong one can ruin your work or damage your sander.
Grit Size
Sandpaper belts come in different grit sizes—the lower the number, the coarser the belt.
- 40–60 grit: Heavy material removal, paint stripping
- 80–100 grit: Smoothing rough wood
- 120–150 grit: Light sanding, finishing
- 180+ grit: Very fine, for final smoothing
Material
Most sanding belts are made of aluminum oxide, which is durable and works for most woods. For metal or very hard woods, zirconia or ceramic belts last longer.
Belt Size
Make sure you buy the correct width and length for your sander. Common sizes include 3×21″, 4×24″, and 3×18″.
Non-obvious insight: Cheap belts can wear out quickly or leave deep scratches. Spending a little more on high-quality belts often saves time and gives a better finish.
Safety First: Essential Precautions
Belt sanders are powerful—and can be dangerous if used carelessly. Follow these safety tips every time:
- Wear safety goggles to protect your eyes from flying dust.
- Use a dust mask or respirator. Sanding creates fine dust that’s bad for your lungs.
- Wear hearing protection. Belt sanders are loud.
- Keep loose clothing and hair away from the moving belt.
- Check the workpiece for nails, screws, or staples. These can tear the belt or cause kickback.
- Work in a well-ventilated area to avoid dust buildup.
- Unplug the sander before changing belts or making adjustments.
Non-obvious insight: Sanding generates static electricity. In dry conditions, touching the sander’s metal parts can give you a mild shock. Use anti-static dust collection systems or ground yourself to reduce this.
Preparing Your Workpiece
Good preparation makes sanding faster and gives better results.
- Clean the surface: Remove dirt, grease, or old finish.
- Secure your workpiece: Clamp it to a workbench so it doesn’t move.
- Mark areas to sand: Use a pencil to outline high spots or problem areas.
- Plan your sanding direction: Sand with the wood grain whenever possible.
If you’re sanding a floor, remove all furniture and cover nearby items with plastic. For furniture or doors, remove hardware that could catch the belt.
Setting Up Your Belt Sander
Before you start, take a few minutes to set up your tool properly.
Install The Correct Belt
- Pull the tension lever to release the old belt.
- Slide the new belt over the drums, making sure the arrows on the belt match the sander’s direction.
- Re-engage the tension lever.
Center The Belt (tracking)
- Plug in the sander and hold it above the workpiece.
- Turn it on and watch the belt. If it starts to drift to one side, adjust the tracking knob until it runs straight.
Adjust Dust Collection
Attach the dust bag or connect a vacuum hose. This keeps your workspace clean and improves visibility.
Test On Scrap
Before sanding your actual piece, test on a scrap of similar material. This helps you check belt tracking and see how aggressive the belt is.
Basic Techniques For Using A Belt Sander
Now you’re ready to start sanding. Here’s how to get smooth, even results:
- Start with the sander off. Place it flat on the workpiece before turning it on.
- Hold firmly with both hands. One on the main handle, the other on the front grip.
- Let the sander reach full speed. Then slowly move it forward.
- Sand with the grain. Move the sander in the same direction as the wood fibers, not across them.
- Keep the sander moving. Don’t stop in one spot or you’ll create a dip.
- Use light pressure. The sander’s weight does most of the work. Pushing down can gouge the surface.
- Overlap your passes. Each new pass should overlap the previous by about one-third.
- Lift off at the end. When done, lift the sander off the wood before switching it off.
Example: Smoothing A Tabletop
Suppose you have a rough tabletop. Start with an 80-grit belt, sand the entire surface, then switch to 120 grit for a finer finish. Always keep the sander moving and check your work often.
Common Mistakes To Avoid
- Tipping the sander: This creates uneven surfaces.
- Stopping in one spot: Causes dips or grooves.
- Using the wrong grit: Too coarse leaves scratches, too fine takes too long.

Advanced Techniques And Applications
Once you’re comfortable with the basics, a belt sander can do much more.
Removing Paint Or Finish
Use a coarse belt (40–60 grit) and keep the sander moving. Be careful not to sand away too much wood underneath.
Leveling Boards
If two boards are joined but not perfectly flat, use a belt sander to level the seam. Mark high spots with pencil and sand until the marks disappear.
Rounding Edges
Tilt the sander slightly and move along the edge. Go slowly to keep the shape even.
Shaping Curves
For gentle curves, use the nose (front) of the belt sander. For tight curves, a narrow belt sander or a stationary model works best.
Metal And Plastic
With the right belt, you can sand metal or plastic. Use belts designed for those materials and go slowly to avoid overheating.
How To Sand Large Areas Evenly
Large surfaces, like floors or doors, need special attention for a uniform finish.
- Work in sections. Divide the surface into manageable areas.
- Sand in the same direction. This avoids visible marks.
- Change belts as needed. Don’t try to do everything with one grit.
- Vacuum between grits. Clean the surface before switching to a finer belt.
Caring For Your Belt Sander
Regular maintenance keeps your sander working well and extends its life.
- Clean dust ports and bags after every use.
- Check belts for wear or tears before each job.
- Inspect the power cord for damage.
- Lubricate moving parts if your model’s manual recommends it.
- Store in a dry place to prevent rust or motor damage.
Troubleshooting Common Problems
Even experienced users run into issues. Here’s how to fix the most common ones:
Belt Slips Or Won’t Track
- Check belt tension.
- Adjust the tracking knob.
- Replace worn or stretched belts.
Sander Feels Weak Or Slow
- Plug into a different outlet.
- Clean out dust from vents.
- Replace an old or clogged belt.
Excessive Dust
- Empty the dust bag.
- Check for clogs in the dust port.
- Use a shop vacuum for better collection.
Uneven Sanding
- Check your technique.
- Make sure the sander is flat.
- Replace the belt if it’s worn unevenly.
Comparing Belt Sanders: What Matters Most
If you’re buying your first belt sander, it’s smart to compare features. Here’s a quick look at how models can differ:
| Feature | Handheld Sander | Stationary Sander |
|---|---|---|
| Portability | High | Low |
| Surface Size | Large areas | Small parts |
| Control | Moderate | High |
| Price Range | $70–$250 | $150–$500+ |
Tip: If you mostly work on big surfaces, choose a wide, handheld sander. For detail work, a stationary model is better.
Essential Accessories And Upgrades
Your belt sander can do more with the right accessories:
- Dust collection adapters: Connect to a shop vacuum for cleaner work.
- Edge guides: Help keep sanding lines straight.
- Belt cleaning sticks: Remove built-up dust and make belts last longer.
- Variable speed control: Lets you adjust for delicate work.
Real-world Example: Refinishing A Door
Let’s say you want to refinish a solid wood door. Here’s how a belt sander helps:
- Remove the door and lay it flat.
- Start with 80-grit belt to strip old finish.
- Progress to 120-grit for smoothing.
- Finish with 180-grit for a silky surface.
- Sand with the grain and keep the sander moving.
- Wipe off dust and check for missed spots.
- Apply new finish.
You can refinish an entire door in less than an hour, compared to several hours by hand.
Practical Tips For Best Results
- Replace belts often. Dull belts slow you down and can burn the wood.
- Use both hands. This gives more control and reduces accidents.
- Change sanding direction slightly between grits. This helps remove scratches from the previous pass.
- Check your progress often. Stop and vacuum dust so you can see the surface.
- Don’t rush. Let the tool and sandpaper do the work.
Environmental And Health Considerations
Belt sanders create lots of fine dust. Some woods (like walnut or mahogany) can cause allergies or skin irritation. Always wear protection and clean up thoroughly. If sanding paint or finishes applied before 1978, be aware of possible lead content—use a HEPA vacuum and take extra precautions.
When Not To Use A Belt Sander
A belt sander is powerful, but it’s not right for every job. Avoid using it for:
- Thin veneers (it can sand right through)
- Delicate inlays or marquetry
- Detailed carvings (use a detail sander or sandpaper instead)
- Tight corners (the belt can’t reach)
Instead, use an orbital sander or hand sanding for these tasks.
Comparison: Belt Sander Vs. Other Sanders
How does a belt sander stack up against other tools? Here’s a quick comparison:
| Tool | Best For | Speed | Finish Quality |
|---|---|---|---|
| Belt Sander | Fast material removal | Very fast | Medium |
| Orbital Sander | Fine finish | Moderate | High |
| Detail Sander | Tight spaces | Slow | High |
| Hand Sanding | Small touch-ups | Slow | Highest |
Professional Finishing: Going Beyond Sanding
After using a belt sander, most professionals follow up with an orbital sander or fine hand sanding. This removes any swirl marks or scratches left by the belt. Vacuum the surface and wipe with a damp cloth before applying any finish or paint.
For the best results, always sand in stages: start with a coarse belt, then medium, then fine. Don’t skip grits, or you may see scratches in the final finish.

Sustainable Use And Disposal
Be mindful of the environment when using a belt sander:
- Choose reusable cloth belts if possible.
- Dispose of used belts and dust safely.
- Recycle sawdust for compost if it’s from untreated wood.
Learning More And Getting Help
Many manufacturers and woodworking forums offer tutorials, videos, and troubleshooting guides. For in-depth safety and technique advice, check resources like Wikipedia.
Frequently Asked Questions
How Do I Change The Sanding Belt On My Belt Sander?
First, unplug the sander. Flip the tension lever to release the old belt. Slide on the new belt, making sure the arrows on the belt match the sander’s direction. Re-engage the tension lever, then adjust the tracking knob so the belt runs straight.
What Grit Sandpaper Should I Use For Rough Wood?
Start with a coarse grit like 60 or 80. For very rough or painted surfaces, you might use 40 grit. After removing the roughness, switch to a finer grit (like 120 or 150) for a smooth finish.
Can I Use A Belt Sander On Metal?
Yes, but use belts made for metal (like zirconia or ceramic). Go slowly to avoid overheating and always wear safety gear. Clean the sander afterward, as metal dust can damage wood projects.
Why Does My Belt Sander Leave Swirl Marks?
Swirl marks happen if you sand across the grain, use a worn belt, or press too hard. Always sand with the grain, keep the sander moving, and use fresh belts.
How Do I Prevent Dust When Using A Belt Sander?
Use the dust bag or connect a vacuum to the dust port. Wear a mask and work in a well-ventilated area. Clean up dust regularly to avoid buildup.
Using a belt sander isn’t hard once you understand the basics. With the right setup, safety habits, and a bit of practice, you’ll get pro-level results on wood, metal, or plastic projects. Start with small jobs, pay attention to detail, and soon you’ll wonder how you ever worked without one.