A claw hammer is one of the most common tools in homes, workshops, and construction sites. Its simple design hides a lot of power and versatility. Many people keep a claw hammer in their toolbox, but not everyone knows how to use it well or safely.
If you’ve ever struggled to pull out a stubborn nail, bent a nail while hammering, or felt unsure about choosing the right hammer, you’re not alone. Learning the correct way to use a claw hammer will make your work easier, faster, and safer.
This guide will show you everything you need to know, from choosing the best hammer for your needs to mastering advanced techniques. Even if you’re a beginner, you’ll soon feel confident using this essential tool.
What Is A Claw Hammer?
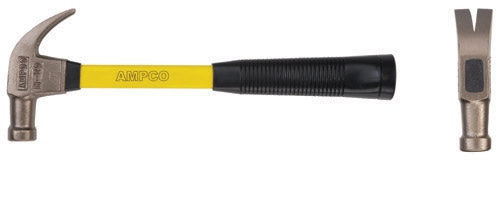
A claw hammer is a hand tool with two main parts: the flat striking face and the curved claw. The face is used for driving nails into wood or other materials. The claw, shaped like a “V,” is used for pulling nails out. Most claw hammers have a wooden, fiberglass, or steel handle that gives leverage and control.
The typical claw hammer weighs between 16 and 20 ounces, but lighter and heavier versions exist. It is most often used in carpentry, home repair, and DIY projects.
Types Of Claw Hammers
Not all claw hammers are the same. Choosing the right type can make a big difference in your work. Here are the most common types:
| Hammer Type | Main Features | Best For |
|---|---|---|
| Curved Claw Hammer | Deep, rounded claw; lighter weight | General woodworking, home repairs |
| Straight Claw (Rip) Hammer | Straight claw; heavier build | Framing, demolition, prying |
| Electrician’s Hammer | Narrow face; insulated handle | Electrical work in tight spaces |
| Finishing Hammer | Lighter weight; smooth face | Trim, delicate tasks |
Curved claw hammers are the most common. The curved claw makes it easier to pull out nails with less damage to wood. Straight claw (rip) hammers are better for prying boards apart and demolition. Electrician’s hammers are designed for electrical work, with a special handle to reduce shock. Finishing hammers are used for small, detailed jobs.
Anatomy Of A Claw Hammer
Understanding the parts of a claw hammer helps you use it more effectively. Here are the main components:
- Handle: Usually made of wood, fiberglass, or steel. The length and material affect control and comfort.
- Head: The heavy, metal top of the hammer. It contains the face and the claw.
- Face: The flat, round striking surface used to hit nails.
- Claw: The curved or straight “V” shaped end, used to pull nails.
- Cheek: The side of the hammer’s head.
- Neck: The part connecting the handle to the head.
Each part is designed for a purpose. For example, a longer handle gives more leverage, while a heavier head provides more force.
Choosing The Right Claw Hammer
Picking the right hammer is important for safety and efficiency. Here’s what to consider:
Weight
- Lightweight hammers (8-12 oz): Good for small nails, delicate work, and less fatigue.
- Standard hammers (16-20 oz): Best for most DIY and carpentry.
- Heavy hammers (22 oz and up): Used for framing, demolition, and tough jobs.
If you’re new to using hammers, start with a 16 oz model. It offers a good balance between power and control.
Handle Material
- Wooden handles absorb shock well but can break.
- Fiberglass handles are strong, light, and resist vibration.
- Steel handles are very durable but may transfer more shock to your hand.
Look for a comfortable grip with a non-slip surface.
Claw Style
Curved claws are best for general use and nail removal. Straight claws work well for prying and demolition.
Face Type
A smooth face is ideal for most jobs, as it won’t leave marks on wood. A milled face (with small grooves) is used for framing to grip large nails.
Balance And Feel
When you pick up a hammer, it should feel balanced. The head should not feel too heavy or too light compared to the handle. Try swinging it gently—if it feels awkward, try another model.
Safety Tips Before You Start
Using a claw hammer can be dangerous if you’re not careful. Follow these safety tips:
- Wear safety glasses to protect your eyes from flying nails or wood chips.
- Check the hammer for cracks, loose heads, or splinters before use.
- Use the right size hammer for the job.
- Make sure the area around you is clear, especially above your head.
- Do not use a hammer with a damaged handle or head.
- Hold the nail with pliers if you are worried about hitting your fingers.
- Keep your hands away from the striking area.
Many injuries happen because people rush or use the wrong tool. Take your time and check your equipment.
How To Grip A Claw Hammer Correctly
A good grip gives you better control and reduces the risk of accidents.
- Hold the handle near the end, not close to the head. This gives you more leverage and power.
- Wrap your fingers around the handle and keep your thumb on the side or top.
- Relax your grip; don’t squeeze too hard. A tight grip can tire your hand and make it harder to aim.
If you need more control for small nails, move your hand slightly closer to the head. For power, use the full length of the handle.
How To Drive A Nail With A Claw Hammer
Driving a nail seems simple, but technique matters. Here’s a step-by-step guide:
- Choose the right nail: Match the nail size to your material and job.
- Position the nail: Hold the nail upright where you want to drive it.
- Start with a tap: Gently tap the nail until it stands on its own. This prevents bending and protects your fingers.
- Grip the hammer properly: Hold near the end of the handle for more power.
- Swing smoothly: Use your wrist and elbow, not just your arm. Aim for the center of the nail head.
- Drive the nail: Use controlled, straight swings. Don’t rush. Let the weight of the hammer do the work.
- Set the nail: For finish work, stop just before the nail is flush. Use a nail set to sink it below the surface.
Tip: If you’re worried about hitting your fingers, use a comb, clothespin, or pliers to hold the nail.
How To Pull Out A Nail With The Claw
Removing nails is a key reason the claw hammer is so useful. Here’s how to do it safely:
- Position the claw: Slide the “V” of the claw under the nail head.
- Leverage the handle: Rock the hammer back, using the head as a pivot. This lifts the nail.
- Protect the surface: Place a thin block of wood under the hammer head to avoid damaging your workpiece.
- Pull slowly: If the nail is stubborn, wiggle the hammer side to side.
- Remove bent nails: For bent nails, use the claw to straighten them a little before pulling.
If the nail is deep or the head is buried, use a small chisel or screwdriver to expose enough of the nail for the claw to grip.
Advanced Nail Removal Techniques
Some nails are hard to remove, especially if they are old, rusty, or sunk deep into the wood. Here are some tips:
- Use leverage: The longer the handle, the more force you can apply. If needed, slip a pipe over the handle to gain extra leverage (only if the hammer is very strong).
- Wiggle, don’t yank: Rocking the hammer gently side to side works better than pulling straight up.
- Double up: For stubborn nails, use a second hammer or pry bar to help lift the nail.
- Protect the surface: Always use a thin piece of wood or a folded cloth under the hammer to prevent dents.
Sometimes, the nail head breaks off or is flush with the surface. In this case, use special nail pullers, pliers, or even drill a small hole next to the nail to ease it out.
Common Mistakes When Using A Claw Hammer
Even experienced users can make mistakes. Here are some to avoid:
- Holding the hammer too close to the head: This reduces leverage and makes driving nails harder.
- Swinging wildly: Fast, uncontrolled swings can miss the nail or damage the wood.
- Using the wrong hammer weight: A hammer that’s too heavy or too light can cause hand fatigue or bent nails.
- Not protecting the surface: Pulling nails without a block under the hammer can leave ugly marks.
- Ignoring safety gear: Not wearing eye protection is risky.
- Trying to drive a bent or damaged nail: This usually ends with a bent nail or damaged wood.
- Using a damaged hammer: Cracked handles or loose heads can cause accidents.
Caring For Your Claw Hammer
A well-maintained hammer lasts longer and works better. Here’s how to care for yours:
- Clean after use: Wipe the hammer with a dry cloth to remove dirt and moisture.
- Check for damage: Look for cracks in the handle or chips in the head.
- Store properly: Keep the hammer in a dry place to avoid rust.
- Tighten loose heads: If the head becomes loose, fix it right away. For wooden handles, soak the head in linseed oil or drive in a wedge.
- Sharpen the claw: If the claw gets dull, use a file to restore its edge.
- Oil metal parts: A thin coat of oil prevents rust.
With care, a good hammer can last a lifetime.
Using A Claw Hammer For More Than Nails
While the main job is driving and pulling nails, a claw hammer has many other uses:
- Prying apart boards: The claw can be used to separate boards or remove molding.
- Demolition: Use the hammer’s weight to break drywall, plaster, or small pieces of wood.
- Tapping parts into place: The flat face can gently tap pieces into alignment.
- Straightening metal: Use the hammer to bend or straighten small metal parts.
- Breaking up objects: The hammer can break tiles, bricks, or other materials during renovation.
Always use the tool for its intended purpose to avoid injury or damage.
Claw Hammer Vs. Other Hammers
Not all hammers are created equal. Here’s how a claw hammer compares with some other types:
| Hammer Type | Main Use | Claw Feature? |
|---|---|---|
| Claw Hammer | Driving & pulling nails | Yes |
| Ball Peen Hammer | Metalworking, shaping metal | No |
| Sledgehammer | Heavy demolition | No |
| Rubber Mallet | Gentle tapping, assembly | No |
| Tack Hammer | Upholstery, small tacks | Yes, but very small |
The claw hammer is the best all-around tool for general carpentry and home repair. Other hammers are designed for specialized tasks.
Practical Tips For Better Results
You can get much better results with a few simple tips:
- Start nails at an angle: For stronger joints, start nails at a slight angle rather than straight up and down.
- Use two nails for joints: To join boards, drive two nails side by side at opposing angles (called “toe-nailing”) for a stronger hold.
- Pre-drill holes: For hardwoods or large nails, drill a small pilot hole to reduce splitting.
- Blunt the tip: Blunt the nail tip with the hammer before driving; it helps prevent wood from splitting.
- Check your aim: Focus on the nail head, not the hammer, to improve accuracy.
- Use a magnetic nail holder: Some hammers have a magnet on the head to hold nails for one-handed starting.
Non-obvious Insights For Beginners
Many beginners miss these key points:
- Let the hammer’s weight do the work: Don’t use muscle alone. A smooth, controlled swing with proper grip is more effective.
- Handle length matters: Longer handles give more leverage but may reduce accuracy for beginners. Find the right balance for your comfort.
- Sound as a guide: Listen to the sound when striking. A solid “thunk” means good contact, while a “ping” often means a glancing blow.
- Surface protection: Even pros forget to use a wood block to protect delicate surfaces when pulling nails. This small step prevents costly repairs.
When To Replace Your Claw Hammer
A hammer doesn’t last forever. Watch for these signs:
- Loose or wobbly head: This is dangerous and hard to fix on some hammers.
- Cracked handle: Especially in wooden models, cracks weaken the hammer.
- Severe rust or pitting: Rust can make the hammer unsafe to use.
- Bent or broken claw: The claw must be sharp and straight for nail removal.
If your hammer shows any of these problems, it’s time for a new one.

Claw Hammer Safety For Kids And Beginners
If you’re teaching children or new users:
- Use a lighter hammer: 8 to 12 ounces is best for small hands.
- Supervise closely: Never leave kids alone with tools.
- Teach slow, controlled swings: Accuracy is more important than power.
- Show how to protect fingers: Use pliers or a comb to hold nails.
- Explain safety gear: Make wearing safety glasses a habit from the start.
Building good habits early helps prevent injuries later.
Environmental And Material Considerations
Not all handles are equal in environmental impact:
- Wooden handles are renewable and biodegradable, but check for sustainable sourcing.
- Fiberglass and steel are more durable but harder to recycle.
Some hammers use recycled materials for handles. If eco-friendliness matters, check product details before you buy.
Most Common Claw Hammer Brands And What Sets Them Apart
A few brands stand out for quality and durability:
- Estwing: Known for solid steel hammers with a single-piece design. Highly durable and made in the USA.
- Stanley: Offers a wide range for professionals and DIYers. Reliable and often features ergonomic grips.
- Vaughan: Famous for traditional wooden handles and craftsmanship.
- DeWalt: Popular among tradespeople. Many models feature anti-vibration technology.
- Craftsman: Good for beginners, with a balance of price and quality.
Choose a brand with a reputation for safety and performance. Read reviews and, if possible, test the hammer in your hand before buying.
How To Store And Transport A Claw Hammer
Proper storage keeps your hammer safe and extends its life:
- Hang on a pegboard: Keeps it off the ground and easy to find.
- Toolbox storage: Place it in a slot or pouch to prevent damage to other tools.
- Sheath or cover: Use a hammer sheath to protect the face and claw during transport.
- Keep dry: Moisture can cause rust or handle rot. Store in a dry place.
When traveling, secure the hammer so it can’t roll or shift, especially in a vehicle.
Claw Hammer Maintenance Checklist
Keeping your hammer in top shape is simple. Follow this routine:
- Wipe clean after each use
- Check for cracks or chips monthly
- Oil metal parts every 2-3 months
- Tighten or repair loose heads immediately
- Store in a dry, safe place
A maintained hammer is a safe hammer.
Innovative Features In Modern Claw Hammers
Today’s claw hammers include features that improve performance and safety:
- Anti-vibration handles: Reduce hand fatigue during long use.
- Magnetic nail starter: Holds nails for one-handed starting.
- Ergonomic grips: Improve comfort and reduce slipping.
- Shock-absorbing materials: Fiberglass and special rubber handles absorb shock better than wood.
Some brands even use advanced alloys for lighter, stronger heads. These features cost more but can be worth it for frequent users.
How Claw Hammers Are Tested For Quality
Manufacturers use strict tests to ensure safety and performance:
- Impact tests: Check if the head can withstand repeated blows.
- Handle strength: Test for bending, cracking, and breakage.
- Claw hardness: Make sure the claw can pull nails without bending.
- Grip testing: Ensure the handle is comfortable and non-slip.
Many reputable brands display test results or certifications. Look for these when choosing a hammer.
Environmental Impact Of Claw Hammer Production
Claw hammers are made from steel, wood, fiberglass, and rubber. Steel production uses a lot of energy and water, but some companies use recycled steel. Wood handles come from trees, so sustainable sourcing matters. Fiberglass and plastics are made from oil but last a long time.
If you’re concerned about the environment, choose a hammer from a company that uses sustainable materials or recycled components. Some brands highlight their eco-friendly practices on their websites or packaging.
Data On Hammer Injuries And Prevention
According to the U.S. Consumer Product Safety Commission, over 30,000 hammer-related injuries are reported each year. Most injuries are to the hands, fingers, and eyes. Using proper technique and safety gear can prevent most of these accidents.
Common causes of injury include:
- Missing the nail and hitting a finger
- Flying debris from struck surfaces
- Splintered handles
- Broken or loose heads
Always check your hammer before use and wear safety glasses to prevent eye injuries.

Frequently Asked Questions
What Is The Difference Between A Claw Hammer And A Framing Hammer?
A claw hammer has a curved claw for pulling nails and is used for general carpentry. A framing hammer is heavier, often with a straight claw and a milled face. Framing hammers are designed for building structures and heavy-duty work.
Can I Use A Claw Hammer For Metalworking?
No, a claw hammer is not designed for metalworking. Use a ball peen hammer for shaping or striking metal. The claw hammer’s face and claw can chip or break if used on hard metal.
How Do I Fix A Loose Hammer Head?
If the handle is wooden, soak the head in linseed oil or drive a wooden wedge into the top of the handle. For fiberglass or steel handles, replacement may be necessary. Never use a hammer with a loose head—it’s unsafe.
What Should I Do If The Claw Hammer Handle Cracks?
Stop using the hammer immediately. Replace the handle or buy a new hammer. A cracked handle can break during use and cause injury.
Where Can I Learn More About Hammer Safety And Use?
For more detailed information, visit the Wikipedia page on hammers. It provides history, types, and safety tips for all hammer types.
A claw hammer is a simple tool, but using it correctly takes skill and knowledge. With practice and the right habits, you’ll find that many home and workshop tasks become easier, safer, and more enjoyable. Whether you are hanging a picture, building furniture, or fixing your deck, the claw hammer will always be one of your most valuable tools.