Using a hammer may seem simple at first glance. You hold it, swing it, and drive a nail. But there’s much more to it than just pounding metal. Many people, including experienced DIYers, make mistakes that lead to bent nails, damaged materials, or even injuries.
Knowing how to use a hammer the right way makes your work faster, safer, and produces better results. Whether you are hanging a picture, building a bookshelf, or repairing furniture, mastering the hammer is a basic skill every adult should have.
In this guide, you’ll learn everything you need to know about using a hammer properly. We’ll cover the different types of hammers, how to choose the right one, the safest grip and swing techniques, and even advanced tips for precision and comfort.
You’ll also find out about common mistakes, how to avoid injuries, and how to take care of your tool. If you’re ready to improve your confidence with this classic hand tool, read on.
Understanding The Hammer: Basic Types And Their Uses
Not all hammers are the same. Knowing the differences helps you pick the right one for your task and prevents damage or injury.
Claw Hammer
The claw hammer is the most common type. One side of the head is flat for driving nails. The other has a curved “claw” for pulling nails out. This hammer is used in woodworking, framing, and most home projects.
Ball Peen Hammer
The ball peen hammer has a rounded end instead of a claw. It’s common in metalworking and shaping metal. Mechanics use it to set rivets or bend and shape metal pieces.
Sledgehammer
A sledgehammer has a heavy, double-sided head. You need both hands to swing it. It’s used for demolition, breaking concrete, or driving stakes into the ground.
Tack Hammer
A tack hammer (or upholstery hammer) is light and has a small head. It’s for delicate jobs like attaching upholstery or small nails.
Rubber Mallet
A rubber mallet has a soft, rubber head. It’s used where you need to avoid damaging surfaces, such as woodworking, paver installation, or assembling furniture.
Specialty Hammers
There are also hammers for drywall, bricklaying, roofing, and more. Always match the hammer to the job to work efficiently and safely.
Key Parts Of A Hammer
Understanding the parts of a hammer helps you use and maintain it better.
- Handle: The long part you hold. Made of wood, fiberglass, or steel.
- Head: The heavy part at the end. Does the actual striking.
- Face: The flat part that hits the nail or object.
- Claw/Peen: The opposite side of the face. Used for pulling nails or shaping metal.
- Neck: Connects the head to the handle.
A hammer with a loose head or cracked handle is unsafe. Always check your tool before use.
How To Choose The Right Hammer
Choosing the right hammer is more than just grabbing the first one you see. The wrong tool can make your work harder and less safe.
Consider The Task
For most home projects, a 16-ounce claw hammer is ideal. For demolition, choose a sledgehammer. For metalwork, use a ball peen hammer. Light tasks may need a tack hammer.
Handle Material Comparison
Here’s a quick look at handle materials and their benefits:
| Handle Material | Pros | Cons |
|---|---|---|
| Wood | Absorbs shock, comfortable grip | Can break, needs care |
| Fiberglass | Good shock absorption, durable | May loosen over time |
| Steel | Very strong, long-lasting | Transfers more shock to hand |
Weight Matters
A heavier hammer drives nails faster but requires more strength and control. Lighter hammers are better for delicate work or for people with less hand strength.
Grip And Balance
Hold the hammer in the store before buying. It should feel comfortable and balanced. A poor grip or awkward balance leads to fatigue and mistakes.
Safe Hammer Use: Essential Steps
Using a hammer safely is critical. Injuries are common when people ignore the basics.
- Check the hammer. Make sure the head is secure and the handle is not cracked.
- Wear safety glasses. Nails can fly or chips can break off.
- Hold the hammer correctly. Grip it near the end of the handle for power.
- Use your wrist and elbow. Keep your wrist straight and swing with your elbow and shoulder, not just your arm.
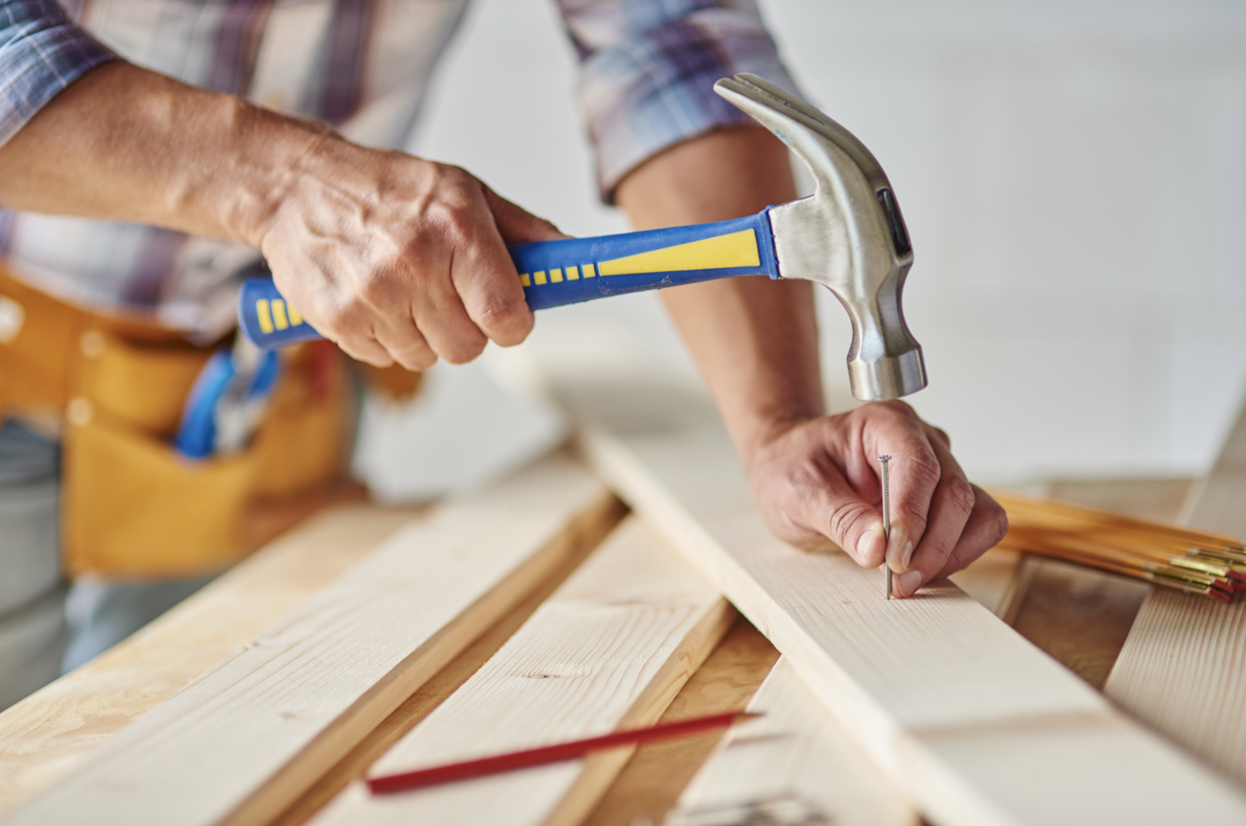
- Start with light taps. Position the nail and tap it in gently before swinging harder.
- Watch your fingers. Hold the nail at the top and move your fingers away as soon as it’s steady.
- Drive the nail straight. Aim for the center and keep the hammer face flat.
Never use a damaged hammer or try to hit very hard objects with a light hammer.
Step-by-step: How To Hammer A Nail
Let’s break down the process for best results.
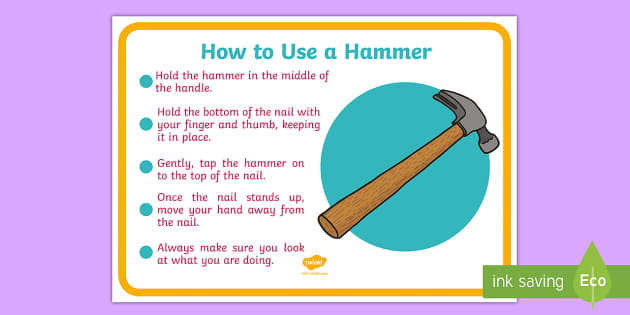
- Mark the spot. Use a pencil or marker where you want the nail.
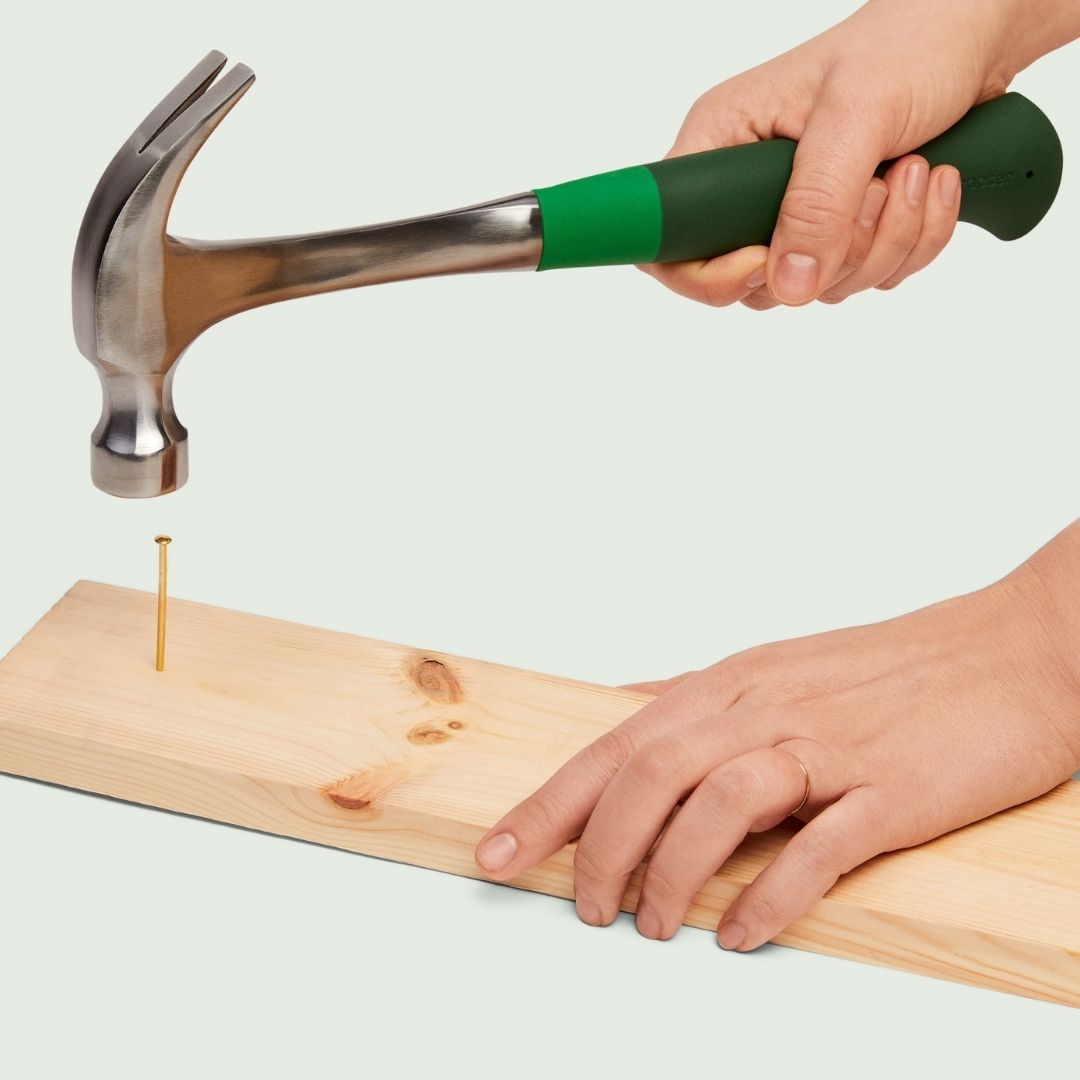
- Hold the nail. Pinch it near the top, not at the base.
- Position the hammer. The face should be flat against the nail head.
- Tap lightly. Start the nail with a few gentle taps.
- Move your fingers away. Once the nail stands by itself, hold the hammer with a stronger grip.
- Swing steadily. Use smooth, controlled swings, letting the weight of the hammer do the work.
- Drive the nail flush. Stop when the nail head is just level with the surface. Do not sink it too deep unless required.
- Pull out bent nails. Use the claw if the nail bends or goes off course.
Extra Tip
If you’re worried about hitting your fingers, use a comb or clothespin to hold the nail steady during the first few taps.
Hammering Techniques For Different Materials
How you hammer depends on what you’re working with.
Wood
Wood is forgiving, but softwood can split. Choose the right size nail and hammer. Tap gently to start, then use stronger swings.
Concrete Or Masonry
Use a masonry nail and a heavier hammer. Wear eye protection, as chips can fly. Concrete is much harder, so patience is key.
Metal
Use a ball peen hammer and proper nails or fasteners. Do not use a claw hammer on metal, as the face can chip.
Drywall
A lightweight hammer and special drywall nails are best. Be gentle to avoid cracking the wall.
Common Hammering Mistakes And How To Avoid Them
Many beginners make the same errors, leading to frustration or accidents.
- Gripping too close to the head: Reduces power and control. Hold near the end for better leverage.
- Swinging too hard: Causes bent nails or damage. Let the hammer’s weight do the work.
- Not aligning the face: Hitting with the edge of the face bends nails or damages surfaces.
- Not supporting material: Always hold or clamp your work piece.
- Using the wrong hammer: Using a claw hammer for metal, or a sledgehammer for small nails, leads to poor results or injury.
- Ignoring safety gear: Eye injuries are common from flying debris.
Advanced Hammering Tips For Better Results
Even experienced users can benefit from a few pro tricks.
Use The Right Swing
Your swing should be smooth and controlled. Don’t “snap” your wrist or swing wildly. Practice makes perfect.
Nail Pilot Holes
For hardwood or near edges, drill a small pilot hole before hammering the nail. This prevents splitting.
Set The Nail
For a clean finish, use a nail set to drive the nail head slightly below the surface, then fill the hole with wood filler.
Avoid Bouncing
If the hammer bounces off the nail, you may be hitting too hard or at the wrong angle. Adjust your force and aim.
Removing Stuck Nails
Wiggle the hammer’s claw side to side instead of pulling straight. This reduces damage to the material.
Using Both Hands
For large hammers or awkward spots, use two hands for extra control and safety.
Caring For Your Hammer
A well-kept hammer lasts for decades and works better.
- Clean after use. Wipe off dirt, resin, or rust.
- Check for damage. Tighten loose heads and replace cracked handles.
- Store properly. Keep in a dry place to prevent rust or wood swelling.
- Sharpen the face. If the face gets smooth or rounded, use a file to restore grip.
- Oil metal parts. A little oil stops rust.
Never use a damaged or rusty hammer—it’s unsafe and less effective.
When To Replace Your Hammer
Even the best tools wear out. Replace your hammer if:
- The head is loose and cannot be tightened
- The handle is cracked, split, or bent
- The face is chipped or deeply pitted
- The claw is broken or bent out of shape
A new hammer is a small investment for safety and quality work.
Comparing Hammers For Common Jobs
Let’s compare which hammer fits different tasks best:
| Task | Best Hammer | Why |
|---|---|---|
| Hanging pictures | Claw hammer | Easy to drive and remove small nails |
| Demolition | Sledgehammer | Heavy weight, breaks material easily |
| Metalwork | Ball peen hammer | Rounded end for shaping metal |
| Upholstery | Tack hammer | Small head, gentle on fabric and tacks |
| Furniture assembly | Rubber mallet | Won’t damage wood or finish |
Safety Gear To Use With A Hammer
Hammering can be dangerous if you don’t protect yourself.
- Safety glasses: Protect your eyes from flying nails or debris.
- Work gloves: Guard against blisters and splinters.
- Ear protection: For heavy or long-term hammering.
- Dust mask: For demolition or working with old materials.
Never skip safety gear, even for “quick” jobs.
Hammering In Tight Or Awkward Spaces
Sometimes there isn’t room for a full swing. Try these tips:
- Use a shorter hammer or tack hammer.
- Start the nail with pliers or a nail holder.
- Tap gently and work slowly.
- For very tight spots, use a right-angle hammer or a hammer with a flexible handle.
The Science: Why Hammer Face And Nail Head Matter
A good hammer has a slightly textured face. This stops the hammer from slipping off the nail and reduces missed strikes. Cheap hammers often have smooth faces, which are more likely to glance off and cause injury.
Nail heads also matter. Large, flat heads are easier to hit and better for beginners. Small heads are for finish work but need more accuracy.
Hammer Maintenance: What Most People Forget
Many people never clean or check their hammers. This is a mistake.
- Dirt and rust build up on the face, making it slippery.
- Resin from wood can gum up the handle or head.
- Loose heads get worse with time and can fly off.
- Small chips in the face can grow, making the hammer unsafe.
Set a reminder to check your hammer every few months.
Hammering For Left-handed People
Most hammers are made for both hands, but some have grips shaped for right-handed users. If you are left-handed, make sure the grip is comfortable and doesn’t twist in your hand. Practice your swing to find what feels best.
Teaching Kids Or Beginners To Use A Hammer
Start with a lightweight hammer and large nails. Use soft wood (like pine) so nails go in easily. Show how to hold the nail safely and always supervise young users. Make it a fun and patient learning experience.
Hammering In Cold Or Wet Conditions
Cold weather makes metal brittle and wood harder to drive nails into. Wear gloves and take extra care. Wet wood is more likely to split, so use smaller nails and lighter taps.
When Not To Use A Hammer
Don’t use a hammer for:
- Screws (use a screwdriver or drill)
- Breaking glass or delicate materials
- Striking hardened steel (use the correct tool)
- Electrical work (metal hammers conduct electricity)
Misusing a hammer leads to accidents and damage.
Comparing Hammer Brands And Quality
Not all hammers are equal. Some brands are trusted for quality and safety.
| Brand | Average Price (USD) | Known For |
|---|---|---|
| Estwing | $25-$40 | Durability, steel construction |
| Stanley | $15-$30 | Value, wide range |
| Vaughan | $20-$35 | Comfort, wood handles |
| DeWalt | $20-$35 | Professional use, balance |
A high-quality hammer can last a lifetime with proper care.
Non-obvious Insights Most Beginners Miss
- Hammer faces wear out. Over time, the striking surface gets smooth or uneven. This increases the risk of slipping. Filing or replacing the hammer keeps your work safer.
- Not all nails fit all hammers. Large hammers can easily miss small nails, and small hammers can’t drive big nails well. Matching nail and hammer size improves accuracy and power.
- Material matters. Some surfaces (like old, dry hardwood) need pilot holes, while new softwood may not. Ignoring this can lead to wasted materials and frustration.
- Swing speed is less important than control. Many try to hammer fast, but steady, accurate swings are better for both safety and results.
Frequently Asked Questions
How Can I Avoid Bending Nails While Hammering?
To avoid bending nails, hold the hammer near the end of the handle for more control. Start with gentle taps to set the nail, then use smooth, controlled swings. Use the right size nail for your material and consider making a pilot hole in hard wood.
What Should I Do If A Nail Gets Stuck Or Bends?
If a nail bends, stop hammering. Use the claw of the hammer to pull it out by rocking side to side. For stuck nails, slide the claw under the head and lever gently. If the nail breaks, use pliers to remove the rest.
Is It Safe To Use A Rusty Or Old Hammer?
No. Rusty or old hammers can have weak spots or loose heads, which can break and cause injury. Check your hammer for damage and replace it if you see cracks, rust, or a loose head. Clean and oil your hammer regularly.
Can I Use Any Hammer For All Jobs?
No. Each hammer type is made for specific tasks. Using the wrong hammer can damage your project or cause injury. For example, use a claw hammer for woodwork and a ball peen hammer for metal. For more, see Wikipedia’s guide on hammers.
What’s The Best Way To Store A Hammer?
Keep your hammer in a dry place, preferably hanging on a tool rack or inside a toolbox. Make sure the area is not damp to avoid rust. Wipe the hammer clean after use and check for damage before storing.
Mastering the hammer is not just about swinging hard. It’s about choosing the right tool, using proper technique, and caring for your equipment. With the right knowledge and attention to detail, you’ll get better results and work more safely. Whether you’re a beginner or want to brush up your skills, a little practice and patience go a long way with this classic tool.