Using a miter saw can change how you work with wood. If you want to build picture frames, cut flooring, or make your own furniture, this tool is a must-have. But a miter saw is not just about quick, straight cuts—knowing how to use it safely and accurately will save you time, money, and frustration.
Many beginners make mistakes that ruin their wood or even put their safety at risk. This guide is here to help you avoid those problems.
You might have seen videos online or read short guides, but many leave out important steps, practical tips, and clear safety advice. Here, you’ll find everything you need: what a miter saw does, how to set it up, step-by-step instructions for every cut, and even how to fix common errors. Whether you’re new to DIY or have some experience but want better results, you’ll discover useful details that most guides miss. Let’s get started and make sure your next project is a success.
What Is A Miter Saw?
A miter saw is a power tool used to make precise crosscuts and angle cuts in wood, plastic, and some metals. The saw has a circular blade mounted on a swing arm that can pivot left or right to create angled cuts. This tool is popular among woodworkers, carpenters, flooring installers, and anyone who builds with wood.
There are three main types of miter saws:
| Type | Main Feature | Best For |
|---|---|---|
| Standard Miter Saw | Simple angled cuts | Picture frames, trim, molding |
| Compound Miter Saw | Angled + bevel cuts | Complex molding, crown, furniture |
| Sliding Compound Miter Saw | Moves forward and backward | Wide boards, flooring, shelving |
Standard miter saws cut at angles but not bevels. Compound miter saws tilt for angled and bevel cuts—great for crown molding. Sliding compound miter saws can cut wider boards because the blade moves forward and backward.
Why Use A Miter Saw?
A miter saw offers several advantages over other saws:
- Accuracy: The tool’s fence and guides help you make straight, repeatable cuts.
- Speed: You can cut many pieces quickly, which saves time on large projects.
- Versatility: It makes crosscuts, miter cuts (angled), bevel cuts (slanted), and even compound cuts (angled and slanted at once).
- Clean Results: The spinning blade usually leaves a smooth edge, reducing the need for sanding.
For example, if you’re installing baseboards, a miter saw lets you cut perfect 45-degree angles for corners. If you’re building a deck, you can make fast, accurate cuts for every board.
Key Parts Of A Miter Saw
Understanding the main parts will help you use the saw better:
- Blade: The spinning disc that cuts the material.
- Blade Guard: Protects your hands from the blade.
- Fence: A straight edge to keep your workpiece steady.
- Table: The flat surface where you place your material.
- Miter Scale: Shows the angle for miter cuts.
- Bevel Scale: Lets you tilt the blade for bevel or compound cuts.
- Handle/Trigger: Used to start and control the saw.
- Clamps: Hold your workpiece in place.
- Dust Bag/Port: Collects sawdust during cutting.
Knowing these parts makes the setup and operation easier and safer.
Safety First: Essential Miter Saw Safety Tips
A miter saw is powerful and dangerous if not used with care. Here are critical safety steps:
- Wear Safety Gear: Always wear safety glasses, hearing protection, and avoid loose clothing.
- Check the Blade: Make sure the blade is sharp, clean, and correctly attached.
- Clear the Area: Remove all scrap wood, tools, and clutter from the saw table and floor.
- Secure Your Workpiece: Use clamps or your hand (well away from the blade) to hold the wood steady.
- Keep Hands Away: Never place your hands closer than 6 inches (15 cm) from the blade.
- Wait for Blade to Stop: After a cut, wait until the blade stops spinning before lifting it.
- Stand to One Side: Stand slightly to the side—not directly in line with the blade’s path.
- Check the Saw: Inspect for any loose parts before starting.
- Don’t Force the Saw: Let the blade do the cutting; don’t push too hard.
One insight many miss: dust from cutting can irritate lungs and eyes. Use a dust mask and connect a vacuum to the dust port if possible.
Setting Up Your Miter Saw
Setting up your miter saw the right way makes every cut safer and more accurate.
Choose A Good Location
Pick a flat, stable surface with enough room for long boards. Many people use a miter saw stand with adjustable arms for support. Avoid placing the saw on uneven floors or tables.
Level The Saw
Check that the saw sits flat. If the table or floor is uneven, your cuts can be crooked. Use a carpenter’s level if needed.
Connect Power Safely
Plug the saw into a grounded outlet. Don’t use damaged cords. If you work outside, use an extension cord rated for power tools.
Install The Blade
If your saw doesn’t have a blade attached, follow these steps:
- Unplug the saw.
- Lift the blade guard.
- Use the included wrench to loosen the bolt.
- Insert the blade (teeth facing forward).
- Tighten the bolt and lower the blade guard.
Double-check the manual for your saw model—some have special steps.
Adjust The Fence
Make sure the fence is straight and locked in position. A crooked fence will ruin your cuts.
Set Up Dust Collection
Attach the dust bag or connect a shop vacuum to the dust port. This keeps your workspace cleaner and safer.
Choosing The Right Blade
The blade is the heart of the miter saw. The right blade gives you clean, accurate cuts.
Blade Sizes
Most miter saws use 10-inch or 12-inch blades. A larger blade cuts thicker and wider boards, but a 10-inch saw is lighter and cheaper.
Tooth Count
More teeth mean a smoother cut. Fewer teeth cut faster but leave rough edges.
- 24-40 teeth: Good for rough cuts, framing, construction lumber.
- 60-80 teeth: Best for fine woodworking, trim, and molding.
Blade Types
Use a carbide-tipped blade for most wood. For plastic or non-ferrous metals, look for blades marked for those materials.
Here’s a quick comparison of common miter saw blades:
| Blade Type | Best For | Typical Tooth Count |
|---|---|---|
| General Purpose | Construction, 2x4s | 24–40 |
| Finishing | Trim, molding | 60–80 |
| Laminate/Plastic | Laminates, plastics | 80–100 |
Pro Tip: Don’t use a dull blade. It’s not just slower—it can burn your wood and is more likely to bind or kick back.

How To Use A Miter Saw: Step-by-step
Let’s walk through the full process for making safe, accurate cuts.
1. Mark Your Cut
Measure your workpiece carefully. Use a sharp pencil or fine marker to draw a clear line where you want to cut. For best accuracy, use a speed square or combination square.
Pro Tip: Mark which side is “waste”—the part you don’t need. Always cut with the blade just touching the waste side of your line.
2. Set The Angle
- For straight cuts: Set the miter angle at 0°.
- For angled cuts: Rotate the saw table to the desired angle (e.g., 45° for corners).
- For bevel or compound cuts: Tilt the blade to the right or left (check your saw’s manual for maximum angle).
Lock the angle lever so the saw can’t move during the cut.
3. Position The Workpiece
Place your board flat against the fence and table. The mark should be lined up under the blade. Make sure the board is fully supported—if it hangs off the table, use extra supports.
4. Secure The Workpiece
If possible, use the saw’s built-in clamp to hold the wood. If not, keep one hand on the piece, but make sure your fingers stay well away from the blade path.
5. Start The Saw Safely
Before starting, check that the blade is clear of the wood. Pull the saw handle down slightly to “hover” the blade just above the mark.
Squeeze the trigger and let the blade reach full speed before you start cutting.
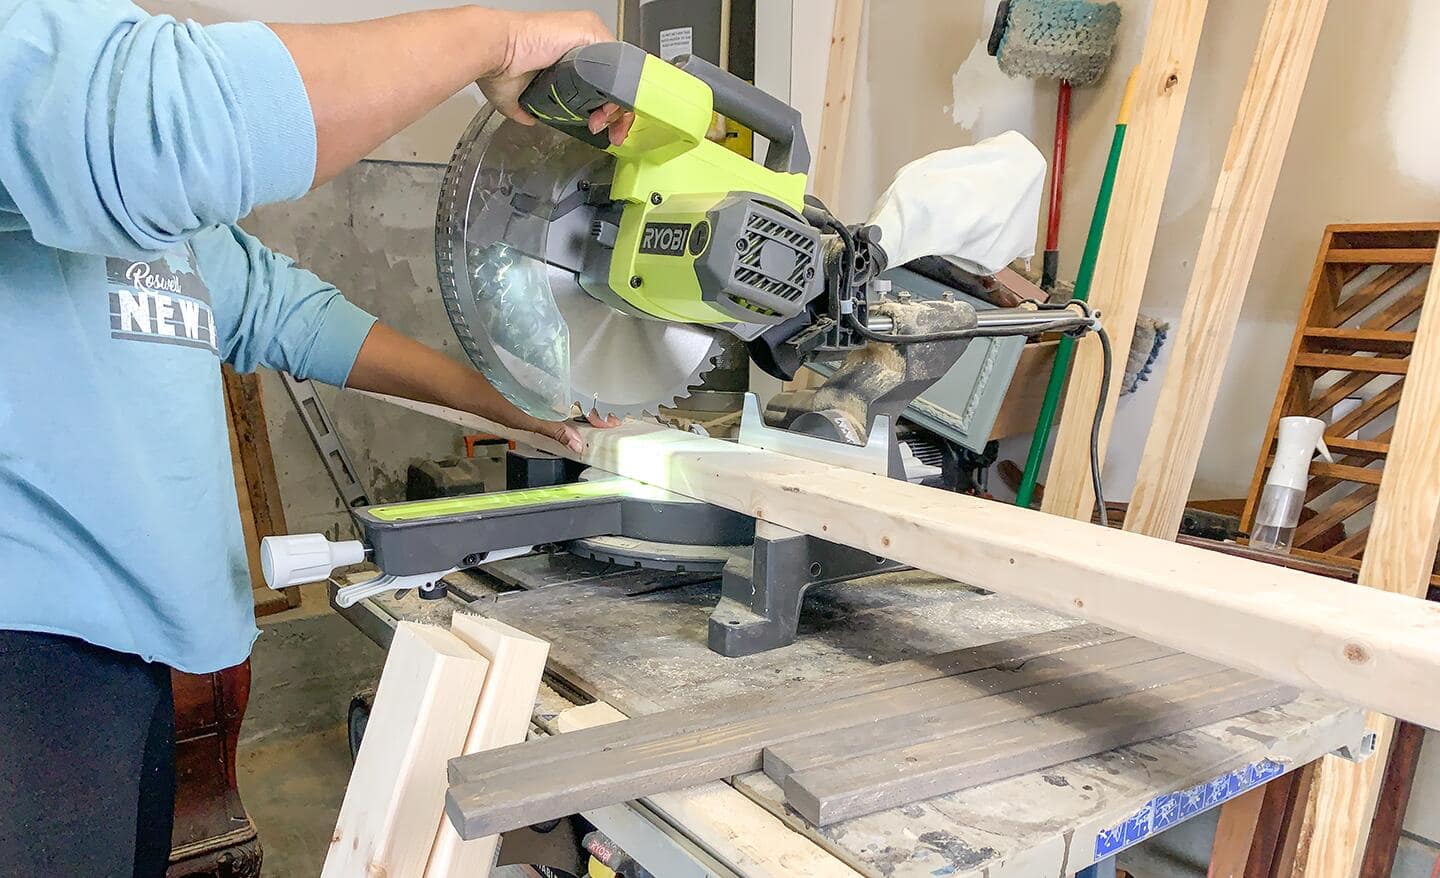
6. Make The Cut
Slowly lower the blade through the wood. Don’t rush—let the blade cut at its own pace. Once the cut is finished, keep the saw down until the blade stops spinning.
Lift the blade and remove your piece.
7. Check Your Cut
Compare your piece to your measurement or use a square to check for accuracy. If the cut is off, check your saw’s settings before the next cut.
Types Of Cuts You Can Make
A miter saw does more than just straight cuts. Here are the main types:
Crosscuts
A crosscut is a straight cut across the width of a board. This is the most basic cut and is used for trimming boards to length.
Miter Cuts
A miter cut is an angled cut across the width of the board. These are used for corners, like picture frames or window trim.
Bevel Cuts
A bevel cut is made by tilting the blade, so the cut is slanted through the thickness of the board—useful for crown molding and joining boards at angles.
Compound Cuts
A compound cut combines a miter and a bevel—angled across both the width and thickness. This is needed for complex trim work.
Repetitive Cuts
If you need to cut many pieces the same length, use a stop block. Clamp a piece of scrap wood to the fence at the right spot. Slide each workpiece against it before cutting for perfect matching lengths.
Common Mistakes And How To Avoid Them
Even experienced users make errors. Here’s how to avoid the most common ones:
1. Cutting On The Wrong Side Of The Line
Always cut with the blade just touching the waste side, not through your measured piece. This keeps your final piece the right size.
2. Not Supporting Long Boards
If your wood hangs off the table, the saw can bind or the wood may drop suddenly. Use roller stands or a miter saw stand with supports.
3. Rushing The Cut
Letting the blade spin up to full speed and lowering it slowly gives you a cleaner, safer cut. Rushing can cause rough edges or kickback.
4. Not Checking Angles
Double-check your angle settings before each cut, especially if you’re switching between miter and bevel cuts.
5. Using A Dull Or Wrong Blade
A dull blade burns wood and can cause the saw to stall. Use the right blade for your material and replace it when it’s worn.
6. Forgetting Safety Steps
Many accidents happen when people skip basic safety steps—like not wearing eye protection or not waiting for the blade to stop. Don’t get comfortable; always follow safety rules.
Real-world Example: Building A Simple Picture Frame
Let’s say you want to make a basic picture frame.
- Measure your photo size.
- Cut four pieces of trim, each with 45° mitered ends (so the corners fit together).
- Use a stop block for matching sides.
- Dry-fit the pieces before gluing.
- Check each corner for a tight fit.
- Sand lightly if needed.
You’ll notice that if your angles are off by even a small amount, the frame won’t fit right. This is why careful setup and cutting matter.
Maintenance And Care For Your Miter Saw
Taking care of your miter saw means it will last longer and stay accurate.
Blade Cleaning And Replacement
Pitch and resin build up on the blade, making cuts rough. Clean with a blade cleaner or soapy water. Replace the blade when it’s dull.
Lubricate Moving Parts
Use a light machine oil to keep the pivot points and slides moving smoothly. Don’t over-oil; too much attracts dust.
Check Calibration
Over time, the angles can drift. Check the miter and bevel scales with a square. Adjust as needed—most saws have adjustment screws.
Dust Management
Empty the dust bag regularly. Clogged dust ports can affect the saw’s movement and create a mess.
Store Properly
Keep the saw covered and in a dry place. Humidity can rust the blade and metal parts.
Advanced Tips For Perfect Results
Even beginners can get professional results with a few expert techniques.
Use Test Cuts
Before cutting your real workpiece, make a test cut on scrap wood. This helps you check the angle, length, and cut quality.
Adjust For Kerf
The kerf is the width of the cut made by the blade. It’s usually about 1/8 inch (3 mm). Always measure and mark for the kerf so your finished piece isn’t too short.
Clamp For Bevel Cuts
When making bevel or compound cuts, the blade can push the wood sideways. Always use a clamp to keep the piece from moving.
Check For Square
After several cuts, use a square to check that the saw is still cutting true 90° angles. If not, recalibrate.
Label Your Pieces
If you’re cutting many parts, label each piece as you cut. This avoids confusion and helps with assembly.
Common Accessories To Improve Your Miter Saw Experience
You can upgrade your miter saw setup with useful accessories:
- Laser Guides: Show exactly where the blade will cut.
- Extension Arms: Support long boards for better accuracy.
- Stop Blocks: Help with repetitive cuts.
- Specialty Clamps: Hold odd-shaped workpieces.
- Zero-Clearance Inserts: Reduce tear-out for cleaner cuts.
Many users overlook the value of a good stand or support system. Wobbly boards lead to mistakes, so invest in supports.
Troubleshooting: Solving Common Miter Saw Problems
Here’s how to fix the most frequent issues:
Saw Won’t Start
- Check the power cord and outlet.
- Make sure the safety switch is off.
- Inspect the fuse or circuit breaker.
Cut Isn’t Straight
- Check that the fence and table are square.
- Make sure the blade isn’t warped or loose.
Blade Binds Or Burns Wood
- Use a sharp blade with the right tooth count.
- Don’t force the cut—let the blade do the work.
- Check for resin build-up on the blade.
Rough Or Splintered Edges
- Use a fine-tooth blade.
- Cut slowly, especially on the finished side.
- Place painter’s tape over the cut line for splinter-prone materials.

When To Use A Miter Saw Vs. Other Saws
A miter saw is great for crosscuts, angles, and trim work. But it’s not for every job.
| Saw Type | Best For | Limitations |
|---|---|---|
| Miter Saw | Crosscuts, angles, trim | Can’t rip long boards |
| Table Saw | Ripping, long straight cuts | Less portable, not for angles |
| Circular Saw | General cutting, portability | Less precise, harder to repeat |
So, if you need to cut a 2×4 to length or make perfect corners, use a miter saw. For cutting plywood sheets, a table saw or circular saw is better.
Practical Examples: Miter Saw In Everyday Projects
- Baseboard Installation: Cut accurate inside and outside corners.
- Deck Building: Trim all joists and boards to the same length.
- Crown Molding: Make compound cuts for perfect ceiling joints.
- DIY Furniture: Build benches, shelves, or tables with perfect angles.
One insight: For flooring, use a sliding miter saw to cut wide planks. Standard saws may not reach across wider boards.
Where To Learn More
If you want to see miter saws in action or get more advanced, check out resources like the official Wikipedia page on miter saws. Watching video demonstrations can also help you understand tricky steps.
Frequently Asked Questions
How Do I Know Which Miter Saw Is Right For Me?
For small projects, a standard or compound miter saw works well. For cutting wide boards or frequent use, a sliding compound miter saw is best. Think about the materials and angles you’ll need before buying.
Can I Use A Miter Saw To Cut Metal Or Plastic?
Some miter saws can cut soft metals (like aluminum) or plastic, but you need a special blade made for those materials. Always check your saw’s manual first.
Why Are My Cuts Not Matching Up At The Corners?
Usually, this happens if the angle setting is off, the saw isn’t calibrated, or you cut on the wrong side of your mark. Double-check your setup and use test cuts on scrap wood.
How Often Should I Change The Blade?
Replace the blade when it feels dull, burns wood, or leaves rough edges. For frequent use, check the blade every few months. Always use the right blade for your material.
Do I Need A Miter Saw Stand?
A stand isn’t required, but it makes cutting long or heavy boards much safer and easier. It also helps keep your saw stable and at a comfortable height.
Using a miter saw can transform your woodworking projects, making them faster, cleaner, and more professional. With the right setup, safe habits, and a bit of practice, you’ll be making perfect cuts in no time. Whether you’re building furniture, finishing a room, or starting your first DIY project, mastering the miter saw is a valuable skill.