Using a wood router can transform the way you work with wood. Whether you are a hobbyist, a DIY home renovator, or starting out in professional carpentry, mastering the wood router opens up a world of creative and practical possibilities.
This versatile power tool cuts, shapes, hollows, and decorates wood with speed and precision. Yet, for beginners, routers can seem intimidating, with their spinning bits, noise, and countless attachments.
But once you understand how to use a wood router safely and effectively, you gain a powerful ally in your workshop. The key is to learn each step carefully—choosing the right router, setting up bits, adjusting speeds, and using best practices for safety and accuracy.
By the end of this guide, you’ll know how to use a wood router with confidence, avoid common mistakes, and unlock new woodworking skills.
What Is A Wood Router?
A wood router is a handheld or table-mounted power tool designed for cutting, trimming, and shaping wood. The router uses a high-speed, spinning bit to remove material and create precise edges, grooves, joints, and decorative profiles.
There are two main types of routers:
- Fixed-base routers – The depth of the cut is set before you start and stays constant.
- Plunge routers – You can lower the bit into the wood while the router is running, which is useful for making interior cuts.
Routers are widely used for making joints, carving patterns, creating decorative edges, and hollowing out wood. Their versatility comes from the wide range of bits available, each designed for a specific task.
Types Of Wood Routers And Their Uses
Choosing the right wood router depends on your needs, the type of work, and your experience level. Here’s a quick comparison of the main types:
| Router Type | Main Features | Typical Uses |
|---|---|---|
| Fixed-Base | Stable, easy to control, set cutting depth | Edge work, joinery, template routing |
| Plunge | Depth adjustable during use | Mortising, inlay work, interior cuts |
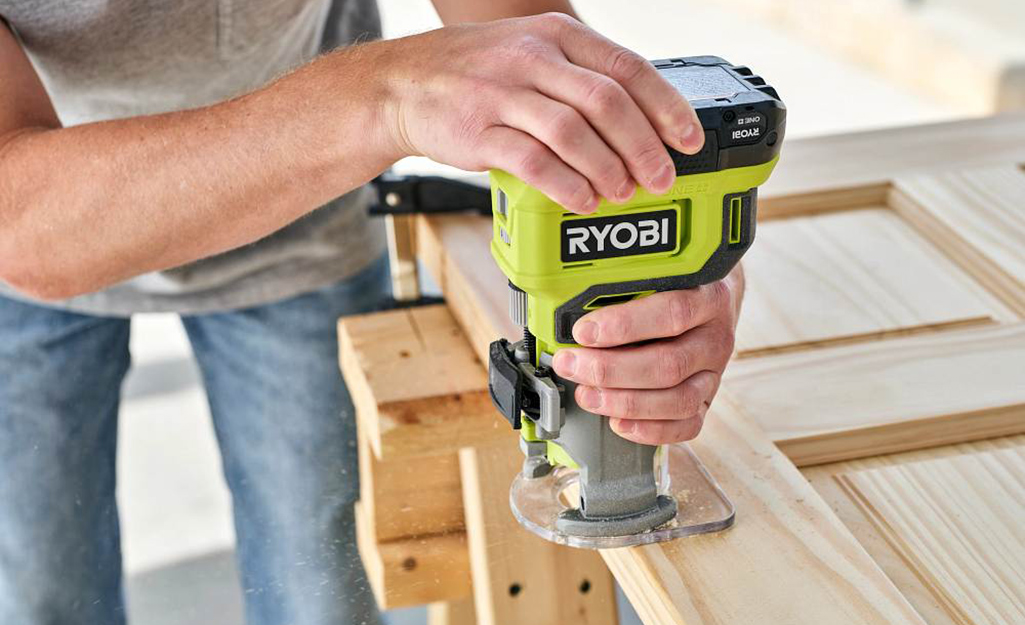
| Compact (Palm) | Lightweight, one-handed | Small trim work, detail work, laminate edging |
| Router Table | Mounted upside down, hands-free | Production runs, precise edge shaping, panel raising |
Fixed-base routers are best for beginners because they offer good control for edge shaping and straight cuts. Plunge routers are ideal if you plan to make deep grooves or mortises. Compact routers work well for light tasks, and router tables offer the most stability for large pieces or repeated cuts.
Essential Parts Of A Wood Router
Before using a wood router, get familiar with its main components:
- Baseplate – The flat part that rests on the wood surface.
- Collet – The clamp that holds the router bit in place.
- Motor housing – Contains the powerful electric motor.
- Depth adjustment ring/knob – Controls how deep the bit cuts into the wood.
- On/off switch – Starts and stops the motor.
- Handles – For guiding and controlling the router.
Some routers include extra features like variable speed control, soft start motors, built-in lights, and dust extraction ports. Each part is important for safety and precision, so take time to read your router’s manual and inspect the tool before you begin.
Choosing The Right Router Bit
Router bits come in many shapes and sizes, each designed for a specific task. Choosing the right bit is critical for safety and getting the result you want.
Here are some common router bit types:
- Straight bit – Cuts straight grooves, dados, and mortises.
- Flush trim bit – Used for trimming edges to match a template or another piece.
- Round-over bit – Makes rounded edges on boards.
- Chamfer bit – Cuts angled edges for decorative effects or joinery.
- Rabbeting bit – Creates a step-shaped cut along the edge.
- Cove bit – Makes concave, decorative edges.
- V-groove bit – Cuts V-shaped grooves for lettering or detail work.
- Dovetail bit – Used for creating dovetail joints.
Different bits have different shaft diameters, usually 1/4 inch or 1/2 inch. Always match the bit shank to your router’s collet size. Larger shanks offer less vibration and better stability.
Comparing Bit Materials
Router bits are usually made from:
| Material | Durability | Best For |
|---|---|---|
| High-Speed Steel (HSS) | Good but wears faster | Softwoods, occasional use |
| Carbide-Tipped | Very durable, stays sharp longer | Hardwoods, frequent use, clean cuts |
Carbide-tipped bits are preferred for most woodworking projects because they last longer and provide a cleaner finish.
Safety Precautions Before Using A Wood Router
Working with a wood router is safe if you follow a few simple rules. These tools operate at high speeds, and accidents can happen quickly. Here’s how to protect yourself:
- Wear eye and ear protection. The router is loud and produces chips and dust.
- Use a dust mask. Wood dust can cause breathing problems.
- Secure your workpiece. Use clamps or a non-slip mat to keep wood from moving.
- Check the bit and collet. Make sure the bit is tight and the collet is clean.
- Keep hands away from the bit. Use push blocks or guides when possible.
- Start and stop with the router off the wood. Never start the motor with the bit touching the wood.
Never rush a cut. Plan your work area, check for obstructions, and keep cords out of the way. If you feel nervous, practice on scrap pieces first.
Setting Up Your Wood Router
Correct setup is the foundation of safe and accurate routing. Here’s a step-by-step process:
1. Choose And Install The Router Bit
- Unplug the router before changing bits.
- Clean the bit shank and collet.
- Insert the bit fully, then pull it out about 1/8 inch (3 mm) so it’s not bottomed out.
- Tighten the collet firmly with the correct wrench.
2. Adjust The Cutting Depth
- For fixed-base routers, use the depth adjustment ring or knob.
- For plunge routers, unlock the plunge and move the motor up or down.
- Set the depth in small increments—never try to remove too much wood in one pass.
3. Select The Speed
Many routers have variable speed settings. Here’s a general guide:
- Small bits (under 1 inch): Higher speeds (20,000–25,000 RPM)
- Large bits: Slower speeds (10,000–15,000 RPM)
Always check the bit manufacturer’s recommendations. High speeds with large bits can be dangerous.
4. Secure The Workpiece
Clamp your wood to the workbench. If routing small parts, use a jig or fixture to keep your hands safe.
5. Test On Scrap Wood
Before routing your actual project, make test cuts on scrap pieces. This checks the depth, bit performance, and your technique.
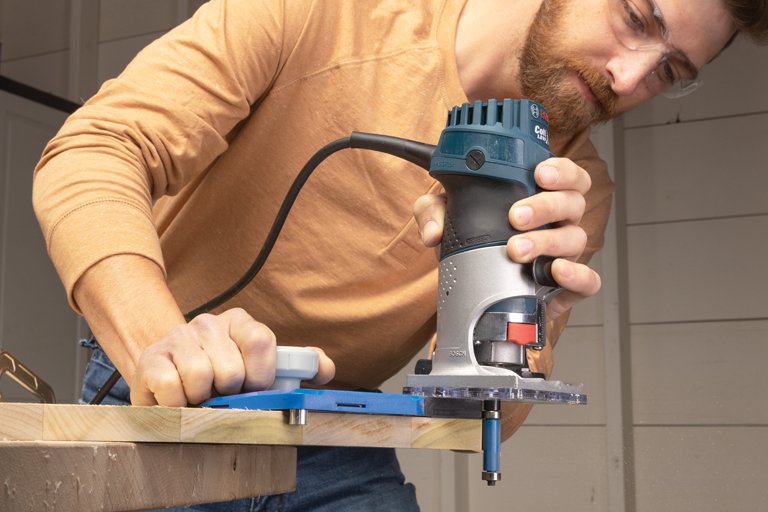
How To Hold And Move The Router
Proper grip and movement ensure smooth, even cuts and prevent accidents.
- Hold the router with both hands using the handles for stability.
- Stand with a balanced stance and keep your hands dry.
- Feed the router from left to right when working on the outside edge of a board (counterclockwise movement).
- On inside edges (like the inside of a frame), move right to left.
Why? Because the router bit spins clockwise. Feeding against the bit’s rotation (called a climb cut) gives you more control. Feeding the wrong direction can cause the router to jerk away.
Making Your First Cut
When you’re ready, follow these steps for a clean, safe cut:
- Double-check all settings. Bit is tight, depth is correct, workpiece is secure.
- Hold the router firmly. Keep your hands on both handles.
- Start the router off the wood. Let it reach full speed before moving.
- Ease the bit into the wood. Move steadily along your path. Don’t force it—let the router do the work.
- Finish the cut and turn off the router. Wait for the bit to stop spinning before setting it down.
If you need to make a deep cut, do it in several shallow passes. This reduces strain on the bit and gives a smoother finish.
Common Wood Router Techniques
Routers are incredibly flexible. Here are the most useful techniques to master:
Edge Profiling
Edge profiling means shaping the outside edge of a board with decorative bits (like round-over or chamfer bits). Move the router steadily, keeping the base flat on the wood.
Cutting Grooves And Dados
A groove is a channel cut with the grain; a dado is across the grain. Use a straight bit, and clamp a guide or straightedge to the workpiece for accuracy.
Template Routing
With a flush trim bit and a pattern, you can make identical parts quickly. Clamp the template to your workpiece, and let the bearing on the bit follow the pattern.
Rabbet And Dado Joints
A rabbet is a step cut along the edge or end of a board. These joints are strong and common in box or cabinet making.
Mortising
A plunge router can cut mortises (slots for tenons) for strong joints. Set the depth stop carefully and make several passes.
Inlay Work
Routers are perfect for inlay—decorative pieces set into the surface of wood. Use a template and a fine bit for best results.
Lettering And Sign Making
With a V-groove bit or special template, you can carve letters and patterns for custom signs.
Using A Router Table
Mounting your router in a router table adds a new level of control, especially for small or tricky pieces. The router sits upside down, and you move the wood across the spinning bit.
Benefits of a router table:
- Both hands are free to guide the workpiece.
- Fence and featherboards keep wood steady.
- Safer for small parts or repetitive cuts.
A router table is ideal for edge work, pattern routing, and production runs. But always use push sticks and guards for safety.
Tips For Clean And Accurate Results
Getting pro-level results with a router takes practice, but these tips will help:
- Make multiple shallow passes. Deep cuts can burn the wood or damage the bit.
- Move at a steady pace. Too slow causes burn marks; too fast causes rough edges.
- Keep the base flat. Tilting the router can ruin the profile.
- Use a fence or guide. For straight cuts, clamp a guide for perfect lines.
- Watch the grain direction. Routing against the grain can tear out wood fibers—if possible, route with the grain.
Non-obvious insight: Try using a backer board (a scrap piece placed behind your workpiece) to prevent splintering at the end of a cut. This is especially helpful on plywood or veneered wood.
Maintaining Your Wood Router And Bits
Well-maintained tools last longer and perform better.
- Clean router bits after each use. Pitch and resin buildup dulls the cutting edge.
- Check the collet for wear. A loose collet can cause wobble or let bits slip.
- Lubricate moving parts (like depth adjustment rings) as needed.
- Store bits in a case or rack to protect the cutting edges.
- Inspect power cords for nicks or damage.
Sharp bits and a clean router make every job easier and safer.
Avoiding Common Mistakes
Many beginners struggle with the same avoidable errors. Watch for these:
- Using the wrong bit speed. Large bits at high speed are dangerous.
- Removing too much in one pass. This overheats bits and burns wood.
- Failing to secure the workpiece. Sliding wood causes crooked cuts and injuries.
- Routing in the wrong direction. Always feed against the bit’s rotation for control.
- Not testing on scrap wood. A test piece saves your project from mistakes.
Non-obvious insight: Don’t ignore wood moisture. If your wood is damp, the router can tear out fibers rather than cutting them cleanly. Work only with properly dried wood for the best finish.
Advanced Techniques For Experienced Users
Once you master the basics, a router can do even more:
- Pattern making: Create jigs for repeated shapes and use a flush trim bit for perfect copies.
- Joinery: Cut dovetails, box joints, and sliding dovetails with specialty bits or jigs.
- Raised panels: Use large profile bits in a router table for cabinet doors.
- Circle cutting: With a trammel jig, cut perfect circles or arcs.
- Fluting and beading: Decorate columns, moldings, or furniture legs with fluting or beading bits.
Remember, advanced techniques often require special jigs and careful setup. Always read bit instructions and practice new operations on scrap wood.
Comparing Wood Routers: What To Consider When Buying
Choosing the best wood router depends on your needs and budget. Here’s a comparison of key features:
| Feature | Why It Matters | Beginner Advice |
|---|---|---|
| Motor Power (HP) | Higher power handles tough jobs | 1.5–2 HP is good for most users |
| Variable Speed | Matches bit speed to task | Very useful, especially for large bits |
| Plunge vs. Fixed Base | Plunge for interior cuts, fixed for edges | Start with fixed base if unsure |
| Collet Size | Determines bit compatibility | 1/2″ collets are more stable |
| Dust Collection | Keeps area clean, improves health | Look for built-in dust port |
| Ergonomics | Comfort, less fatigue | Try holding in store if possible |
Common buyer mistake: Choosing a router based only on price. Cheap routers may lack power, have poor bit retention, or vibrate too much. Invest in a quality tool and good bits—it pays off quickly in results and safety.
Practical Examples: Projects You Can Do With A Wood Router
Understanding techniques is easier with real examples. Here are a few starter projects that show the power of a router:
- Decorative picture frames: Use round-over and cove bits to shape the frame edges.
- Bookshelves with dado joints: Cut clean dadoes for strong, invisible shelf supports.
- Custom signs: Carve names or house numbers using letter templates and a V-groove bit.
- Drawer construction: Use a rabbeting bit to make neat drawer bottoms.
- Tabletop edge molding: Add a classic profile to a plain table with a beading bit.
Each project teaches a new router skill and builds your confidence.
Keeping Safe: Router Safety Reminders
Even experienced woodworkers can become careless, so always keep these safety principles in mind:
- Unplug the router before changing bits or making adjustments.
- Wear personal protective equipment (PPE) every time.
- Wait for the bit to stop spinning before lifting the router.
- Keep your workspace clean and free of clutter.
- Never remove safety guards or shields.
- Read and follow the router’s instruction manual.
If you ever feel unsure, stop and ask for advice from more experienced users or trusted sources like Wikipedia.
Frequently Asked Questions
How Do I Know Which Router Bit To Use?
Choose the bit based on your desired cut or profile. For example, use a straight bit for grooves, a round-over bit for smooth edges, and a flush trim bit for copying shapes. Always check your router’s manual for compatible bit sizes and shank diameters.
Why Does My Router Burn The Wood?
This usually happens when you move too slowly, use a dull bit, or try to cut too deep in one pass. Make sure your bit is sharp and clean, use multiple shallow passes, and keep a steady feed rate.
Can I Use A Wood Router On Materials Other Than Wood?
Yes, routers can cut some plastics and soft metals like aluminum, but you need the right bit and speed. Always check the material’s safety, use proper dust extraction, and never route unknown materials without research.
How Do I Avoid Tear-out On The Edges?
To avoid tear-out, use sharp bits, cut with the grain when possible, and use a backer board at the end of your cut. Making shallow passes also helps prevent splintering.
Is A Plunge Router Better Than A Fixed-base Router?
Each has advantages. Plunge routers are better for interior cuts and mortises, while fixed-base routers are easier for edge work and are more stable for beginners. Many woodworkers own both or use a combo kit.
Mastering a wood router isn’t just about owning the tool—it’s about understanding its strengths, practicing safe habits, and learning from each project. With patience and care, you’ll discover just how creative and precise your woodworking can become.