If you are planning to start woodworking or tackle home improvement projects, choosing the right saw is an important first step. The most common question people ask is: should you get a miter saw or a circular saw? Both tools are essential in carpentry, but they serve different purposes. Making the right decision can save you time, money, and frustration. This guide will help you understand the differences, strengths, and weaknesses of each tool. You will also learn where each saw shines, which one suits your needs best, and what beginners often miss when choosing between them.
Understanding The Basics
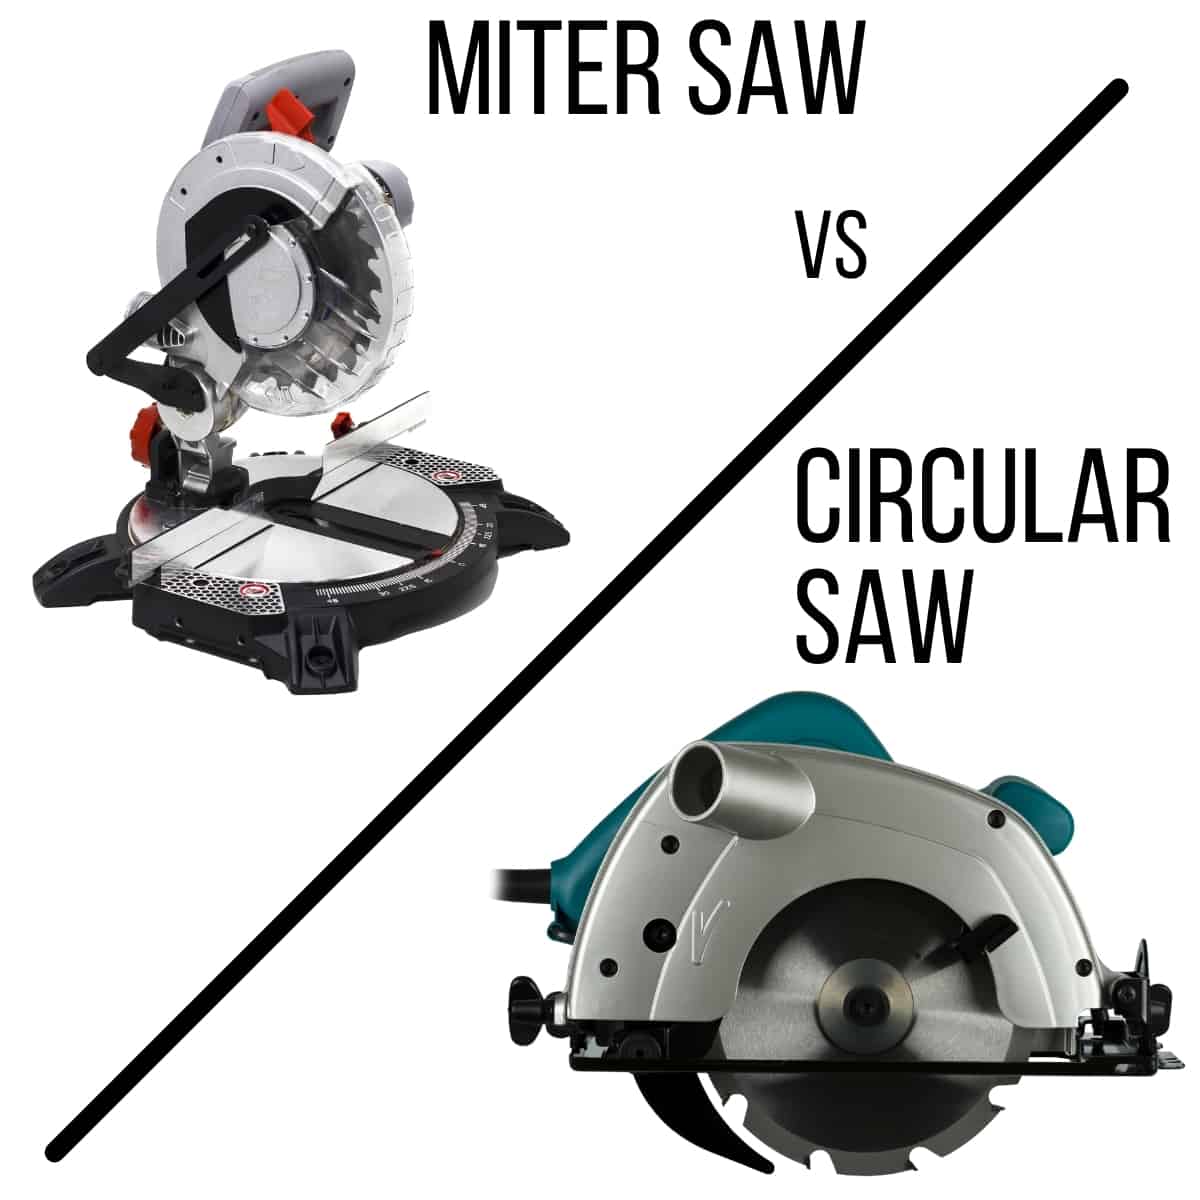
Before comparing, it’s helpful to know what each saw is and how it works.
What Is A Miter Saw?
A miter saw is a specialized cutting tool. It is usually mounted on a stand or workbench. The main feature is a circular blade attached to a swing arm. This arm lets you lower the blade onto the workpiece for precise cuts. Miter saws are mostly used for making angled cuts (called miters) and crosscuts. You usually pull the blade down onto the wood, and the base helps you set exact angles.
What Is A Circular Saw?
A circular saw is a handheld power tool. It features a round, spinning blade that cuts through wood, plastic, metal, and more. Unlike a miter saw, you move the circular saw across the material. It is portable and versatile, useful for straight cuts and freehand work. With the right blade, it can handle many different materials and thicknesses.
Key Differences Between Miter Saw And Circular Saw
Knowing the main differences will make your decision easier.
| Feature | Miter Saw | Circular Saw |
|---|---|---|
| Design | Stationary, mounted | Handheld, portable |
| Cutting Style | Downward, precise | Forward, flexible |
| Best For | Angled, cross, and bevel cuts | Rip, cross, and freehand cuts |
| Material Size | Limited by blade and fence | Handles large sheets |
| Ease of Use | Simple for beginners | Requires steady hand |
| Portability | Bulky | Highly portable |
| Price Range | Higher (usually) | Lower (usually) |
This table shows that each saw excels in different areas. Let’s dive deeper into what this means for your projects.

Strengths And Weaknesses
Understanding the pros and cons of each tool helps you avoid costly mistakes.
Miter Saw Pros
- Accuracy: Miter saws are unbeatable for precise angled and crosscuts. You can set the angle exactly, making them perfect for trim, molding, and framing.
- Repeatability: Once set, you can make many identical cuts quickly. This is useful for jobs where every piece must match.
- Safety: The stationary design keeps the blade fixed, reducing the chance of slips.
- Clean Cuts: The cuts are usually smoother, with less splintering.
Miter Saw Cons
- Limited Mobility: Because they are large and heavy, miter saws are not easy to move around.
- Cutting Capacity: The size of the blade limits how wide the material can be. Most miter saws handle up to 12 inches wide, so they’re not ideal for cutting large sheets.
- Cost: High-quality miter saws are more expensive than most circular saws.
- Less Versatile: Mainly used for crosscuts and angled cuts, not for ripping long boards.
Circular Saw Pros
- Versatility: Circular saws cut almost anything—wood, metal, plastic, and masonry with the right blade.
- Portability: Lightweight and easy to carry to different job sites.
- Long Cuts: Excellent for cutting large panels, plywood sheets, and long boards.
- Affordable: Entry-level models are budget-friendly.
Circular Saw Cons
- Accuracy: Harder to make perfect angles or repeated cuts unless you use guides or jigs.
- Skill Required: Needs a steady hand and practice for straight cuts.
- Safety Risks: More chances of kickback or slips if not used carefully.
- Finish Quality: May leave rough edges, especially on finished surfaces.
When To Use A Miter Saw
A miter saw is your best friend when you need precision and speed for repeatable cuts. If you plan to install baseboards, window or door trim, crown molding, or picture frames, a miter saw will save you hours. It is also excellent for building furniture that requires many identical pieces.
For example, if you are making a picture frame, you need four pieces cut at exactly 45 degrees. With a miter saw, you simply set the angle, cut, and you are done. The pieces will fit perfectly, and you can repeat the process easily.
Some miter saws also offer a sliding feature, which lets you cut wider boards by pulling the blade forward. This is useful for flooring or wide trim.
When To Use A Circular Saw
A circular saw is the right tool for general-purpose cutting. If you need to rip (cut along the length) a board, or cut a sheet of plywood in half, a circular saw is the way to go. It’s also handy for rough carpentry, framing, and demolition work.
Imagine you are building a shed and need to cut large plywood sheets to size. Carrying them to a miter saw is impossible, but with a circular saw, you can cut them on the ground or on sawhorses. The ability to bring the tool to the material is a huge advantage.
Many people use a guide rail or a straight edge with a circular saw to improve accuracy for long cuts. With practice, you can achieve clean, straight edges.
Typical Projects For Each Saw
The right saw depends on what you want to build. Here are some common projects for each tool:
Miter Saw Projects
- Cutting baseboards and crown molding
- Framing windows and doors
- Building picture frames
- Making furniture parts that need identical lengths or angles
- Cutting deck boards to length
Circular Saw Projects
- Ripping sheets of plywood or MDF
- Cutting 2x4s for framing walls
- Shortening doors or panels
- Cutting roofing materials
- Demolition and rough cuts
Many professionals and DIYers eventually own both saws, but you can complete most beginner projects with just one, depending on your main goals.
Types And Variations
Both saws come in several versions. Understanding these can help you choose the right model.
Miter Saw Types
- Standard Miter Saw: Basic, for cross and miter cuts.
- Compound Miter Saw: Cuts bevels (angled cuts through the thickness).
- Sliding Compound Miter Saw: Adds a sliding arm for wider cuts.
- Dual-Bevel Miter Saw: Tilts both left and right for complex angles.
Choosing between these depends on your needs. A sliding compound miter saw, for example, can cut wider boards, which is helpful for flooring or large trim.
Circular Saw Types
- Sidewinder (Direct Drive): Motor is beside the blade. Lightweight and common.
- Worm Drive: Motor is behind the blade. More torque, heavier, good for tough jobs.
- Corded vs Cordless: Cordless offers more portability but less power and runtime.
- Mini Circular Saws: Smaller, for light-duty or tight spaces.
Think about what materials you will cut most often. For heavy-duty framing, a worm drive saw is better. For light DIY, a sidewinder or even a mini saw may be enough.
Safety Considerations
Both saws can be dangerous if not used correctly. Here’s how to stay safe:
Miter Saw Safety Tips
- Always use clamps or hold-downs to secure the material.
- Keep hands away from the blade path.
- Wait for the blade to stop spinning before lifting it.
- Wear safety glasses and ear protection.
- Check that the blade guard moves freely.
Circular Saw Safety Tips
- Support long pieces to prevent binding.
- Use both hands—one on the saw, one on the handle.
- Don’t start the saw with the blade touching the material.
- Stand to one side to avoid kickback.
- Wear eye, ear, and dust protection.
Non-obvious tip: Check blade sharpness regularly. A dull blade is more likely to kick back or burn the wood. Many beginners overlook this simple but crucial step.
Accuracy And Quality Of Cut
A key difference is the precision you can achieve. Miter saws are designed for repeatable, accurate cuts at specific angles. The fence and angle stops help ensure consistency. This is important for projects like trim or frames, where gaps are very noticeable.
Circular saws need extra tools for accuracy, like cutting guides or jigs. You can make straight, accurate cuts, but it takes more setup and skill. Freehand cuts are rarely perfect.
Another insight: Blade selection matters a lot. A fine-tooth blade on either saw will produce a smoother cut, while a coarse blade is faster but rougher. Beginners often use the blade that comes with the saw, but upgrading can improve results.
Cost Comparison
Let’s look at typical prices for each type.
| Type | Entry-Level | Mid-Range | Professional |
|---|---|---|---|
| Miter Saw | $120 – $180 | $200 – $400 | $500 – $800+ |
| Circular Saw | $40 – $80 | $100 – $200 | $250 – $400+ |
As you can see, miter saws are typically more expensive, especially for sliding and compound versions. Circular saws are cheaper, making them a popular first tool for beginners.
Which Tool Should You Buy First?
This is the big question for many DIYers and new woodworkers. The answer depends on your main projects.
- If you want to build furniture, install trim, or need many angled or repeated cuts, start with a miter saw.
- If you need to cut large sheets, do framing, or want a general-purpose tool, begin with a circular saw.
An important factor many overlook: accessories. For a circular saw, you may need extra blades, a good straight edge or track, and clamps to get the best results. For a miter saw, a stable stand is a smart investment.
Advanced Uses And Pro Tips
After mastering the basics, you can unlock more from both tools.
Miter Saw Tricks
- Crown Molding: Use a compound miter saw to cut complex angles for crown molding. There are special charts and calculators online to help with the math.
- Dado Cuts: Some miter saws can make shallow grooves (dados) by adjusting the blade height, useful for joinery.
- Stop Blocks: Set up a stop block on the fence for repeated cuts at the same length.
Circular Saw Tricks
- Bevel Cuts: Tilt the baseplate for angled cuts—great for roof framing.
- Plunge Cuts: Start a cut in the middle of a panel by tilting the saw forward and lowering it into the material.
- Cutting Non-Wood: With the right blade, you can cut metal, tile, or plastic. Just be sure to use proper safety gear.
Many beginners don’t realize that proper saw setup and calibration can improve results greatly. Check the blade for squareness, and always read the manual for maintenance tips.
Blade And Accessory Options
Both saws use different blades for different materials and cuts. Choosing the right blade makes your work easier and cleaner.
Miter Saw Blades
- Crosscut Blades: Many teeth, smooth finish for wood.
- Combination Blades: Versatile, for both ripping and crosscutting.
- Specialty Blades: For cutting aluminum, plastics, or laminate.
Circular Saw Blades
- Rip Blades: Fewer teeth, faster cuts along the grain.
- Plywood Blades: Many fine teeth for smooth edges.
- Masonry Blades: Diamond or carbide grit for concrete or brick.
- Metal Blades: For cutting sheet metal or pipes.
A common mistake: using the wrong blade for the material. Not only does this give poor results, but it can also be dangerous. Always check the blade type and condition before starting.
Maintenance And Longevity
Proper care extends the life of your tools.
Miter Saw Maintenance
- Clean dust from moving parts after use.
- Lubricate the pivot points and slides.
- Check blade alignment and replace as needed.
- Inspect power cords for damage.
Circular Saw Maintenance
- Blow out dust from vents and motor housing.
- Check the baseplate for flatness.
- Tighten all screws and handles.
- Change blades often for best results.
Many users forget to inspect safety features like blade guards and electric brakes. Keeping these in good condition prevents accidents.
Portability And Storage
If you have limited space or need to move your tools, portability matters.
- Miter saws are heavy and large. They need a sturdy bench or a dedicated stand. Some models have foldable stands for easier transport.
- Circular saws are easy to carry and store. They fit in most toolboxes or shelves.
A helpful tip: Cordless circular saws are excellent for work in places without power outlets, like outdoor projects or new construction sites.
Environmental And Noise Considerations
Both saws create dust and noise, but there are differences.
- Miter saws often have dust collection ports that connect to shop vacuums. This keeps your workspace cleaner.
- Circular saws produce more airborne dust, especially when cutting large panels. Work outdoors or use a dust mask.
- Noise levels can be high for both tools. Always wear hearing protection.
Real-world Examples
Let’s look at two sample projects to see which saw works best.
Installing Baseboards
You need to cut dozens of pieces at 45-degree angles. The job requires accurate, repeatable cuts. A miter saw makes this fast and easy. Using a circular saw here would be slow and less precise.
Building A Shed
You need to cut sheets of plywood, framing lumber, and roof panels. A circular saw is ideal, as you can bring it to the material and make all the necessary cuts without moving heavy boards.
Expert Insights And Common Beginner Mistakes
Many beginners think they need the most expensive tool. In reality, the right technique matters more than the price tag. Start with a quality basic model, and upgrade as your skills grow.
Another common mistake is ignoring safety gear. Even experienced carpenters can have accidents. Always use eye and ear protection, and follow safe practices.
Also, pay attention to power ratings. Some cheap circular saws have lower power and will struggle with thick material. Look for higher amp ratings for heavy work.
Environmental Impact And Power Usage
Both saws are electric and draw between 10–15 amps for most models. Cordless models use rechargeable batteries, which adds convenience but produces battery waste over time. Using dust extraction helps reduce airborne particles and keeps your workspace safer.

What Professionals Prefer
Most carpenters and contractors own both tools. For on-site work, a circular saw is essential. For finish work, a miter saw is a must. Over time, as your projects grow, you may find that having both tools saves time and improves quality.
Decision Guide: Which Saw Is Right For You?
Still unsure? Use these points to guide your choice:
- Choose a miter saw if you want perfect angles, clean finish work, and repeated cuts.
- Choose a circular saw if you want maximum flexibility, portability, and the ability to cut large pieces.
If your budget allows, start with a circular saw and add a miter saw when you begin more complex projects.
Frequently Asked Questions
What Is The Main Difference Between A Miter Saw And A Circular Saw?
The main difference is how the saw is used. A miter saw is stationary and brings the blade down onto the material for accurate angled or crosscuts. A circular saw is handheld and moves across the material, making it more versatile for long or large cuts.
Can A Circular Saw Replace A Miter Saw?
A circular saw can do many jobs, but it cannot match the precision of a miter saw for angled and repeated cuts. For rough carpentry, a circular saw is enough, but for trim and finish work, a miter saw is better.
Are Miter Saws Safer Than Circular Saws?
Generally, miter saws are safer because the blade is fixed, and your hands are away from the cutting area. Circular saws require more attention to hand placement and cutting technique.
Do I Need Both Saws For Home Diy Projects?
Many DIYers start with a circular saw because of its flexibility. However, owning both tools will make your work faster and more accurate as your skills and projects expand.
Where Can I Learn More About Saw Safety And Best Practices?
You can find detailed safety guides and video tutorials on official sites like OSHA. Always consult your tool’s manual and follow local safety regulations.
Choosing between a miter saw and a circular saw is not just about features or price. Think about your main projects, space, and future plans. With the right tool, your woodworking or DIY experience will be safer, easier, and much more enjoyable.