A miter saw is a powerful tool found in most woodworking shops and construction sites. When you want to make fast, precise cuts at different angles, nothing beats a miter saw. But what exactly is a miter saw used for, and why do so many people consider it a must-have?
If you’ve ever seen someone slicing through wood with a spinning blade mounted on an arm, you’ve likely seen a miter saw in action. Whether you’re a beginner or an experienced DIYer, understanding this tool can help you make better cuts, improve your projects, and avoid costly mistakes.
This guide will explain everything you need to know about miter saws. You’ll learn what they do, how they work, when to use them, and which types are best for different jobs. Along the way, you’ll discover tips, examples, and even some common errors beginners often make.
By the end, you’ll see why a miter saw is much more than just another cutting tool.
Understanding The Miter Saw
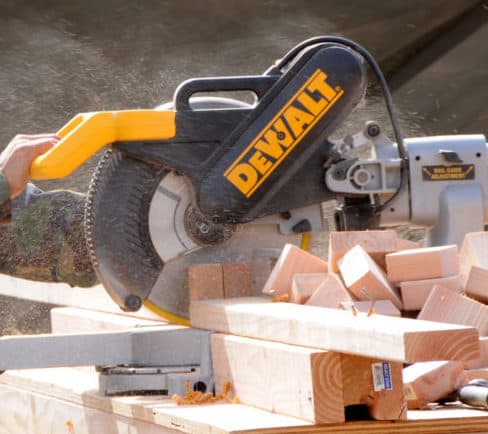
A miter saw is a stationary power tool designed to make accurate crosscuts and angled cuts in wood, plastic, or even metal. The blade is attached to a swinging arm, which brings the blade down onto the material. Unlike a circular saw or hand saw, a miter saw stays in one place and the material is fed into it.
The key feature is the pivoting arm that allows you to set precise angles, called “miters.” This makes the miter saw perfect for projects where joints and corners must fit perfectly, such as picture frames, crown molding, and door frames.
Basic Parts Of A Miter Saw
To use a miter saw confidently, it helps to know its main parts:
- Blade: The spinning disc that does the cutting, usually 8 to 12 inches in diameter.
- Fence: The flat surface where you press your material to keep it steady and square.
- Miter Scale: Lets you set the horizontal angle of your cut, from 0° (straight) to usually 45° or more.
- Bevel Scale: Allows the blade to tilt for angled cuts through the thickness of the material.
- Handle and Trigger: Used to lower the blade and start the cutting motion.
- Table: The base that supports everything and holds the material in place.
These parts work together to give you control and accuracy.
What Is A Miter Saw Used For?
Miter saws are specialized, but their range of uses is wider than many people realize. Here are the main ways you’ll see a miter saw used:
1. Making Crosscuts
The most common use is making crosscuts, which are straight cuts across the width of a board. This is essential when you need to trim a long board down to size. Crosscuts are quick and clean, and miter saws excel at making them perfectly square.
2. Cutting Angles (miters)
If you’ve ever made a picture frame or installed baseboards, you know that corners need to fit tightly. A miter saw makes this easy by letting you cut precise angles, usually up to 45 degrees in either direction. This is called a miter cut.
3. Bevel Cuts
A bevel cut tilts the blade to slice through the thickness of the material at an angle. This is different from a miter, which is angled across the face. Bevel cuts are useful for projects like crown molding, where two angled surfaces must meet seamlessly.
4. Compound Cuts
A compound cut combines a miter and a bevel at the same time. These cuts are essential for complex trim work, especially when joining two pieces at an angle on both axes. For example, installing crown molding on a sloped ceiling usually requires compound cuts.
5. Repetitive Cuts
When you need to cut many pieces to the exact same length, a miter saw is unbeatable. You can set up a stop block on the fence and make multiple identical cuts quickly, which is handy for flooring, framing, or any project needing consistency.
6. Cutting Trim And Molding
Trim, baseboards, and molding usually need to fit precisely around corners and edges. A miter saw makes it easy to cut these pieces to length and at the correct angle so everything fits tightly.
7. Cutting Lumber For Framing
In construction, miter saws are used to cut 2x4s, studs, and other framing lumber to the right size. This keeps walls, roofs, and floors straight and strong.
8. Cutting Decking And Outdoor Materials
When building decks or fences, you’ll often need to cut boards quickly and accurately. A miter saw can handle treated lumber, composite decking, or even some light metal materials.
9. Flooring Installation
Flooring planks—whether wood, laminate, or engineered—often need to be trimmed to fit a room. A miter saw makes these cuts fast and precise, so your floorboards meet the walls and corners perfectly.
10. Cutting Pvc And Plastic
With the right blade, a miter saw can slice through PVC pipe and plastic trim without melting or shattering. This is useful for plumbing, outdoor trim, or craft projects.
11. Light Metal Cutting
Some miter saws, especially those with special blades, can cut through aluminum, copper, or thin steel. This is common in window frames or metal trim work, but always check your saw and blade rating before attempting.
12. Craft And Diy Projects
From building picture frames to making furniture, a miter saw helps hobbyists and crafters achieve professional-looking results. Even simple home decor projects benefit from clean, accurate cuts.
Types Of Miter Saws And Their Uses
Not every miter saw is the same. Understanding the types helps you pick the right one for your needs.
Basic Miter Saw
This is the simplest form. It only makes crosscuts and basic miter cuts (angles). Good for:
- Picture frames
- Simple trim work
- Straight cuts on small boards
Compound Miter Saw
A compound miter saw tilts the blade for bevel cuts in addition to miter cuts. This adds flexibility for:
- Crown molding
- Angle joints
- Furniture making
Sliding Compound Miter Saw
The sliding feature lets the blade move forward and backward, increasing your cutting width. These saws handle:
- Wide boards (up to 12 inches or more)
- Flooring
- Decking
- Complex trim
Dual-bevel Sliding Miter Saw
These saws tilt both left and right, making compound cuts in either direction without flipping the workpiece. Ideal for:
- Advanced trim
- Crown molding on both sides of a room
- Projects needing mirrored angles
Comparison Of Miter Saw Types
Here is a quick comparison to help you see the differences:
| Type | Bevel Capability | Sliding Feature | Best For |
|---|---|---|---|
| Basic Miter Saw | No | No | Simple angles, framing |
| Compound Miter Saw | Single | No | Crown molding, bevel cuts |
| Sliding Compound | Single or Dual | Yes | Wide boards, flooring |
| Dual-Bevel Sliding | Dual | Yes | Complex trim, professional use |
Common Applications In Woodworking And Construction
A miter saw shines in many settings, from home workshops to building sites. Let’s look at some real-world examples.
Framing Walls
When building a house or a shed, you’ll need to cut dozens or hundreds of studs to the same length. A miter saw makes this process fast and keeps everything square, which is critical for strong walls.
Installing Baseboards And Crown Molding
Corners in a room rarely meet at exactly 90 degrees. A miter saw allows you to adjust angles slightly for a perfect fit. For crown molding, a compound miter saw helps you make those tricky joint cuts that must meet on both vertical and horizontal planes.
Building Furniture
Furniture projects often require clean, repeatable cuts. Whether it’s a bookshelf, table, or bench, a miter saw provides the accuracy needed for professional-looking joints.
Deck And Outdoor Projects
Deck boards, railings, and balusters all need to be cut to size. With a sliding miter saw, you can handle even extra-wide boards used in modern deck designs.
Custom Picture Frames
Every frame requires four pieces cut at a perfect 45-degree angle. A miter saw is the best tool for this, ensuring tight, gap-free joints.
Flooring Installation
Cutting floorboards to fit around corners, doorways, or other obstacles is much easier with a miter saw. The clean, straight cuts also help reduce waste.

Key Benefits Of Using A Miter Saw
Why do so many professionals and DIYers choose miter saws over other tools? Here are the main benefits:
Precision And Accuracy
Miter saws are designed for repeatable accuracy. When you set an angle or length, every piece will be the same as the last, which is difficult with a hand saw or circular saw.
Speed And Efficiency
A miter saw can cut through materials in seconds. For projects with many cuts, this means you save hours compared to manual sawing.
Versatility
With adjustable angles and tilting blades, you can make crosscuts, miters, bevels, and compound cuts—all with one tool.
Safety
Since the material stays still and the blade is guided, a miter saw is often safer than a handheld circular saw. Most models have blade guards and safety switches.
Clean Cuts
The design of the saw and the sharp blades produce smooth, splinter-free edges. This reduces the need for sanding and rework.
How To Use A Miter Saw Safely And Effectively
Even the best tool can be dangerous if not used correctly. Here’s how to get the best results safely:
Preparation
- Wear safety glasses and hearing protection.
- Make sure the saw is on a stable surface.
- Check that the blade is sharp and properly installed.
- Clear the work area of scraps and debris.
Making The Cut
- Measure and mark your cut line.
- Align the mark with the blade while the saw is off.
- Hold the material firmly against the fence.
- Lower the blade slowly and let it reach full speed.
- Cut through the material in one smooth motion.
- Let the blade stop spinning before lifting it back up.
After The Cut
- Remove the finished piece carefully.
- Check the cut for accuracy.
- If making repeated cuts, use a stop block for consistency.
Pro Tips For Better Results
- Use the right blade for your material—fine-tooth blades for trim, coarse blades for framing.
- Clamp small or narrow pieces to prevent shifting.
- Let the saw do the work—don’t force the blade.
- Keep the fence clean for accurate angles.
- For dust control, connect a shop vacuum or use built-in dust bags.
Common Mistakes To Avoid
- Cutting too quickly can cause rough edges or splinters.
- Forgetting to check angles can lead to gaps in joints.
- Not supporting long boards may result in crooked cuts or binding.
- Using a dull blade is unsafe and gives poor results.

Choosing The Right Miter Saw For Your Needs
With so many types available, how do you pick the best miter saw for your projects? Consider these factors:
Blade Size
- 8-inch: Good for small trim and craft work.
- 10-inch: The most common size, handles most jobs.
- 12-inch: Best for wide boards and heavy-duty work.
Power And Motor
Higher wattage motors cut faster and handle tougher materials. If you plan to cut hardwoods or thick lumber, pick a saw with a strong motor (1,500 watts or more).
Sliding Vs. Non-sliding
If you need to cut wide boards, a sliding miter saw is essential. For mostly trim or framing, a non-sliding model may be lighter and cheaper.
Single Vs. Dual Bevel
Dual-bevel saws are more flexible for complex projects but cost more. If you only need to make basic bevel cuts, a single-bevel saw is often enough.
Portability
If you need to move your saw between job sites, look for a lighter model with a carrying handle.
Dust Collection
Good dust control keeps your workspace cleaner and protects your health. Some saws have built-in dust ports or bags.
Price
Miter saws range from around $100 for basic models to over $600 for professional-grade saws. Choose a saw that fits your budget and needs, but don’t sacrifice safety or accuracy for a lower price.
Comparison Of Popular Blade Sizes
Here’s a helpful breakdown of what different blade sizes can cut:
| Blade Size | Max Cut Depth | Max Cut Width | Best For |
|---|---|---|---|
| 8-inch | 2 inches | 5 inches | Trim, crafts |
| 10-inch | 2.5 inches | 8 inches | General use, framing |
| 12-inch | 3.5 inches | 12 inches | Decking, large boards |
Extra Features To Consider
- Laser guides: Show exactly where the blade will cut.
- LED work lights: Make it easier to see your cut line.
- Extension wings: Support long pieces of material.
- Soft start motors: Reduce wear and tear on the saw.
Non-obvious Insights Most Beginners Miss
It’s easy to overlook some details that make a big difference in your results.
- Adjusting for Kerf: The thickness of the saw blade removes a small amount of material, called the “kerf.” Always account for kerf when measuring, especially for tight joints.
- Fine-Tuning Angles: Even small errors (less than 1 degree) can add up over a long run of trim or molding. Test cuts on scrap material can save you from wasting expensive wood.
- Changing Blades for Materials: Switching to a blade suited for the material (wood, plastic, or metal) improves safety and cut quality.
- Letting the Blade Stop: Lifting the blade before it stops spinning can cause chips or rough edges. Always wait for a complete stop before moving the saw.
When Not To Use A Miter Saw
Although miter saws are versatile, they have limits.
- They are not suitable for ripping long boards lengthwise. Use a table saw for this.
- Cutting very large sheets (like plywood) is awkward and often unsafe.
- Miter saws are not ideal for cutting very small pieces, as it can be hard to hold them safely.
- For curved or intricate cuts, a jigsaw or band saw is better.
Miter Saw Vs. Other Saws
How does a miter saw compare to other common saws? Here’s a quick overview:
| Saw Type | Best For | Main Limitation |
|---|---|---|
| Miter Saw | Angles, crosscuts, trim | No rip cuts, limited sheet cutting |
| Circular Saw | General cuts, rip cuts | Less accurate for angles |
| Table Saw | Long rip cuts, sheet goods | Not portable, less suited for angles |
| Jigsaw | Curves, small shapes | Not for straight, precise cuts |
Maintenance And Care For Your Miter Saw
To keep your miter saw working well and cutting safely:
- Clean the saw after each use, removing dust and debris.
- Check the blade regularly for sharpness and replace it if dull.
- Lubricate moving parts as recommended by the manufacturer.
- Inspect the power cord for damage.
- Store the saw in a dry place to avoid rust.
Proper maintenance extends the life of your tool and keeps your cuts accurate.
Advanced Tips For Getting The Most From Your Miter Saw
- Use a sacrificial fence: Attach a temporary fence made from scrap wood. It supports small cuts and helps prevent tear-out.
- Zero-clearance inserts: These fill the gap around the blade and provide extra support for thin materials.
- Custom jigs: Create simple jigs for repetitive angled cuts or to hold awkward pieces securely.
- Practice on scrap: Always test your setup with scrap pieces before cutting your final material, especially for expensive wood or trim.
- Dust extraction: Connect your miter saw to a shop vacuum for healthier air and a cleaner workspace.
Frequently Asked Questions
What Is The Difference Between A Miter Saw And A Chop Saw?
A miter saw can cut at various angles and often has bevel features, making it versatile for woodworking and trim work. A chop saw usually only makes straight cuts at 90 degrees and is mostly used for cutting metal or masonry, not wood.
Can A Miter Saw Cut Metal?
Yes, but only with the right blade and proper safety precautions. Always check if your saw and blade are rated for metal. For frequent metal cutting, a dedicated metal chop saw is safer and more efficient.
Do I Need A Sliding Miter Saw?
If you plan to cut wide boards (more than 6-8 inches), a sliding miter saw is a good investment. For simple trim or framing, a non-sliding miter saw is usually enough.
How Do I Get Accurate Angles With A Miter Saw?
Use the built-in angle gauge and make test cuts on scrap wood. For perfect joints, especially in trim work, adjust slightly based on your test results, as real-world corners are rarely exactly 90 degrees.
What Safety Gear Should I Use With A Miter Saw?
Always wear safety glasses and hearing protection. For dusty jobs, a dust mask is also smart. Keep hands away from the blade, and never bypass safety guards.
A miter saw is one of the most useful tools for both beginners and professionals. With it, you can tackle projects ranging from simple repairs to detailed woodworking and construction jobs. By understanding how it works, when to use it, and how to stay safe, you set yourself up for success. For more detailed information on tool safety and usage, the Wikipedia entry on miter saws is a trustworthy resource.
Whether you’re framing a house, installing new floors, or just making your first picture frame, the miter saw can help you work faster and achieve cleaner, more precise results. With the right knowledge and a little practice, you’ll soon see why this tool is a staple in every serious workshop.