Yamaha 4 Stroke Outboard Fuel Pump Problems: Quick Fixes
Yamaha 4-stroke outboard fuel pump problems often stem from clogged filters or faulty pumps. Regular maintenance can prevent these issues and ensure optimal performance.
Yamaha 4-stroke outboards are known for their reliability and efficiency. However, fuel pump problems can disrupt your boating experience. Common symptoms include difficulty starting, stalling, or reduced power while running. These issues often arise from clogged fuel filters, damaged pump components, or air leaks in the fuel system.
Regular inspections and timely maintenance can help identify potential problems early. Understanding these common issues allows boat owners to take proactive measures. This not only enhances performance but also prolongs the life of the outboard engine. Staying informed about fuel pump health is essential for a smooth and enjoyable boating experience.
Introduction To Yamaha 4 Stroke Outboard Fuel Issues
Yamaha 4 stroke outboards are popular for their power and efficiency. However, they can face fuel pump problems. These issues can affect performance and reliability. Understanding these problems is crucial for boat owners.
The Importance Of Fuel Pump Functionality
The fuel pump plays a key role in outboard performance. It ensures a steady flow of fuel to the engine. If it fails, the engine may not run smoothly. Here are some important points:
- Fuel Delivery: Pumps fuel from the tank to the engine.
- Engine Performance: A good pump ensures optimal power.
- Reliability: A working pump prevents breakdowns.
Regular maintenance of the fuel pump is essential. It helps avoid costly repairs and keeps the engine running efficiently.
Common Symptoms Of Fuel Pump Problems
Identifying fuel pump issues early is important. Here are some common symptoms:
- Engine Stalling: The engine may suddenly stop.
- Difficulty Starting: The engine struggles to start.
- Uneven Idling: The engine runs rough or shakes.
- Low Power: The boat may lack acceleration.
These symptoms indicate potential fuel pump failure. Ignoring them can lead to more severe problems.
| Symptom | Possible Cause |
|---|---|
| Engine Stalling | Fuel starvation or pump malfunction |
| Difficulty Starting | Weak fuel delivery |
| Uneven Idling | Clogged filter or pump issues |
| Low Power | Insufficient fuel pressure |
Being aware of these symptoms helps maintain your Yamaha outboard. Early detection leads to better performance.
Identifying The Problem
Yamaha 4-stroke outboard fuel pump problems can disrupt your boating experience. Recognizing issues early helps prevent bigger problems. This section will guide you through identifying these issues effectively.
Initial Diagnosis
Start by observing your outboard motor. Here are common signs of fuel pump issues:
- Engine Stalling: The engine stops unexpectedly.
- Hard Starting: The engine struggles to start.
- Inconsistent Performance: The motor runs rough or loses power.
- Fuel Leaks: Look for any fuel pooling around the motor.
Check the fuel lines for cracks or kinks. Inspect the fuel filter for clogs. A dirty filter can restrict fuel flow.
Tools You’ll Need For Troubleshooting
Gathering the right tools makes diagnosing fuel pump issues easier. Here’s a list of essential tools:
| Tool | Purpose |
|---|---|
| Multimeter | Check electrical connections and voltage. |
| Fuel Pressure Gauge | Measure fuel pump pressure. |
| Screwdrivers | Access fuel pump and components. |
| Wrench Set | Loosen or tighten fittings. |
| Safety Goggles | Protect eyes during repairs. |
Having these tools ready helps speed up the troubleshooting process.
Quick Fixes At A Glance
Yamaha 4-stroke outboard fuel pump problems can disrupt your boating experience. Knowing quick fixes can save you time and frustration. Below are easy solutions for urgent situations. These tips help you get back on the water quickly.
Temporary Solutions For On-the-water Scenarios
In case of a fuel pump issue while on the water, try these quick fixes:
- Check Fuel Lines: Look for leaks or blockages.
- Inspect Fuel Filter: A clogged filter can restrict flow.
- Use a Primer Bulb: Manually prime the fuel system.
- Turn Off the Engine: Restart it after a minute.
- Check Battery Connections: Ensure they are tight and clean.
These actions can help you diagnose problems quickly. Always carry basic tools onboard for emergencies.
Long-term Maintenance Tips
Preventive care is essential for your Yamaha outboard. Follow these maintenance tips:
| Maintenance Task | Frequency | Description |
|---|---|---|
| Inspect Fuel System | Every 25 hours | Check for leaks and cracks in fuel lines. |
| Replace Fuel Filter | Every 100 hours | Change to ensure clean fuel flow. |
| Clean or Replace Spark Plugs | Every 100 hours | Worn plugs can affect performance. |
| Check Battery Health | Monthly | Ensure connections are secure and battery is charged. |
Regular maintenance keeps your Yamaha running smoothly. Follow these guidelines to avoid future problems.
Replacing Fuel Filters
Keeping your Yamaha 4 Stroke outboard running smoothly is crucial. Regular maintenance includes checking and replacing fuel filters. Dirty filters can lead to engine problems. They block fuel flow and reduce performance.
Signs That Your Fuel Filter Needs Attention
- Engine Stalling: Your engine may stop unexpectedly.
- Difficulty Starting: The engine struggles to start or won’t start.
- Reduced Power: You notice less power during acceleration.
- Frequent Misfires: The engine misfires during operation.
- Unusual Noises: You hear strange sounds from the engine.
Step-by-step Guide To Replacing Fuel Filters
Follow these steps to replace your fuel filters:
- Gather Tools: You will need a wrench, screwdrivers, and a new fuel filter.
- Safety First: Turn off the engine and disconnect the battery.
- Locate the Filter: Find the fuel filter near the engine.
- Remove Old Filter: Use a wrench to loosen the fittings. Carefully pull off the old filter.
- Inspect Connections: Check for any signs of wear or damage.
- Install New Filter: Position the new filter correctly. Tighten the fittings securely.
- Reconnect Battery: Reattach the battery cables.
- Test the Engine: Start the engine and check for leaks.
Replacing fuel filters helps maintain your Yamaha outboard’s performance. Regular checks prevent bigger problems down the line. Keep an eye on those signs!
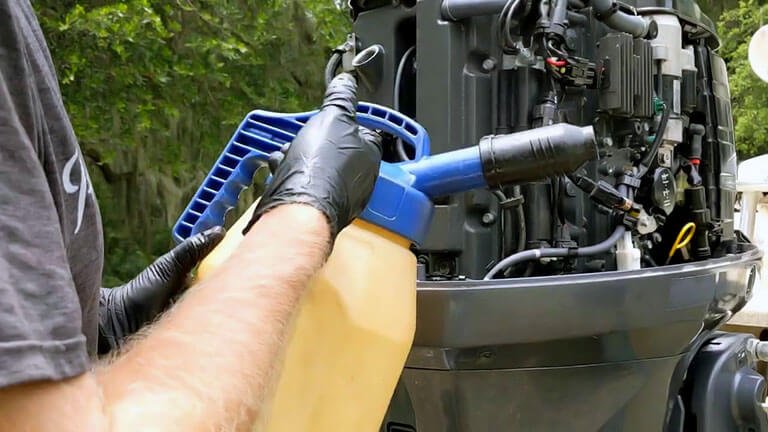
Priming The Fuel Pump
Priming the fuel pump is crucial for Yamaha 4-stroke outboards. It ensures proper fuel flow to the engine. A well-primed pump helps avoid starting issues and engine stalling.
The Role Of Priming In Fuel Pump Health
Priming boosts fuel pressure in the system. This process removes air from the fuel lines. Proper priming enhances engine performance and reliability.
- Prevents air bubbles: Air can cause hesitation and stalling.
- Improves fuel delivery: Consistent fuel flow keeps the engine running smoothly.
- Increases lifespan: A well-functioning pump lasts longer and reduces repair costs.
How To Properly Prime The Fuel Pump
Follow these steps to prime your Yamaha fuel pump effectively:
- Locate the fuel bulb on your outboard.
- Ensure the fuel lines are connected properly.
- Squeeze the fuel bulb until it feels firm.
- Check for any leaks in the fuel lines.
- Try starting the engine.
Repeat the priming process if the engine does not start. This ensures a strong fuel supply for ignition.
| Step | Description |
|---|---|
| 1 | Locate the fuel bulb. |
| 2 | Check connections. |
| 3 | Squeeze until firm. |
| 4 | Inspect for leaks. |
| 5 | Start the engine. |
Proper priming can prevent many fuel pump issues. Regular checks keep your Yamaha outboard running efficiently.
Fuel Line Checks And Repairs
Proper fuel line maintenance is vital for Yamaha 4-stroke outboards. Fuel lines can wear out over time. Regular checks can prevent costly repairs and ensure safe operation.
Inspecting For Leaks And Cracks
Start by inspecting your fuel lines for any signs of damage. Look for:
- Leaks: Fuel should not drip or pool.
- Cracks: Small fissures can lead to bigger problems.
- Discoloration: Faded or discolored lines indicate wear.
Use a flashlight for better visibility. Check connections at the fuel pump and carburetor. Apply gentle pressure to the lines. If they feel soft or spongy, replace them immediately.
The Correct Way To Repair Fuel Lines
Repairing fuel lines requires careful attention. Follow these steps for effective repairs:
- Turn off the engine: Safety first.
- Release pressure: Use the fuel line release valve.
- Cut the damaged section: Use a sharp knife.
- Use appropriate connectors: Ensure a tight fit.
- Secure the connection: Use clamps to avoid leaks.
- Test the system: Check for leaks after repairs.
Check your owner’s manual for specific guidelines. Regularly inspect repairs to ensure they hold up.
| Common Issues | Symptoms | Repair Method |
|---|---|---|
| Leaking Lines | Fuel odor, pooling fuel | Replace with new lines |
| Cracked Lines | Reduced fuel flow | Cut and splice with connectors |
| Soft or Spongy Lines | Fuel pressure drops | Replace immediately |
Regular checks and prompt repairs ensure your Yamaha outboard runs smoothly. Stay vigilant about fuel line conditions for a safer boating experience.
Electrical Connection Insights
Yamaha 4-stroke outboard engines rely on solid electrical connections. Issues can arise from loose wires or corroded connectors. Understanding these connections is vital for optimal performance.
Troubleshooting Electrical Issues
Electrical problems can lead to fuel pump failure. Follow these steps to troubleshoot:
- Check battery voltage. Ensure it’s above 12 volts.
- Inspect wiring for damage. Look for frays or breaks.
- Examine connectors. Ensure they are clean and tight.
- Test the fuel pump relay. A faulty relay can disrupt power.
Use a multimeter to measure voltage at the pump. This helps identify power supply issues.
Ensuring Reliable Electrical Connections
Reliable connections are crucial. Follow these tips to maintain them:
- Use dielectric grease on connectors. This prevents corrosion.
- Regularly inspect wiring harnesses. Replace damaged wires promptly.
- Secure connections with zip ties. This reduces movement and wear.
- Keep terminals clean. Dirt can cause poor conductivity.
| Problem | Solution |
|---|---|
| Corroded connectors | Clean with a wire brush. Apply dielectric grease. |
| Loose wires | Tighten connections. Replace damaged wiring. |
| Faulty relay | Replace relay. Test new relay with a multimeter. |
Regular maintenance ensures your Yamaha outboard runs smoothly. A little attention to electrical connections can prevent bigger problems later.
Fuel Pump Replacement Tutorial
Yamaha 4-stroke outboard motors may face fuel pump issues. Recognizing when to replace the pump is essential. This guide helps you understand when a full replacement is necessary and provides a simple step-by-step process.
When To Consider A Full Replacement
Not all fuel pump problems need replacement. Here are signs to consider:
- Inconsistent Engine Performance: Engine stalls or hesitates.
- Fuel Leaks: Observe any fuel pooling around the pump.
- Unusual Noises: Clicking or whining sounds indicate issues.
- Low Fuel Pressure: Use a gauge to check fuel pressure levels.
If you notice any of these signs, it’s time for a replacement.
Step-by-step Replacement Process
Replacing your Yamaha fuel pump can be straightforward. Follow these steps:
- Gather Tools:
- Socket set
- Wrench
- Screwdriver
- New fuel pump
- Disconnect Battery: Always disconnect the battery first.
- Remove the Old Pump:
Locate the fuel pump. Unscrew it carefully and detach the fuel lines.
- Install the New Pump:
Attach the new pump. Ensure it aligns correctly with the mounting holes.
- Reconnect Fuel Lines: Securely connect the fuel lines to the new pump.
- Reconnect Battery: Once everything is secure, reconnect the battery.
- Test the System: Start the engine and check for leaks.
Follow these steps to ensure a successful replacement. Regular maintenance helps prevent future issues.
Preventive Measures For Fuel Pump Care
Taking care of your Yamaha 4-stroke outboard fuel pump is essential. Proper maintenance can prevent costly repairs. Fuel pump issues often arise from neglect. Follow these preventive measures to keep your fuel pump in top shape.
Routine Maintenance Schedules
Regular maintenance is key to a healthy fuel pump. Create a schedule to check your fuel system. Here are some important tasks to include:
- Inspect fuel lines for cracks or leaks.
- Replace fuel filters as needed.
- Check for moisture in the fuel tank.
- Examine the fuel pump for wear and tear.
- Test the fuel pressure regularly.
Consider the following routine:
| Maintenance Task | Frequency |
|---|---|
| Inspect fuel lines | Every month |
| Replace fuel filters | Every 100 hours |
| Check fuel moisture | Every trip |
| Examine fuel pump | Every 200 hours |
| Test fuel pressure | Every 50 hours |
Best Practices For Fuel Quality And Storage
Fuel quality impacts your fuel pump’s performance. Use high-quality fuel for best results. Follow these best practices:
- Always purchase fuel from reputable sources.
- Store fuel in clean, dry containers.
- Keep containers sealed to prevent contamination.
- Add fuel stabilizers to prevent degradation.
- Use fuel within the recommended time frame.
Remember, clean fuel leads to a healthy fuel pump. Regularly checking fuel quality saves you from future problems.
Professional Help Vs. Diy
Yamaha 4-stroke outboard fuel pump problems can frustrate many boaters. Deciding between seeking professional help or tackling it yourself is crucial. Understanding when to call an expert and how to troubleshoot issues on your own can save time and money.
When To Seek Professional Assistance
Some situations require expert intervention. Here are key signs to look for:
- Persistent Issues: Problems that don’t resolve after basic checks.
- Complex Problems: Issues involving multiple components.
- Safety Concerns: Situations that may lead to accidents.
- Warranty Considerations: Repairing under warranty may require a dealer.
Consulting a professional can ensure proper diagnosis and repair. Their expertise can prevent further damage to your outboard.
Resources For Diy Troubleshooting
For those who want to try DIY methods, many resources exist. Here are some helpful tools and guides:
- Owner’s Manual: Always refer to the Yamaha manual for specific instructions.
- Online Forums: Join boating forums for advice from experienced users.
- YouTube Tutorials: Watch videos on troubleshooting fuel pump issues.
Basic troubleshooting steps include:
- Check fuel lines for clogs or leaks.
- Inspect the fuel filter for blockages.
- Test the fuel pump’s electrical connections.
- Examine the fuel tank for contamination.
Document any findings during your DIY process. This can help professionals if you need to escalate the issue later.
Frequently Asked Questions
What Are Common Yamaha Outboard Fuel Pump Issues?
Common issues include fuel leaks, erratic pressure, and complete pump failure, affecting engine performance.
How To Identify Fuel Pump Problems?
Signs include engine stalling, difficulty starting, and inconsistent power. Listen for unusual noises from the pump.
Can I Fix A Yamaha Fuel Pump Myself?
Basic issues like cleaning or replacing filters can be DIY. Complex repairs may require professional assistance.
How Often Should I Replace The Fuel Pump?
Replacement is recommended every 5 years or after significant fuel system issues. Regular maintenance helps prevent problems.
What Causes Fuel Pump Failure In Yamaha Outboards?
Causes include clogged filters, corrosion, and prolonged inactivity. Fuel quality also significantly impacts pump lifespan.
Conclusion
Understanding Yamaha 4 stroke outboard fuel pump issues is essential for every boat owner. Regular maintenance and timely inspections can prevent costly repairs. Always address any signs of trouble promptly. With the right knowledge, you can keep your outboard running smoothly and enjoy your time on the water.
Stay informed and sail confidently!