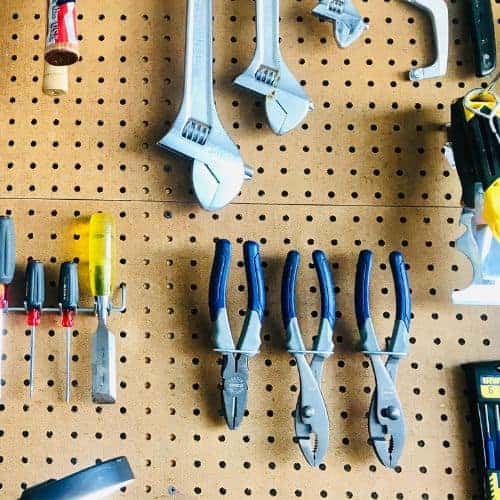
Hanging pliers on a pegboard can transform your workspace from cluttered and chaotic to organized and efficient. Whether you are a DIY enthusiast, a professional mechanic, or just someone who wants their tools in order, learning how to store pliers properly is a small change that brings big results.
When every tool has a home, you spend less time searching and more time working. But many people struggle to find a system that works for them. Pliers come in many shapes and sizes, and the wrong method can lead to messy, hard-to-reach, or even damaged tools.
This guide will show you the best ways to hang pliers on a pegboard, from choosing the right hooks to arranging your layout for quick access. Along the way, you’ll learn practical tips, avoid common mistakes, and discover a few tricks even experienced users often miss.
Let’s dive into the details and set up a pegboard system that makes your pliers easy to find, grab, and use.
Why Hang Pliers On Pegboard?
Pegboards have been a favorite in workshops for decades. But why choose them for pliers specifically? First, pegboards save space. Instead of piling your pliers in a drawer where they tangle, you can hang them in neat rows. This not only looks better but also protects your tools from scratches and wear.
Another key benefit is visibility. When you can see all your pliers at once, you quickly find the one you need. This is especially helpful if you have different types—needle-nose, side-cutters, locking pliers, and more.
Accessibility is a third advantage. Pliers on a pegboard are always within arm’s reach, so you avoid the frustration of searching through toolboxes. Plus, a tidy workspace makes it easier to keep track of which tools are missing or in use.
Finally, pegboards offer flexibility. As your collection grows or changes, you can easily rearrange hooks and holders without drilling new holes or buying more storage.
Understanding Pegboards: Types And Materials
Before you hang a single plier, it’s important to know the kinds of pegboards available. The material and size you choose affect how well your storage system works.
Common Pegboard Materials
- Wooden Pegboards: Often made from MDF or hardboard, these are affordable and widely used. They are sturdy enough for most hand tools but can warp in humid areas.
- Metal Pegboards: These are strong, durable, and can hold heavier tools. Metal pegboards resist moisture and bending, making them ideal for garages or basements.
- Plastic Pegboards: Lightweight and resistant to rust, plastic pegboards are good for light-duty tools. However, they may flex or break under heavy loads.
Pegboard Hole Sizes
Pegboards usually come with holes spaced 1 inch apart. The most common hole diameters are 1/8-inch and 1/4-inch.
- 1/8-inch holes: Best for light tools and smaller hooks.
- 1/4-inch holes: Suitable for heavier hooks and bigger tools.
Matching your hook size to your pegboard is crucial. Using a hook that is too small or too large for the hole can make your setup unstable.
Choosing The Right Pegboard Size
Measure the wall space where you want to mount your pegboard. Think about how many pliers you have now and if you might add more in the future. It’s better to buy a larger board than to run out of room quickly.
Example Pegboard Size Comparison
| Pegboard Size (inches) | Number of Pliers (approx.) | Best Use Case |
|---|---|---|
| 24 x 24 | 8-12 | Small home workshop |
| 36 x 24 | 12-18 | Medium workspace |
| 48 x 32 | 20+ | Professional garage |
Selecting Hooks And Holders For Pliers
Not all hooks are the same. Choosing the right type is essential for keeping your pliers secure and easy to grab.
Types Of Pegboard Hooks
- Straight Hooks: Simple and versatile. Good for hanging pliers by their handles or jaws.
- Double-Prong Hooks: More stable than single hooks. Useful for larger or heavier pliers.
- Looped or “J” Hooks: The curved shape cradles the handle, preventing pliers from slipping off.
- Specialty Pliers Holders: Designed specifically for pliers, these often hold several pairs upright in a row.
- Spring Clips: Hold pliers tightly by their handles. Great for pliers that do not hang well on hooks.
Matching Hooks To Pliers Type
Different pliers may need different hooks. For example, needle-nose pliers fit well on straight or looped hooks, while locking pliers (like Vise-Grips) are heavier and need double-prong hooks.
Hook Comparison Chart
| Pliers Type | Recommended Hook | Stability |
|---|---|---|
| Needle-nose | Straight or looped hook | High |
| Slip-joint | Double-prong hook | Very High |
| Cutting pliers | Straight hook | Medium |
| Locking pliers | Double-prong or specialty holder | Very High |
Common Mistakes When Choosing Hooks
- Using hooks that are too short—pliers can fall off easily.
- Picking hooks that are too thin—hooks bend and become loose.
- Not testing hook fit before hanging many tools.
- Overloading a single hook with multiple heavy pliers.
Tip: Buy a small set of assorted hooks first. Test which types work best for your tools before buying more.
Planning Your Pegboard Layout
A good layout saves time and reduces stress. Here’s how to plan where each plier goes:
Group Pliers By Type Or Size
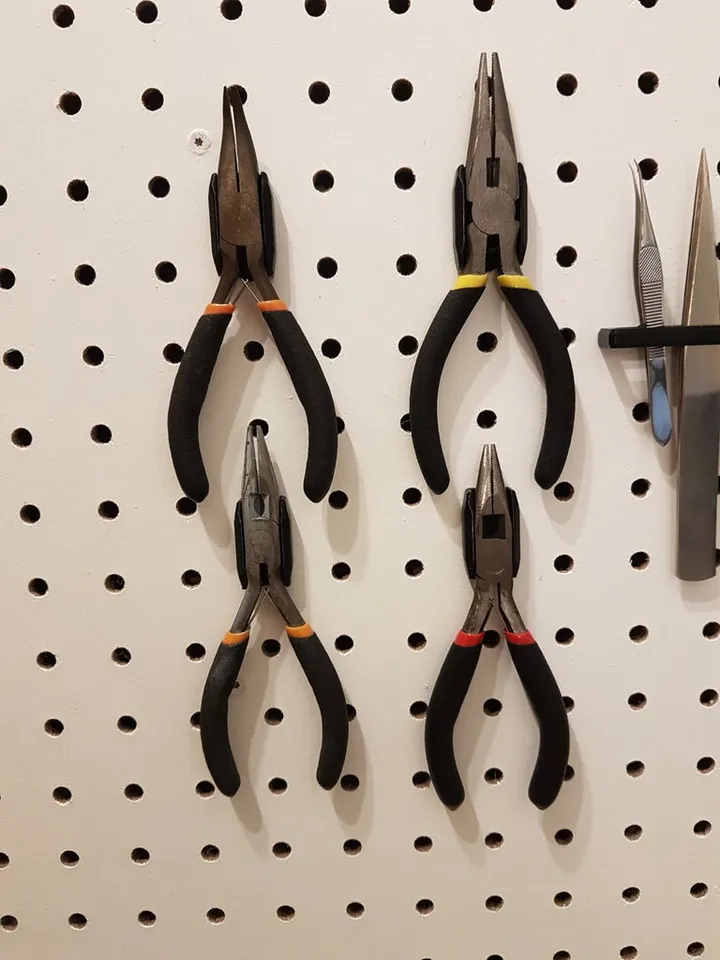
Arrange pliers in groups: all needle-nose together, all cutters together, and so on. This makes it simple to grab the right tool fast.
Place Most-used Pliers At Eye Level
Keep your favorite or most-used pliers between your shoulders and waist. Tools above or below this range are harder to reach and less visible.
Leave Space For Future Tools
Don’t cram every inch of your pegboard. Leave gaps so you can add new pliers or move hooks as your needs change.
Draw Your Layout First
Sketch your pegboard on paper or take a photo and mark where each plier will go. This helps avoid moving hooks around multiple times.
Use Labels For Clarity
If you share your workspace, label each spot with the plier’s name or a picture. This helps everyone know where tools belong.
Installing The Pegboard
Hanging the pegboard properly is as important as the layout. A wobbly or weakly attached board can be dangerous.
Tools And Materials You Need
- Pegboard sheet (wood, metal, or plastic)
- Mounting screws or wall anchors
- Drill and drill bits
- Level
- Spacers (wood strips or pegboard mounting kit)
- Measuring tape
- Pencil
Step-by-step Installation
- Choose the Wall: Find a spot that is dry and easy to reach. Avoid areas near water or where tools might get wet.
- Mark the Area: Use a pencil and level to outline where your pegboard will go.
- Install Spacers: Pegboards need a gap behind them so hooks can go through the holes. Attach wood strips or spacers to the wall first.
- Drill Mounting Holes: Use the drill to make holes in the pegboard and wall.
- Attach Pegboard: Screw the pegboard into the spacers. Make sure it’s level and firmly attached.
- Test Strength: Press gently on the board. It should not move or flex.
Insider tip: Use at least four mounting points for boards larger than 24 x 24 inches. This prevents sagging when you hang heavy tools.
Hanging Pliers: Step-by-step Guide
Now that your pegboard is up and hooks are ready, it’s time to hang your pliers.
Step 1: Sort Your Pliers
Lay out all your pliers on a table. Clean them if needed. Group by type (cutting, gripping, specialty) and by size.
Step 2: Match Pliers To The Right Hooks
For each group, pick the best hook type. Remember, heavier pliers need stronger hooks.
Step 3: Place Hooks On The Pegboard
Start at eye level for the tools you use most. Snap or slide the hooks into the pegboard holes. Make sure they are firmly attached.
Step 4: Hang Pliers By Handles Or Jaws
Most pliers hang best by their handles, but some (like locking pliers) may need to hang by the jaws. Test both ways for each tool.
Step 5: Adjust For Spacing
Space pliers so their handles do not overlap. This prevents tangling and makes each tool easy to grab.
Step 6: Test Access And Fit
Try removing and hanging each plier several times. If any tool is hard to take off or put back, adjust the hook or location.
Step 7: Label (optional)
Add labels below or above each hook if you want extra clarity.
Creative Solutions For Difficult Pliers
Some pliers are tricky to hang. For example, miniature pliers may fall through large hooks, and extra-large pliers may not fit standard holders.
For Small Or Slippery Pliers
- Use spring clips or foam-lined hooks for extra grip.
- Attach a rubber band to the hook to prevent slipping.
For Heavy Or Oversized Pliers
- Use two hooks—one for each handle.
- Try a specialty pliers rack designed for large tools.
- Consider a magnetic strip as backup support.
For Multi-tool Sets
- Use pliers racks that hold several tools upright in a row.
- Mount a small shelf under the pegboard for odd-shaped tools.
Non-obvious insight: If you have pliers with insulated handles, avoid hanging them near sharp metal hooks. Over time, repeated contact can wear down the insulation.
Maintenance: Keeping Your Pegboard System Working
A pegboard is not “set and forget. ” Over time, you’ll need to maintain your storage system.
Regular Checks
- Every few months, check hooks for looseness.
- Wipe off dust and dirt from the board and tools.
- Tighten any mounting screws that have come loose.
Rotating Tools
If you buy new pliers or stop using old ones, update your layout. Remove unused tools to keep the board tidy.
Inspect For Damage
Look for worn-out hooks or cracked pegboard sections. Replace as needed to avoid accidents.
Clean Tools Before Hanging
Dirty or oily pliers can stain your pegboard. Wipe them clean before putting them back.
Examples: Pegboard Setups For Different Workspaces
What works in a large garage might be overkill for a small apartment. Here are some practical examples:
Home Garage
- Use a 36 x 24-inch metal pegboard for durability.
- Group pliers by function (cutting, gripping, specialty).
- Hang pliers in two rows for easy access.
- Add a magnetic strip for tiny tweezers or small pliers.
Apartment Or Small Workshop
- Use a 24 x 24-inch plastic pegboard.
- Hang only most-used pliers; keep extras in a toolbox.
- Use labels for each hook if you share space.
Professional Mechanic’s Shop
- Install several 48 x 32-inch metal pegboards.
- Use heavy-duty double-prong hooks for large locking pliers.
- Keep a pliers rack for small specialty tools.
- Label each hook with the plier’s size and brand.
Non-obvious insight: For family workshops, color-code hooks for each person’s tools. This keeps everyone’s set organized and reduces confusion.
Common Mistakes To Avoid
Many people make the same errors when setting up their pegboard system. Here’s what to watch out for:
- Ignoring hook quality: Cheap hooks bend and fall out easily.
- Overloading the pegboard: Too many heavy tools can pull the board off the wall.
- Hanging pliers too close together: Handles tangle, making tools hard to grab.
- Skipping spacers: Without a gap behind the board, hooks won’t fit.
- Not planning ahead: Filling every inch leaves no room for new tools.
Advanced Tips For Experts
If you want to take your pegboard setup to the next level, try these tips:
- Custom 3D-printed holders: Design your own holders for unique plier shapes.
- Integrated lighting: Add LED strips above or behind your pegboard for better visibility.
- Mobile pegboard panels: Mount pegboards on rolling carts for a flexible workspace.
- Inventory system: Use QR codes or an app to track which tools are on the board.
For more advanced workshop organization ideas, check out resources like Wikipedia’s Pegboard page.
Safety And Care For Pliers
Proper hanging is not just about convenience. It also protects your tools and keeps your workspace safe.
- Keep pliers dry: Moisture causes rust. Store your pegboard in a dry area.
- Avoid over-tight hooks: Hooks that pinch plier handles can damage the grip.
- Check insulation: If you use pliers for electrical work, inspect insulation for wear before hanging.
- Don’t hang broken tools: Remove and repair or replace damaged pliers quickly.
Frequently Asked Questions
How Do I Prevent Pliers From Falling Off The Pegboard?
Use the correct hook size and type for each plier. Double-prong and looped hooks are more secure than straight hooks. Test each hook by shaking the pegboard gently after hanging your tools.
Can I Hang Other Tools With My Pliers On The Same Pegboard?
Yes, pegboards are versatile. You can hang screwdrivers, wrenches, hammers, and even small power tools. Just make sure you use the right hooks and leave enough space between each tool.
How Much Weight Can A Pegboard Hold?
A well-installed metal pegboard with solid wall anchors can hold 50 pounds or more. Wooden and plastic boards have lower limits, usually around 20-30 pounds. Always check the manufacturer’s instructions for your specific board.
What If My Pliers Have Odd-shaped Handles?
Try using spring clips, foam-lined hooks, or specialty pliers racks. For very unusual shapes, consider custom holders or a small shelf under the pegboard.
Do I Need To Clean My Pegboard Regularly?
Yes, dust and dirt can build up over time. Wipe down the board and your pliers every few months. This keeps your workspace clean and helps prevent rust on your tools.
Final Thoughts
Hanging pliers on a pegboard is a simple step that makes a big difference in any workspace. With the right materials, hooks, and layout, you can keep your tools organized, safe, and easy to reach. Take the time to plan your system, test different setups, and maintain your board as you go.
You’ll enjoy a cleaner, more efficient workspace—and you might even find yourself looking forward to your next project. Remember, a little effort in organizing today saves hours of searching tomorrow.