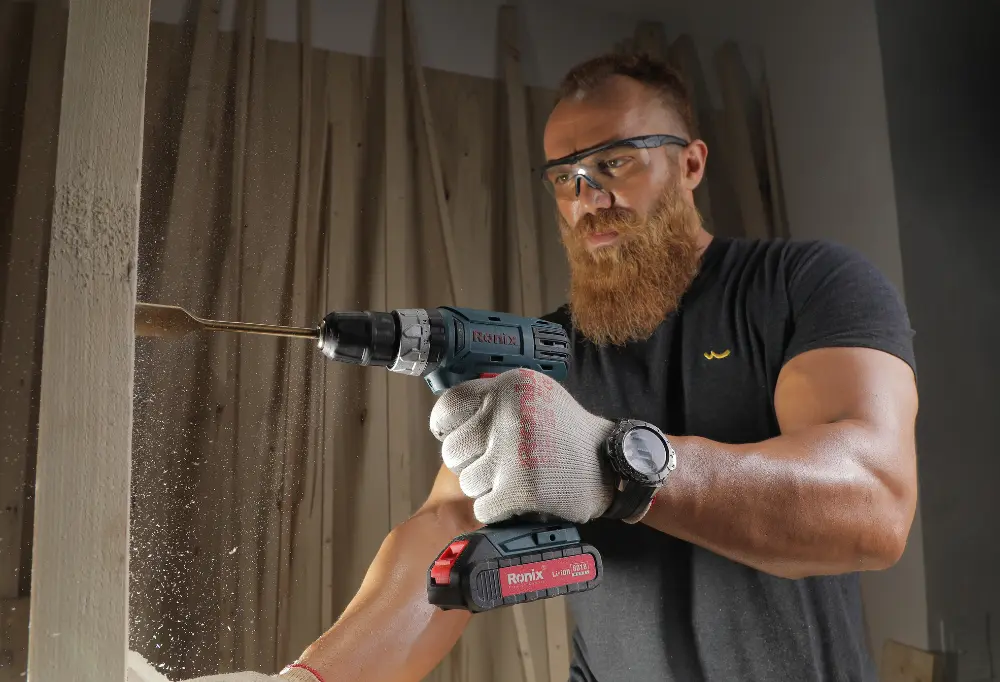
Using a cordless drill can seem simple, but there is more to it than pressing a button and making a hole. Whether you are hanging pictures, building furniture, or fixing something around the house, a cordless drill is one of the most useful tools you can own.
However, using it safely and efficiently requires some knowledge, practice, and a few pro tips. This guide will walk you through everything you need to know about cordless drills — from choosing the right model, understanding how it works, and learning how to drill, drive screws, and care for your tool.
If you want to get better results and avoid common mistakes, keep reading.
Understanding Your Cordless Drill
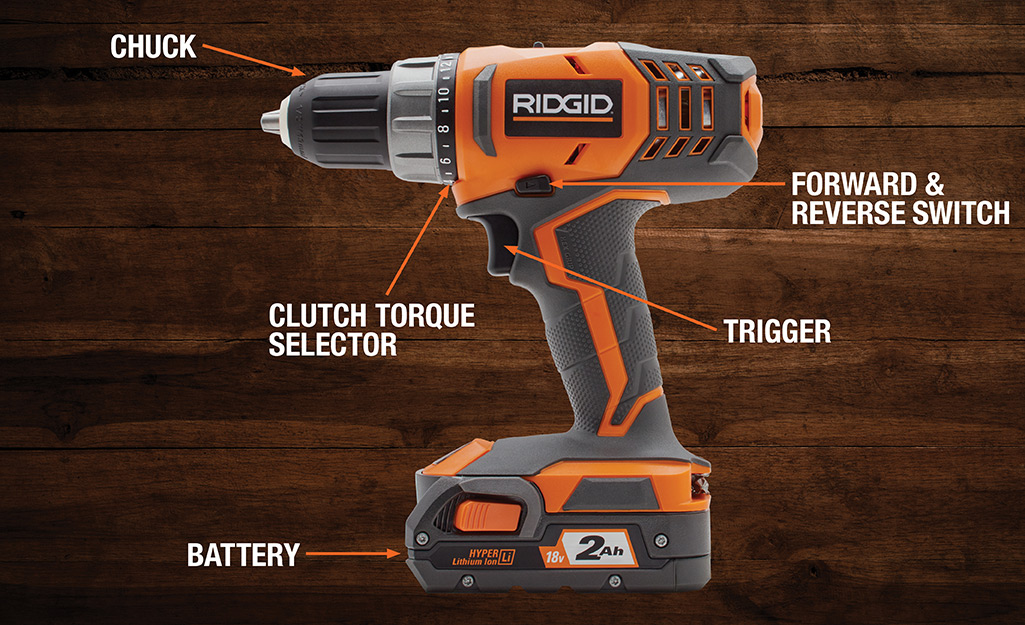
Before you start using a cordless drill, it’s important to know what makes up the tool and how each part works. Most cordless drills have some basic parts: the battery, chuck, clutch, trigger, forward/reverse switch, and torque settings.
The battery powers the drill and is usually rechargeable. Most modern cordless drills use lithium-ion batteries, which are light and last longer. The chuck is the part at the front that holds the drill or screwdriver bit. You can open and close the chuck by twisting it.
The clutch is a ring behind the chuck, often with numbers. It controls how much force the drill uses before stopping—very useful for driving screws without damaging the material. The trigger is what you squeeze to make the drill spin. The harder you press, the faster it turns. Next to the trigger is the forward/reverse switch, which changes the direction of rotation.
Torque settings let you adjust the power for different jobs. Low numbers are for light tasks (like small screws in soft wood), while high numbers are for tougher jobs (like drilling into metal).
Understanding these parts helps you use the drill correctly and safely. Many beginners overlook the clutch, but it’s key to avoiding overdriven screws and stripped holes.
Choosing The Right Cordless Drill
Not all cordless drills are the same. Picking the right one depends on what you plan to do. Here are some important factors to consider:
- Voltage: Common voltages are 12V, 18V, and 20V. Higher voltage means more power, but also more weight. For most home projects, 18V or 20V is a good balance.
- Battery Type: Lithium-ion batteries are the best choice today. They charge quickly and last longer than older types like nickel-cadmium.
- Chuck Size: The most common sizes are 3/8 inch and 1/2 inch. The size tells you how big a bit you can use. For most DIY projects, 3/8 inch is enough.
- Speed Settings: Some drills have two speeds—one for drilling and one for driving screws. This gives you more control.
- Weight and Comfort: A heavy drill can tire your hand, especially during long jobs. Try holding a few drills in the store to see which feels best.
- Brand and Warranty: Well-known brands like DeWalt, Makita, and Bosch often offer better support and longer tool life.
Comparing Popular Cordless Drill Types
Here’s a quick look at the main differences between compact, standard, and hammer drills:
| Drill Type | Main Use | Voltage Range | Weight | Best For |
|---|---|---|---|---|
| Compact Drill | Light tasks | 12V-18V | 1.5-2 kg | Small repairs, furniture |
| Standard Drill | General use | 18V-20V | 2-2.5 kg | DIY, wood, plastic |
| Hammer Drill | Heavy duty | 18V-20V | 2.5-3 kg | Masonry, concrete |
Choosing the right drill will make your work easier and help you avoid buying a tool that’s too weak or too heavy for your needs.
Getting Ready: Safety And Preparation
Before picking up your cordless drill, you need to think about safety and preparation. Personal safety is the first priority. Always wear safety glasses to protect your eyes from flying debris, even for simple tasks. If you’re drilling into metal or masonry, wear hearing protection as well.
Check your workspace. Remove any clutter, and make sure your workpiece is stable. If you’re drilling into a wall, use a stud finder to avoid hitting electrical wires or plumbing. Mark the spot you want to drill with a pencil or masking tape. The tape also helps prevent the drill bit from slipping on smooth surfaces.
Inspect your drill and battery. Make sure the battery is charged and attached firmly. Check the drill bit for damage or dullness—using a blunt bit makes the tool work harder and gives a messy result.
One detail many users forget: always check the direction switch before starting. If it’s set to reverse, the drill won’t drive the screw or make a clean hole.
Choosing The Right Drill Bit
The drill bit is just as important as the drill itself. Using the wrong bit can ruin your project or damage your tool. Here’s how to choose the right one:
- Twist bits are for wood, plastic, and light metals.
- Spade bits create large, flat-bottomed holes in wood.
- Masonry bits are for concrete, brick, or stone. They often have a carbide tip.
- Brad point bits are best for precise wood drilling.
- Hole saws cut large holes, for example, for door hardware.
Make sure the bit matches the material. Never use a wood bit on metal or a masonry bit on wood. Using the right bit also helps the battery last longer.
Drill Bit Size Chart Example
To help you pick the right bit for common screw sizes, here is a simple guide:
| Screw Size | Drill Bit Size (Wood) | Drill Bit Size (Metal) |
|---|---|---|
| #6 | 1/16″ | 5/64″ |
| #8 | 7/64″ | 1/8″ |
| #10 | 1/8″ | 9/64″ |
Having the right bit ready before you start makes the work smoother and helps avoid mistakes.
Fitting And Changing Drill Bits
Most cordless drills today use a keyless chuck. This lets you change bits without extra tools. Here’s how to do it:
- Hold the drill with one hand and twist the chuck with the other to open it.
- Insert the bit as far as it will go.
- Tighten the chuck by twisting it the other way until you feel resistance.
- Give the bit a gentle pull to check it’s secure.
Some drills use a hex chuck for quick bit changes—just push the bit in and it locks automatically.
A common mistake is not tightening the chuck enough, which can make the bit slip during use. If you hear a clicking sound when tightening, that means the bit is secure.
Setting The Torque And Speed
The clutch and speed settings on your cordless drill are not just for show—they help you control how much force and speed the drill uses.
- For driving screws, use a low speed and low torque setting. This gives you more control and prevents stripping the screw or damaging the material.
- For drilling holes, use a higher speed and higher torque.
Many drills have a two-speed switch: one for low speed, high torque (driving screws), and one for high speed, low torque (drilling holes). Adjust the clutch to match the size of the screw or the toughness of the material.
A smart tip: Start with a low setting and increase if needed. This reduces the risk of accidents and gives a cleaner result.
Credit: ronixtools.com
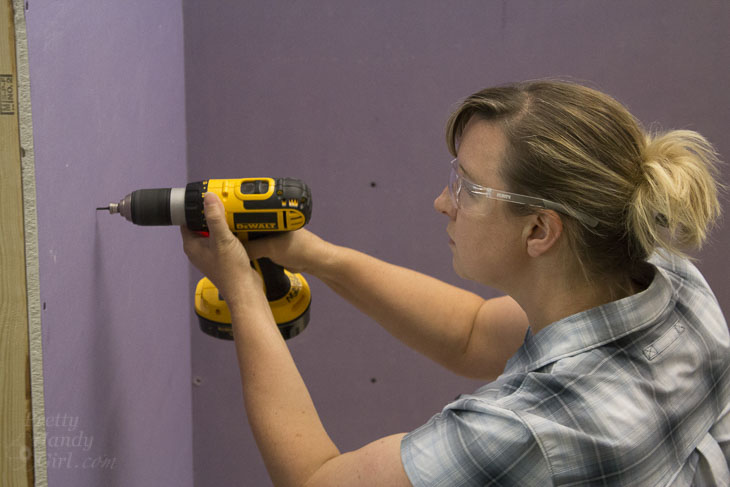
How To Drill A Hole
Drilling a hole with a cordless drill is a basic skill, but doing it well makes a big difference. Follow these steps for best results:
- Mark the spot: Use a pencil or tape to mark where you want the hole.
- Secure the material: Use a clamp if possible to hold the workpiece steady.
- Select the right bit: Match the bit to the material and desired hole size.
- Set the speed and torque: For wood or plastic, use a medium speed. For metal, use a slower speed.
- Hold the drill properly: Keep a firm grip with both hands, and hold the drill perpendicular to the surface.
- Start slowly: Squeeze the trigger gently to start the hole.
- Increase speed: Once the bit bites into the material, increase speed for a smooth cut.
- Drill to depth: Stop once you reach the desired depth. Some drills have a depth stop attachment, or you can wrap tape around the bit to mark the depth.
If you’re drilling into a wall, pull the bit out every few seconds to clear dust and avoid overheating.
How To Drive Screws
Cordless drills are often used as screwdrivers. To drive screws:
- Insert the screwdriver bit: Use a bit that matches the screw head—Phillips, flat, or Torx.
- Set the clutch: Use a lower torque setting to avoid overdriving.
- Place the screw: Hold the screw in place or use a magnetic bit holder.
- Apply steady pressure: Start slowly and let the drill do the work.
- Increase speed if needed: For long screws, increase speed as the screw goes in.
Driving screws with the wrong bit can strip the screw head. Always match the bit to the screw.
A useful tip: For long or tough screws, drill a pilot hole first. This reduces splitting and makes driving easier.
Advanced Drill Features And Attachments
Modern cordless drills often come with extra features and attachments. Here’s a look at some you might find:
- Hammer function: Lets you drill into concrete or masonry by adding a pounding action.
- LED light: Illuminates dark workspaces.
- Level bubble: Helps keep the drill straight.
- Side handle: Adds control for heavy-duty jobs.
You can also get attachments like right-angle adapters for tight spaces, or depth stops for precise hole depths.
If you’re using advanced features, read the manual to avoid damaging the tool.
Common Mistakes And How To Avoid Them
Many beginners make the same errors when using a cordless drill. Here are some to watch for:
- Using the wrong bit: Always choose a bit that matches the material and the screw or hole size.
- Forgetting to check torque: Too much torque can strip screws or break bits.
- Drilling at the wrong angle: Hold the drill perpendicular unless the job requires a different angle.
- Not securing the material: A moving workpiece can lead to poor results or injury.
- Ignoring battery charge: Always start with a fully charged battery to avoid losing power mid-task.
- Letting the bit overheat: If you see smoke or smell burning, stop and let the bit cool.
A non-obvious tip: Let the drill do the work. Pushing too hard can damage the motor or the bit. Steady, moderate pressure is best.
Credit: www.homedepot.com
Drill Maintenance And Care
A cordless drill will last much longer with regular care. Here’s how to keep your tool in top shape:
- Clean the drill: Wipe off dust after each use. Clean the vents to avoid overheating.
- Check the chuck: Remove bits and wipe out any debris.
- Charge the battery: Store the battery charged, but avoid leaving it on the charger for days.
- Lubricate moving parts: A drop of oil on the chuck keeps it working smoothly.
- Store properly: Keep the drill in a case or dry place. Avoid humid areas.
If you notice unusual sounds or smells, stop using the drill and check for problems.
Battery Life And Charging Tips
Cordless drills are only as good as their batteries. Here’s how to get the most from yours:
- Fully charge before first use: This “primes” the battery for longer life.
- Avoid deep discharges: Try not to run the battery completely flat; recharge when you notice power dropping.
- Keep batteries cool: Heat shortens battery life. Store batteries away from sunlight or heaters.
- Use the right charger: Always use the charger that comes with your drill.
Many users don’t realize that lithium-ion batteries last longer if you keep them between 20% and 80% charge, rather than letting them drain completely.
Drilling Different Materials
Not all materials are the same. Here are some tips for drilling into common materials:
Wood
- Use twist or brad point bits.
- For hard woods, go slower to avoid burning the wood.
- Clamp thin pieces to prevent splitting.
Metal
- Use high-speed steel (HSS) bits.
- Apply a drop of oil to cool the bit and make drilling easier.
- Use slow speed and steady pressure.
Concrete Or Masonry
- Use a masonry bit and hammer function.
- Start with a small pilot hole, then use the final size.
- Remove dust from the hole for better results.
Plastic
- Use a twist bit.
- Go slow to avoid cracking or melting the plastic.
- Support the back of thin plastic to prevent breaking.
Selecting the right technique for each material ensures clean holes and extends the life of both bits and drill.
Using A Cordless Drill For Projects
A cordless drill is useful for many home and DIY projects. Here are some ideas where your drill will shine:
- Assembling furniture: Drive screws quickly and accurately.
- Hanging shelves or pictures: Drill precise holes for anchors.
- Building a deck: Drill pilot holes and drive large screws.
- Electrical work: Make clean holes for wiring.
- Plumbing: Drill through cabinets for pipes.
One non-obvious use: With a mixing paddle attachment, you can mix paint, drywall compound, or even cement.
Cordless Drill Safety Reminders
While cordless drills are safer than many power tools, you still need to be careful:
- Never wear loose clothing or jewelry near the drill.
- Always remove the battery before changing bits or cleaning.
- Keep hands away from the rotating bit.
- Do not use a drill in wet conditions unless it is rated for it.
- If the drill jams, release the trigger and remove the bit safely.
Respect the tool, and it will serve you well for years.
Troubleshooting Common Problems
Even with good care, you may run into issues. Here’s how to fix the most common ones:
- Drill won’t start: Check the battery charge and connection.
- Bit slips in the chuck: Tighten the chuck firmly, or replace if worn.
- Drill makes strange noises: Stop and inspect for debris or damage.
- Battery won’t charge: Try a different charger or battery to isolate the problem.
- Overheating: Let the drill cool before continuing; clean vents if needed.
If you can’t solve the problem, check your warranty or contact the manufacturer.
Comparing Cordless Drill Features
When shopping for a cordless drill, compare more than just price. Here are some features that matter:
| Feature | Basic Model | Advanced Model |
|---|---|---|
| Battery Type | NiCd | Lithium-Ion |
| LED Light | No | Yes |
| Clutch Settings | 10-12 | 20+ |
| Speed Gears | 1 | 2 |
| Weight | 2.5 kg | 2 kg |
Looking beyond the basics can help you find a drill that fits your needs and budget.
When To Replace Your Cordless Drill
Even the best cordless drills wear out. Here are signs it’s time to replace yours:
- The battery won’t hold a charge and replacements are expensive.
- The motor makes grinding noises or loses power.
- The chuck is worn and bits slip even after tightening.
- Spare parts are no longer available.
Modern drills offer better batteries, more features, and lighter designs. Sometimes, upgrading saves you frustration and money over time.
Credit: prettyhandygirl.com
Where To Learn More
If you want to dive deeper into cordless drill technology or safety, check out resources from trusted sources like Wikipedia. These sites offer in-depth guides and updates on the latest tools.
Frequently Asked Questions
How Long Does A Cordless Drill Battery Last?
Most lithium-ion batteries last between 3 to 5 years or about 300 to 500 charge cycles. The runtime per charge depends on the drill’s power, the work you’re doing, and the battery’s capacity (measured in amp-hours). Heavier tasks drain the battery faster.
Can I Use My Cordless Drill As A Screwdriver?
Yes, cordless drills are perfect for driving screws. Use the right screwdriver bit and set the clutch to a low setting to avoid overdriving or stripping the screw.
What Does The Clutch Do On A Cordless Drill?
The clutch controls how much force is applied when driving screws. It “slips” when the set torque is reached, preventing damage to screws, bits, or the material.
Why Is My Drill Bit Getting Stuck?
Bits get stuck if the hole is too small, the bit is dull, or you’re drilling into tough material without the right bit. To avoid this, use sharp bits, apply steady pressure, and back out the bit regularly to clear dust.
Is A Brushless Motor Better For A Cordless Drill?
Brushless motors are more efficient, produce less heat, and last longer. They also deliver more power and run time from the same battery compared to brushed motors.
Using a cordless drill opens up many possibilities for DIY and home improvement. With the right knowledge and a bit of care, you’ll get great results and keep your tool running for years.