A belt sander is a power tool that stands out for its strength, speed, and ability to shape, smooth, and finish wood and other materials quickly. If you’ve ever walked into a woodworking shop, you’ve probably seen or heard one in action—its loud hum and the smell of freshly sanded wood are hard to miss. But what exactly is a belt sander used for, and why do so many professionals and DIY enthusiasts rely on it? This article explores every aspect of the belt sander, from its main uses to advanced techniques, safety tips, and more. Whether you’re a beginner or an experienced craftsperson, you’ll find clear explanations and practical advice to get the most from this powerful tool.
Understanding The Belt Sander
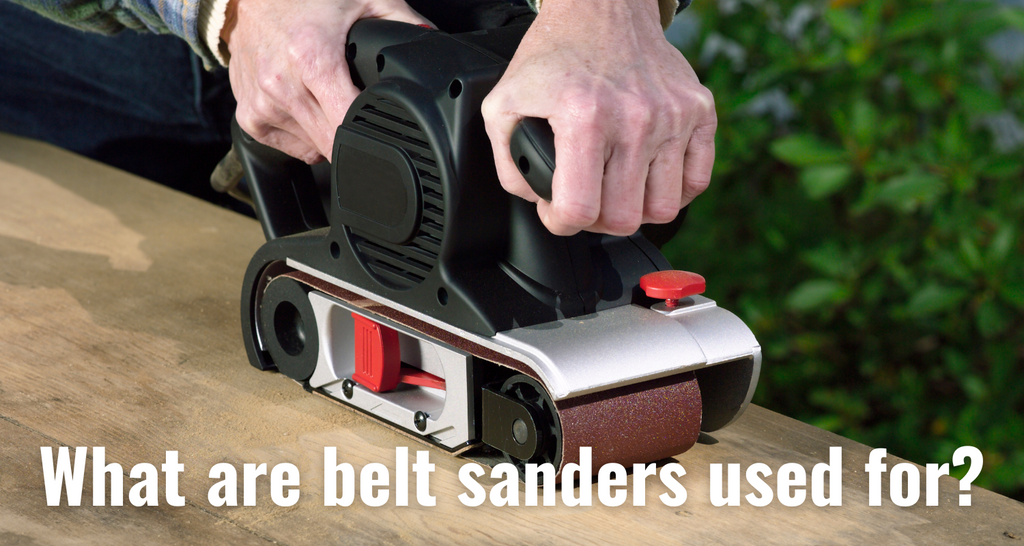
A belt sander uses a continuous loop of abrasive sandpaper mounted on two drums. As the motor powers the drums, the belt spins rapidly across a flat base. This setup allows the sander to remove material quickly and evenly. Belt sanders come in handheld (portable) and stationary (benchtop) versions, each designed for specific tasks. Handheld models are great for moving across surfaces, while stationary ones are used for smaller pieces that you move against the belt.
Most belt sanders are designed for woodworking, but they’re also used on metal, plastic, and even painted surfaces. They’re not delicate tools—they’re built for heavy-duty work, from leveling uneven boards to stripping paint. For fine detail sanding, other sanders like orbital or detail sanders are better suited.
Main Uses Of A Belt Sander
Belt sanders are popular because they can handle many tough jobs that would be slow or difficult with hand sanding. Here are the most important uses:
1. Rapid Material Removal
When you need to remove a lot of material fast—such as leveling a high spot on a wood floor or smoothing rough-cut lumber—a belt sander is the tool of choice. The wide, powerful belt sands away wood, glue, or paint much faster than most other sanders.
2. Surface Preparation
Before painting, staining, or finishing wood, it’s important to create a smooth, even surface. Belt sanders excel at preparing large surfaces, making them ready for finer sanding or finishing. Professionals often start with a belt sander, then move to less aggressive sanders for the final finish.
3. Smoothing Edges And Joints
Joining two pieces of wood often leaves uneven edges or glue lines. A belt sander can quickly even out these areas, creating flush joints that look clean and professional.
4. Removing Paint Or Varnish
Old paint or varnish can be difficult to strip, especially from large surfaces like floors, doors, or tables. The belt sander’s aggressive action makes it ideal for removing tough coatings. However, it’s important to use the right grit and technique to avoid damaging the wood underneath.
5. Leveling Uneven Surfaces
Wood floors, tables, or countertops often have high spots that need leveling. A belt sander can flatten these areas efficiently. Some professionals use it as a first step in refinishing hardwood floors.
6. Shaping And Rounding
Although belt sanders are not as precise as specialty tools, they can be used to shape and round edges. For example, you can create a gentle curve on the edge of a board or smooth out a rough corner.
7. Sharpening Tools
Stationary belt sanders are sometimes used to sharpen chisels, axes, or even knives. The continuous belt provides a flat grinding surface, but you must be careful not to overheat or damage the blade.
8. Metalworking
With the correct abrasive belt, a belt sander can also grind and finish metals. This is common in metal fabrication shops, where the sander is used to smooth welds, remove rust, or shape parts.
9. Removing Rust
Old metal tools or hardware often develop rust. A belt sander equipped with a coarse belt can quickly clean up these items, restoring their appearance and function.
10. Finishing Projects
After shaping and leveling, a belt sander can be used with a finer grit belt to give wood a smooth, even finish before applying paint or varnish.

Credit: universalgrinding.com
Types Of Belt Sanders
Not all belt sanders are the same. The right type depends on your needs, workspace, and the materials you work with.
Handheld Belt Sanders
These are portable and can be moved across large surfaces. They’re perfect for floors, doors, tables, and even outdoor decks. Sizes vary, but the most common belt width is 3 or 4 inches.
Stationary (benchtop) Belt Sanders
These stay in one place, and you bring the workpiece to the sander. They’re often combined with a disc sander. Benchtop models are great for smaller pieces, edges, and detail work.
Mini Belt Sanders
Designed for hobbyists or small-scale jobs, mini belt sanders are compact and easy to control. They’re useful for model-making, crafts, or small repairs.
Floor Belt Sanders
These are heavy-duty machines designed for sanding large areas of flooring. They’re more powerful and often used by professionals.
Here’s a simple comparison between main types:
| Type | Best For | Typical Size | Mobility |
|---|---|---|---|
| Handheld | Large surfaces, doors, decks | 3–4 inch belt width | Portable |
| Benchtop | Small pieces, edges | 2–6 inch belt width | Stationary |
| Mini | Detail work, crafts | 1–2 inch belt width | Portable |
| Floor | Floor sanding | 8–12 inch belt width | Stationary/Heavy |
Choosing The Right Belt Sander
Selecting the best belt sander depends on your projects, workspace, and experience level. Here are key factors to consider:
Size And Power
A larger sander covers more area quickly but can be harder to control. Smaller models are better for detail work. Most handheld sanders range from 5 to 12 amps.
Belt Size
Standard sizes are 3×21, 3×18, and 4×24 inches. The longer the belt, the more surface you can cover in a single pass.
Variable Speed
Some models let you adjust the speed. Lower speeds are good for delicate work, while higher speeds remove material faster.
Dust Collection
Sanding creates a lot of dust. Good models have a built-in dust bag or can connect to a shop vacuum. This keeps your work area cleaner and protects your lungs.
Ergonomics
Comfortable handles and low vibration make long jobs easier. Try holding the sander before you buy to see if it feels right.
Price And Brand
Well-known brands often offer better reliability and warranties. Prices range from budget models around $60 to professional ones over $300.
Here’s a side-by-side look at key features:
| Feature | Why It Matters | What to Look For |
|---|---|---|
| Power (Amps) | Stronger motor = faster sanding | 8+ amps for heavy use |
| Belt Size | Wider belt = covers more surface | 3×21″ for general use |
| Speed Control | Match speed to job | Variable speed dial |
| Dust Collection | Reduces mess, improves health | Large dust bag or vacuum port |
| Comfort | Less fatigue during use | Ergonomic grip, balanced weight |

Credit: en.wikipedia.org
Using A Belt Sander: Step-by-step Guide
A belt sander is simple to use, but technique matters. Here’s how to get great results:
1. Choose The Right Sandpaper
Belt sanders use abrasive belts that come in different grits. Coarse grits (40–60) remove material quickly. Medium grits (80–120) smooth surfaces. Fine grits (150–240) are for finishing. Always start with a coarser grit and move to finer grits as you progress.
2. Prepare The Work Area
Clear your workspace of clutter. Wear safety glasses, a dust mask, and hearing protection. Make sure your piece is securely clamped or held in place.
3. Install The Belt
Unplug the sander. Release the tension lever, slip the belt onto the drums, and make sure the arrows on the belt match the direction on the sander. Tighten the lever and check that the belt is centered.
4. Set The Speed (if Available)
For delicate work or soft woods, use a lower speed. For heavy material removal, go higher.
5. Start Sanding
Hold the sander with both hands. Start the sander before contacting the workpiece. Lower it gently onto the surface. Move the sander in the direction of the wood grain to avoid scratches.
6. Keep Moving
Don’t let the sander sit in one spot—it will dig a groove. Move it slowly and evenly, overlapping each pass slightly.
7. Check Your Progress
Stop and check your work often. Change to a finer grit when the surface is smooth. Clean away dust before switching grits.
8. Finish Up
When done, turn off the sander and wait for it to stop before setting it down. Clean the tool and empty the dust bag.
Advanced Tips And Techniques
Belt sanders are powerful, but a few expert tips can help you achieve even better results and avoid mistakes.
1. Avoiding Gouges
One common mistake is pressing too hard or letting the sander stay in one spot, which causes gouges. Let the weight of the tool do the work. Practice keeping the sander flat and moving at a steady pace.
2. Sanding To The Edge
Getting close to edges without rounding them takes control. Use the front edge of the belt and slow, careful movements. For very sharp edges, finish with a hand sander.
3. Dust Management
Fine dust is not only messy—it can harm your lungs and damage your sander. Always use the dust bag or connect a vacuum if possible. Clean the filter regularly.
4. Working With Metal
If you’re sanding metal, use belts designed for metal. Wood belts will wear out quickly and may clog. Also, be aware that sanding metal can create sparks—keep flammable materials away.
5. Leveling Large Surfaces
For big surfaces, like a table top, mark the high spots with a pencil. Sand these areas first, then even out the rest. Check your progress with a straight edge.
6. Changing Belts Regularly
Dull belts don’t cut well and can burn your work. Change belts as soon as you notice they’re not working efficiently.
7. Using The Sander Upside Down
Some stationary belt sanders can be used upside down, with the belt facing up. This lets you bring small pieces to the belt for more control. Always use the proper safety guard.
8. Cool-down Periods
For long sanding jobs, give the sander a break every 10–15 minutes. Motors can overheat, shortening the life of your tool.
9. Cleaning The Belt
If your sanding belt gets clogged with resin or dust, try a belt cleaning stick (sometimes called a sanding belt eraser). This can extend the life of your belts and save money.
10. Checking Belt Tracking
If the belt drifts to one side, use the tracking knob (usually on the side of the sander) to re-center it. A misaligned belt can damage your project and the tool.
Credit: engineerwarehouse.com
Common Mistakes To Avoid
Even experienced users sometimes make mistakes with belt sanders. Here are errors to watch out for:
- Using the wrong grit – Starting with too fine a grit takes longer and can clog the belt. Always begin with a coarser grit for heavy removal.
- Sanding across the grain – Moving the sander against the wood grain leaves scratches that are hard to hide.
- Not securing the workpiece – If your wood moves while sanding, you can end up with uneven surfaces.
- Applying too much pressure – Pressing hard can burn the wood, damage the belt, and wear out the motor.
- Ignoring dust collection – Dust builds up quickly and can make the work area slippery and unhealthy.
- Not checking the belt direction – Belts have arrows showing the direction of travel. Installing them backward reduces effectiveness.
- Letting the sander run idle on the surface – Always keep the sander moving to avoid creating dips or grooves.
Belt Sander Safety
Belt sanders are powerful tools, so safety is important.
- Always wear safety glasses and a dust mask.
- Keep fingers away from the moving belt.
- Don’t wear loose clothing or jewelry that can get caught.
- Hold the sander firmly with both hands.
- Unplug the tool before changing belts or making adjustments.
- Use hearing protection—the motor is loud.
- Work in a well-ventilated area.
- Never leave the sander running unattended.
Maintenance And Care
Taking care of your belt sander helps it last longer and work better.
Cleaning
After each use, unplug the sander and brush off dust. Empty the dust bag or canister. Occasionally clean the belt with a cleaning stick.
Checking Belts
Inspect belts for tears, wear, or clogging. Replace as needed. Store belts flat in a dry area to avoid curling.
Lubrication
Some models need occasional lubrication of moving parts. Check your manual.
Inspecting The Power Cord
Look for cracks or cuts in the cord. Replace damaged cords to avoid electric shocks.
Storing Properly
Keep the sander in a dry place, away from moisture and direct sunlight. Store it with the tension released from the belt to prevent stretching.
Belt Sanders Vs. Other Sanders
You might wonder how a belt sander compares to other common sanders. Here’s a quick overview:
| Sander Type | Best For | Strengths | Weaknesses |
|---|---|---|---|
| Belt Sander | Heavy material removal, large surfaces | Very fast, powerful | Can gouge, not for fine detail |
| Orbital Sander | General finishing, medium sanding | Smoother finish, easy to control | Slower, less aggressive |
| Detail Sander | Small areas, corners | Precise, reaches tight spots | Small surface, slow |
| Random Orbital Sander | Finishing, swirl-free sanding | Versatile, smooth finish | Not for heavy removal |
When Not To Use A Belt Sander
While a belt sander is excellent for big jobs, there are times when it’s not the right tool:
- Fine finishing – For the final sanding before painting or staining, use a less aggressive sander.
- Delicate materials – Thin veneers or softwoods can be damaged easily.
- Tight corners or detailed shapes – A detail or orbital sander works better here.
- Small pieces – It’s hard to control the sander on tiny workpieces.
Real-world Examples
To see how versatile a belt sander can be, consider these real-life scenarios:
- Refinishing a wood floor: Professionals use a heavy-duty floor belt sander to remove old finish and level boards before applying a new finish.
- Making a cutting board: After glue-up, a belt sander quickly evens out joints and smooths the surface.
- Restoring a rusty tool: A coarse belt on a stationary sander strips away rust, saving time compared to wire brushing.
- Building a table: The sander flattens the top, evens the edges, and prepares the wood for finishing.
Environmental Impact And Dust Control
Sanding produces a lot of dust, which can affect air quality at home or in your workshop. Some tips for minimizing the impact:
- Use the dust collection system on your sander.
- Wear a mask and work in a ventilated area.
- Clean up dust regularly to prevent buildup.
- Consider using low-dust sandpaper or a wet sanding method for certain jobs.
Proper dust control helps keep you healthy and protects your workspace.
Innovations And Recent Trends
Belt sanders have seen new features in recent years:
- Variable speed controls for more precise sanding.
- Brushless motors that last longer and run cooler.
- Improved dust collection, with HEPA filters for better air quality.
- Cordless models for greater mobility.
Manufacturers continue to improve comfort, efficiency, and safety, making belt sanders more accessible for beginners and pros alike.
For a comprehensive overview of belt sanders and their history, you can visit Wikipedia.
Frequently Asked Questions
What Is The Main Advantage Of A Belt Sander?
The main advantage is rapid material removal. A belt sander can flatten, smooth, or strip large surfaces much faster than other sanders, making it ideal for big projects.
Can You Use A Belt Sander On Metal?
Yes, with the right abrasive belt, you can use a belt sander to grind or polish metal. Always use belts designed for metalwork to avoid clogging and overheating.
How Do You Prevent Gouges When Using A Belt Sander?
To avoid gouges, keep the sander moving at all times. Don’t press too hard; let the tool’s weight do the work. Sand in the direction of the grain and check your progress often.
What Grit Sandpaper Should I Use With A Belt Sander?
Start with a coarse grit (40–60) for heavy removal, then move to medium (80–120) and finish with fine (150–240) as needed. The right grit depends on your project and how much material you need to remove.
Is A Belt Sander Safe For Beginners?
With the right safety gear and by following instructions, a belt sander is safe for beginners. Practice on scrap wood first, use both hands, and always wear safety glasses and a dust mask.
A belt sander is a tool that can save you hours of hard labor and help you achieve professional-quality results. By understanding its uses, features, and safety rules, you can make the most of this powerful tool in your workshop or home projects.