Hanging pegboard in your garage can change the way you work and organize tools. A simple wall can become a smart storage system, making every tool easy to find and grab. But getting it right is more than just screwing a board to the wall.
Many people miss small details, leading to weak boards, falling tools, or wasted space. If you want a durable, safe, and useful pegboard setup, you need to plan, measure, and use the right materials.
This guide breaks down every step in clear language, showing you how to hang pegboard in your garage like a pro. From choosing the right board to adding hooks and shelves, you’ll learn practical tips that most beginners overlook. You’ll also see how to avoid common mistakes that can cost you time and money.
Whether you’re a first-timer or want to improve your current setup, this is your complete resource.
Why Hang Pegboard In Your Garage?
A garage often becomes a messy space. Tools pile up, things get lost, and finding what you need wastes time. Pegboard solves these problems in a simple way. It helps you:
- Maximize wall space – Vertical storage keeps the floor clear.
- Find tools quickly – Each tool has a visible spot.
- Change layout easily – Move hooks and shelves as your needs change.
- Improve safety – Hanging sharp or heavy tools keeps them off the ground.
- Increase workspace – More room for projects, less clutter.
Surveys show that a well-organized garage can even increase your home’s value. According to a report by the National Association of Realtors, 78% of home buyers see garage storage as a key selling point. Pegboards are also budget-friendly compared to cabinets or custom racks.
Understanding Pegboard Types And Materials
Not all pegboards are the same. The material you choose affects strength, cost, and appearance. The three main types are:
1. Masonite (hardboard) Pegboard
This is the most common type, made from compressed wood fibers. It is lightweight, easy to cut, and widely available. Standard thickness is 1/4 inch. Masonite is good for most hand tools but can sag under heavy weight. It is also sensitive to moisture, which is common in garages.
2. Metal Pegboard
Made from steel or aluminum, metal pegboard is strong and holds heavy tools. It resists moisture, doesn’t warp, and lasts for years. The main downside is cost—metal boards are usually 2-3 times more expensive than masonite. They also weigh more and are harder to cut to size.
3. Plastic Pegboard
Plastic boards are light, moisture-proof, and easy to clean. They often use special hooks, which can be good or bad. Some brands lock the hooks in place, so they never fall out. Plastic pegboard isn’t as strong as metal but works well for lighter tools or damp garages.
Comparison Of Pegboard Materials
Here’s a quick look at the main differences:
| Pegboard Type | Strength | Moisture Resistance | Cost |
|---|---|---|---|
| Masonite (Hardboard) | Medium | Low | Low |
| Metal | High | High | High |
| Plastic | Low-Medium | High | Medium |
Non-obvious tip: Many beginners skip metal or plastic boards due to price, but in humid climates, these materials last much longer and prevent mold.
Tools And Materials You Need
Gather everything before you start. Here’s a full list for a basic pegboard installation:
- Pegboard sheets (choose the size and material)
- Wooden furring strips (1×2 inch boards, for mounting)
- Screws (2-3 inch for furring strips, 1-inch for pegboard)
- Wall anchors (if no studs are available)
- Drill and drill bits
- Level
- Stud finder
- Tape measure
- Pencil or marker
- Saw (if you need to cut furring strips or pegboard)
- Safety glasses and gloves
Extra options: Paint, sandpaper, or finishing trim for a clean look. Special pegboard spacers are available but furring strips are stronger.
Planning Your Pegboard Layout
A little planning saves a lot of headaches later. Think about what you want to store and where you want the board.
Measure Your Wall Space
Use a tape measure to find the width and height of the area. Common pegboard sheet sizes are 2×4 feet, 4×4 feet, or 4×8 feet. Choose a size that fits your wall and leaves room for doors, outlets, or switches.
Mark the top and bottom edges with a pencil.
Find Wall Studs
Pegboard needs support, especially for heavy tools. Use a stud finder to locate vertical wooden studs in the wall. Mark these with a pencil. If you can’t find studs, you’ll need to use wall anchors for extra holding power.
Decide On Board Height
Hang the board so the top is at or just above eye level. This makes it easy to reach tools but keeps the floor clear. For most people, 5 to 6 feet from the floor to the top edge works well.
Plan For Outlets And Obstructions
If there’s an electrical outlet, switch, or pipe in the area, plan to cut the pegboard around it. Always keep at least a few inches of space at the bottom to avoid water or damage.
Non-obvious tip: Leave a small gap (1-2 inches) between pegboard sheets if you’re mounting several in a row. This allows for expansion and easier replacement later.

Cutting Pegboard And Furring Strips
Most hardware stores will cut pegboard for you, but you may need to trim it at home.
Cutting Pegboard
Use a circular saw or jigsaw for straight cuts. Always wear safety glasses. Clamp the board to a work table to keep it steady. Mark your cut line with tape or pencil. Cut slowly to avoid splinters.
Cutting Furring Strips
Measure and cut wooden furring strips to match the width of your pegboard. You’ll need at least three strips: one for the top, one for the middle, and one for the bottom. For large boards, add extra strips every 16-24 inches for support.
Pro tip: Sand the edges of furring strips and pegboard after cutting. This prevents splinters and makes the final look cleaner.
Painting Or Finishing (optional)
Some people like to paint pegboard to match their garage or add personality. Use a spray primer first, then a spray paint made for wood or metal. Make sure the paint doesn’t clog the peg holes—use light coats and keep the spray moving.
Let the board dry completely before installation.
You can also add a clear sealant to masonite pegboard for moisture resistance.
How To Mount Furring Strips
Furring strips create the space needed behind the pegboard for hooks to fit. This is a step many beginners get wrong, leading to a board that sits flat against the wall (and can’t hold hooks).
Step 1: Position The Strips
Hold each furring strip against the wall, lining up with the pencil marks for the top, middle, and bottom of your pegboard area. Use a level to make sure each strip is straight.
Step 2: Attach To Studs
Drill pilot holes through the furring strip and into the wall studs. Use 2-3 inch wood screws to anchor the strips. For a 4×8 foot board, use at least three screws per strip. If you can’t hit a stud, use strong wall anchors rated for at least 50 lbs.
Step 3: Check For Level
After attaching, run the level across all strips again. Adjust as needed before tightening screws fully.
Non-obvious insight: If you plan to store very heavy tools (like sledgehammers), use 2×4 furring strips instead of 1×2 for extra strength.
Mounting The Pegboard
Now it’s time to hang the pegboard sheet itself.
Step 1: Pre-drill Pegboard Holes
Lay the pegboard face down. Mark where each furring strip sits behind it. Drill small pilot holes every 12-16 inches along these lines. This makes it easier to screw into the furring strips later.
Step 2: Position The Pegboard
With a helper (or by yourself for small boards), hold the pegboard against the wall, lining up with the furring strips. Make sure the peg holes are vertical and the board is even.
Step 3: Fasten The Board
Drive 1-inch wood screws through the pegboard and into the furring strips. Start at one corner and work across, checking with a level as you go. Don’t overtighten—just enough for the board to be snug and flat.
Step 4: Check The Fit
Once all screws are in, push gently on the board to check for movement. If it flexes, add more screws along the edges or in the middle.
Pro tip: If using metal or plastic pegboard, follow the manufacturer’s instructions. Some types come with special mounting hardware or pre-drilled holes.
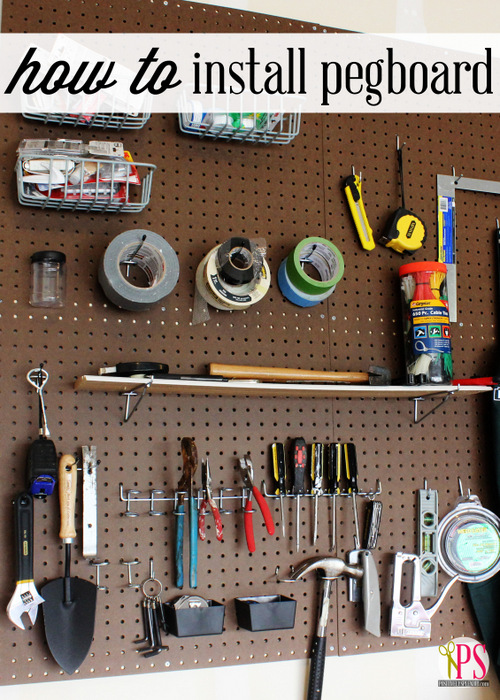
Adding Pegboard Accessories
With the board up, you can add hooks, baskets, or shelves.
Choosing Pegboard Hooks
Standard pegboard has holes spaced 1 inch apart (center to center), usually 1/4 inch in diameter. Most hooks fit both masonite and metal boards. Some hooks have lock tabs or clips to keep them from falling out. For heavy tools, look for locking hooks.
Pegboard Storage Options
- Single hooks – Good for hammers, pliers, or wrenches.
- Double hooks – Hold larger items like drills or saws.
- Baskets – Store spray cans, nails, or small parts.
- Shelves – Hold toolboxes, glue, or power tools.
- Bins – Sort screws, washers, or bits.
Arranging Tools
Place the most-used tools at eye level. Group similar tools together (all screwdrivers, all pliers, etc. ). Keep sharp or dangerous tools higher up, away from children. Make a habit of putting tools back after use—this keeps your system working.
Example Pegboard Layout
Here’s a sample arrangement for a 4×4 foot board:
- Top row: Screwdrivers, pliers, tape measure
- Middle: Hammer, level, wrenches, utility knife
- Bottom row: Power drill, safety glasses, gloves
- Side basket: Spray cans, lubricants
- Small bin: Screws, nails, anchors
Non-obvious tip: Use colored hooks or labels to show where each tool belongs. This makes cleanup easier and helps you spot missing tools at a glance.
How To Cut Pegboard Around Outlets Or Obstacles
Sometimes, you need to fit the pegboard around electrical outlets, switches, or pipes.
Step 1: Mark The Obstacle
Hold the pegboard in place and use a pencil to trace the outline of the outlet or pipe onto the board.
Step 2: Drill Starter Holes
At the corners of your outline, drill small holes to make cutting easier.
Step 3: Cut The Opening
Use a jigsaw or keyhole saw to cut along the lines. Go slowly and keep the cut smooth.
Step 4: Test The Fit
Hold the pegboard back up and check that the opening fits. Sand any rough edges for safety.
Pro tip: For outlets, use a plastic outlet extender or cover to keep wires safe and tidy.
Safety Considerations
A strong pegboard is also a safe one. Here’s what to watch for:
- Weight limits: Don’t overload hooks. Check the rating (usually 5-10 lbs per hook).
- Heavy tools: Store these closer to wall studs or on shelves.
- Children: Keep sharp or dangerous tools out of reach.
- Moisture: In humid garages, choose metal or plastic pegboard to avoid mold.
- Fire risk: Don’t hang oily rags or flammable items near electrical outlets.
If you’re unsure about your wall’s strength, consult a local handyman or contractor.
Maintaining Your Pegboard
Pegboard is low-maintenance, but a few habits keep it working well:
- Check hooks every few months for bending or loosening.
- Clean the board with a damp cloth to remove dust and oil.
- Rearrange tools as your needs change. Don’t be afraid to try new layouts.
- Inspect for moisture if using masonite; replace boards if they warp or mold.
Non-obvious insight: Take a photo of your pegboard layout. If a tool is missing, you’ll know where it goes!
Common Mistakes And How To Avoid Them
Many first-timers make simple errors. Here’s how to avoid the most common ones:
1. Mounting Pegboard Flat Against The Wall
Hooks won’t fit if there’s no space behind the board. Always use furring strips or spacers.
2. Missing Wall Studs
Screws driven only into drywall are weak. Find studs or use strong wall anchors.
3. Overloading Hooks
Even metal pegboard has limits. Spread out heavy tools and use shelves for power tools.
4. Blocking Outlets
Plan your layout to keep outlets clear and accessible.
5. Skipping Planning
A random layout wastes space. Sketch your tool arrangement before hanging anything.
6. Using The Wrong Hooks
Not all hooks fit all boards. Check size and locking features before buying.
7. Forgetting To Seal Masonite
In damp garages, unsealed masonite can warp or mold. Add a sealant or pick a different material.
Advanced Tips For A Professional Pegboard Setup
Want to go beyond basic? These ideas add function and style:
- Add LED strip lights above or below the board for better visibility.
- Install a magnetic strip for metal tools like screwdrivers or drill bits.
- Use a dry erase board or chalkboard next to the pegboard for project notes.
- Attach a small shelf below the pegboard for parts bins or chargers.
- Hang a power strip nearby for charging tools.
- Add custom labels for each tool’s spot.
- Paint the board in your favorite color or with a grid for easy measuring.
- Use clear bins for small parts so you can see what’s inside at a glance.
- Mount hooks sideways for wide tools like saws or levels.
Cost Breakdown: What To Expect
Pegboard is usually affordable, but prices vary by size and material. Here’s a rough estimate for a 4×8 foot masonite pegboard setup:
| Item | Typical Price (USD) |
|---|---|
| 4×8 ft masonite pegboard | $25 – $40 |
| Furring strips (3-4 pieces) | $10 – $15 |
| Screws and anchors | $5 – $10 |
| Hooks, baskets, bins | $20 – $50 |
| Paint/sealant (optional) | $10 – $15 |
| Total | $70 – $130 |
Metal boards usually cost $80–$150 per 4×8 sheet, but last much longer. For more details on pegboard materials and options, check out the Pegboard Wikipedia page.
Step-by-step Summary
For a quick reference, here’s the complete process:
- Choose the right pegboard material and size.
- Gather all tools and materials.
- Measure wall space and mark stud locations.
- Cut pegboard and furring strips as needed.
- Paint or seal pegboard if desired.
- Mount furring strips to wall studs.
- Pre-drill pegboard for mounting screws.
- Hang and fasten the pegboard to furring strips.
- Add hooks, baskets, and shelves.
- Arrange tools for easy access.
Frequently Asked Questions
How Much Weight Can A Garage Pegboard Hold?
This depends on the material and how it’s mounted. Masonite pegboard on furring strips and studs usually holds 15-20 lbs per square foot. Metal boards can handle 40 lbs or more per square foot. Always check hook and anchor ratings for safety.
Can I Hang Pegboard On Concrete Or Brick Walls?
Yes, but you’ll need masonry anchors or Tapcon screws to attach furring strips. Drill pilot holes with a masonry bit, then screw the strips into place. The rest of the process is the same as for drywall.
What Size Hooks Fit Standard Pegboard?
Most standard hooks are made for 1/4 inch diameter holes, spaced 1 inch apart. Check your pegboard’s packaging to be sure. Some plastic or metal boards use special hooks—always match hooks to your board type.
Is Pegboard Safe For Power Tools?
Yes, if you use strong hooks or shelves. Store heavy power tools near wall studs or on reinforced shelves. Don’t overload single hooks, and always check the weight rating before hanging large items.
How Do I Keep Pegboard Hooks From Falling Out?
Use locking hooks or add rubber washers behind the hooks for a tighter fit. Some people use zip ties or clips to keep hooks in place. For heavy or often-used tools, choose hooks with built-in locks.
Final Thoughts
Hanging pegboard in your garage is a smart, affordable way to get organized and make your space more useful. With good planning and the right materials, you can build a system that lasts for years and grows with your needs.
Remember to measure carefully, use strong supports, and choose the best pegboard material for your climate and tools. Don’t rush—small details make a big difference in safety and performance.
A well-done pegboard is more than just storage—it’s the heart of a productive garage. With each tool in its place, projects go faster and safer. Start small, learn as you go, and enjoy the new order in your workspace. Your future self will thank you every time you grab the right tool in seconds.