Keeping your saw blades clean is one of the simplest ways to improve cutting quality and extend the life of your tools. Over time, pitch, resin, and sap build up on the teeth and gullets, making even high-quality blades work harder.
This can lead to rough cuts, burning, and even damage to your saw or workpieces. If you’ve ever noticed your saw struggling, making more noise, or leaving burn marks, a dirty blade might be the cause. Cleaning saw blades is not just about appearance—it’s about performance, safety, and saving money in the long run.
Many people buy new blades when the old one starts to cut poorly. But often, a good cleaning brings back the sharpness and cutting power you thought was gone. Whether you use circular saws, table saws, or miter saws, learning how to clean saw blades properly is an essential skill for anyone working with wood or metal.
This guide will take you through every step, from understanding why cleaning matters, to the best products and methods, to common mistakes and expert tips. By the end, you’ll know exactly how to keep your saw blades cutting smoothly and safely for years.
Why Cleaning Saw Blades Matters
Every saw blade, no matter the brand or cost, collects debris as it cuts. Wood and metal both leave behind pitch, resin, and other sticky residues. Over time, this buildup dulls the cutting edge, increases friction, and forces the motor to work harder. As a result, you may notice:
- Rougher cuts and splintered edges
- Increased noise and vibrations
- Burn marks on wood
- Shorter blade life
- Greater risk of kickback or binding
A dirty blade also heats up faster. This extra heat can warp the steel or even loosen the carbide tips, making the blade unsafe. In some workshops, cleaning a blade can double its life. For professionals, this means saving money and downtime.
Even for hobbyists, cleaning makes every project smoother and safer.
It’s easy to underestimate how much of a difference cleaning makes until you see the results for yourself. For example, woodworkers often report that a blade they thought was dull works like new after a thorough cleaning. This is because many performance problems blamed on dullness are actually caused by sticky buildup.
Cleaning doesn’t just help you get cleaner cuts—it also helps preserve the accuracy of your work. When a blade is dirty, it can drift or bind in the cut, making it harder to follow lines or achieve precise joints.
Another overlooked benefit is safety. A clean blade is less likely to kick back or grab the material. This is especially important when working with powerful saws or cutting dense hardwoods. Clean blades also put less stress on your saw’s motor, reducing the risk of overheating or mechanical failure.
This means your saw will last longer and require fewer repairs, saving you money over time.
Signs Your Saw Blade Needs Cleaning
It’s not always obvious when a blade needs attention. Here are some clear warning signs:
- Burn marks on cuts – If you see dark lines on the wood, the blade is likely gummed up.
- Excessive effort – The saw feels like it’s working harder than usual, or you must push harder.
- Rough or chipped edges – Clean blades make cleaner cuts; dirty blades tear fibers.
- Unusual smells – Burning resin or wood smells stronger when the blade is coated.
- Visible buildup – Sticky or shiny material between teeth or in gullets is a clue.
Don’t wait until the blade stops working well. Regular inspection and cleaning prevent bigger problems.
Sometimes, the signs are subtle. For example, if the saw starts making a slightly higher-pitched whine or the cutting feels less smooth, it may be due to hidden buildup. Even a small amount of pitch can increase friction and cause overheating.
If you notice sawdust sticking to the blade after a cut, this is another sign of resin buildup. Checking your blades regularly—before and after each project—helps catch these problems early.
Tools And Materials You Need
Before you start, gather everything you need. Using the right tools makes the job faster and safer.
- Stiff nylon brush (old toothbrush or dedicated cleaning brush)
- Plastic or metal pan (large enough to fit the blade flat)
- Cleaning solution (see choices below)
- Protective gloves (cut-resistant recommended)
- Soft cloth or rag
- Toothpicks or wood skewers (for stubborn debris)
- Eye protection (for scrubbing and rinsing)
- Compressed air (optional, for drying)
Choosing the right brush is important. Avoid metal or wire brushes, as these can scratch the blade or dull the carbide tips. A toothbrush works well for smaller blades or fine teeth, while a larger nylon brush is better for big blades.
If you have several blades to clean, consider getting a dedicated set of brushes just for this task.
Toothpicks or wooden skewers are particularly handy for scraping out packed resin from tight gullets. Unlike metal picks, they won’t scratch the steel or chip the carbide. If you clean blades often, keep a small container of these picks near your cleaning station.
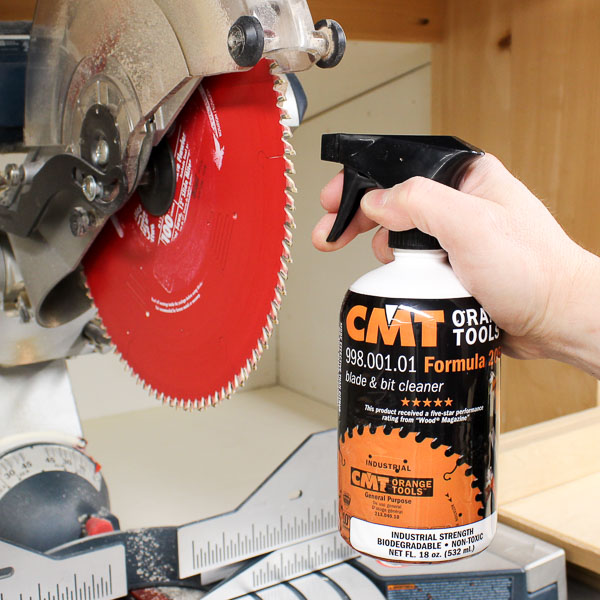
Choosing A Cleaning Solution
Not all cleaners are equal. Here’s a quick comparison of popular options:
| Cleaner | Effectiveness | Safe for Carbide | Cost | Odor |
|---|---|---|---|---|
| Simple Green | High | Yes | Low | Low |
| Oven Cleaner | Very High | No (damages carbide) | Low | Strong |
| Household Ammonia | Medium | Yes | Low | Medium |
| Commercial Blade Cleaner | Very High | Yes | Medium | Low |
| Mineral Spirits | Medium | Yes | Medium | Low |
Pro tip: Avoid oven cleaners on carbide-tipped blades. The harsh chemicals can loosen the glue holding the tips. Stick with Simple Green, specialized blade cleaners, or diluted ammonia for most blades.
If you want a more natural approach, dish soap and hot water can remove light buildup, especially if you clean your blades regularly. However, for heavy resin or pitch, a stronger cleaner is usually needed. Some commercial blade cleaners come in spray bottles for easy application, making them convenient for quick cleanings between projects.
Step-by-step Guide: How To Clean Saw Blades
Cleaning a saw blade is straightforward if you follow the right steps. Here’s how to do it safely and effectively.
1. Remove The Blade Safely
First, unplug the saw or remove the battery. Never clean a blade while it’s on the tool. Use the right wrench to remove the blade. Wear gloves to avoid cuts, and place the blade on a flat, stable surface.
If you’re unsure how to remove the blade, check your saw’s manual. Some saws have a blade lock button to make removal easier. Always handle the blade by the center or the sides, not the teeth, to avoid injury.
2. Inspect The Blade
Before cleaning, look for cracks, missing teeth, or warping. If you see serious damage, do not clean or use the blade. Replace it instead. Cleaning a cracked blade is dangerous.
Many small cracks can be hard to see. Hold the blade up to the light and look closely at the base of the teeth and around the arbor hole. Any damage here can cause the blade to fail during use.
Chips in the carbide tips often show up as shiny spots or uneven edges.
3. Prepare The Cleaning Solution
Pour your chosen cleaner into the pan. The liquid should be deep enough to submerge the blade. For strong products like ammonia, dilute with water (about 1:4 ratio). Never mix different cleaners.
Use just enough solution to cover the blade and save on cleaner. If the blade is larger than the pan, rotate it halfway through soaking to ensure all parts are exposed.
4. Soak The Blade
Place the blade flat in the solution. Let it soak for 10–20 minutes. This loosens pitch and sap. For heavy buildup, let it soak up to 30 minutes, but don’t leave overnight—some chemicals can damage the blade over long periods.
If you’re using a less aggressive cleaner, you might need a little more soaking time. Occasionally, agitate the solution or gently move the blade to help loosen debris.
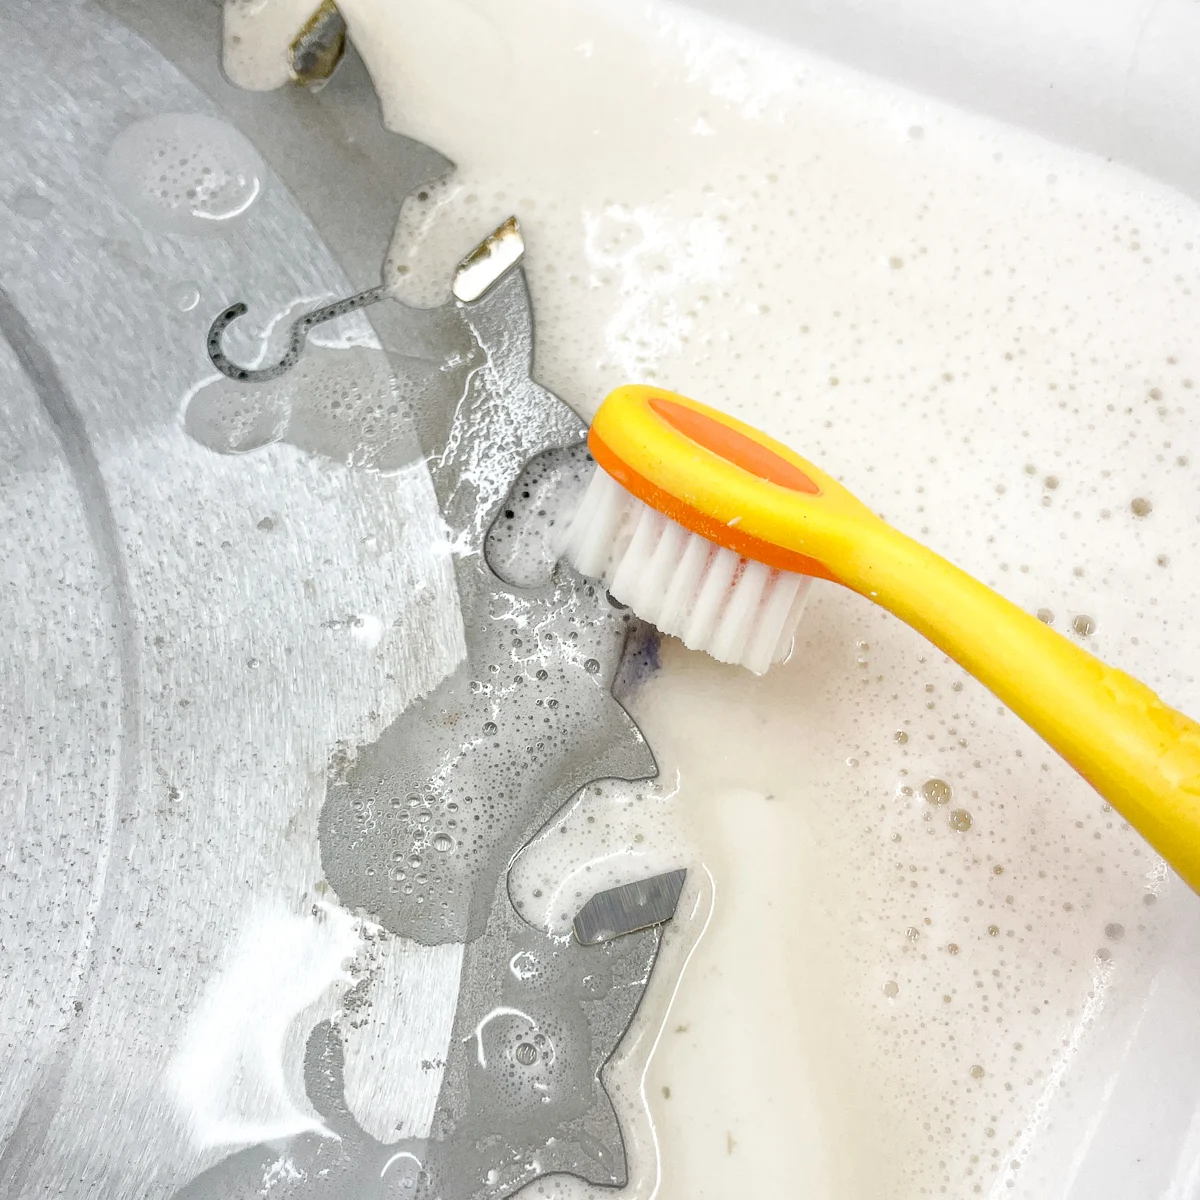
5. Scrub The Blade
After soaking, use a stiff nylon brush to scrub each tooth and the gullets (the space between teeth). Always scrub away from the sharp edge to avoid injury and dulling the blade. For stubborn spots, use a toothpick or wood skewer—never metal, as it can scratch the carbide.
Work systematically around the blade so you don’t miss any areas. Pay extra attention to the back side of the teeth, where resin often collects. If your blade has expansion slots or anti-vibration holes, clean these carefully, as they can trap debris.
6. Rinse Thoroughly
Rinse the blade with clean water. Make sure all cleaner and debris are removed. Wipe the blade dry with a soft cloth immediately to prevent rust.
A common mistake is leaving cleaning solution in tight spots, which can cause corrosion. Run water through all holes and slots. If you’re worried about water spots, use distilled water for a final rinse.
7. Dry Completely
If possible, use compressed air or a hair dryer to remove water from tight spots. Leaving any moisture can lead to rust, especially on high-carbon steel blades.
Pay special attention to the mounting hole and expansion slots, as water can hide there. Even a small amount of moisture can create rust overnight, especially in humid climates.
8. Lubricate (optional)
Lightly spray the blade with a rust inhibitor or a silicone-based lubricant. This protects the steel during storage and the next use. Wipe off any excess with a clean rag.
For long-term storage, a thin coat of paste wax can also help protect the steel. Just be sure to wipe the teeth clean before using the blade again, as wax can build up if left too thick.
9. Reinstall The Blade
Carefully reinstall the blade on your saw, making sure the teeth face the correct direction. Tighten the nut or bolt securely, but don’t over-tighten.
Double-check that the blade is seated properly and spins freely before plugging the saw back in or replacing the battery.
What To Avoid: Common Mistakes
Many people unknowingly damage their saw blades during cleaning. Here are mistakes to avoid:
- Using oven cleaner on carbide-tipped blades: The harsh lye can weaken glue and ruin the blade.
- Soaking for too long: Some blades can corrode if left in solution overnight.
- Scrubbing with metal brushes: This scratches and dulls the carbide or steel.
- Skipping the rinse: Cleaning solutions left on the blade can cause corrosion.
- Not drying fully: Even small amounts of water cause rust.
- Forgetting eye protection: Splashes can injure eyes, especially with strong cleaners.
- Mixing different cleaners: Some chemicals react dangerously; stick to one product at a time.
Another common error is using strong solvents without good ventilation. Always clean in a well-ventilated area, especially when using ammonia or mineral spirits. If you’re unsure about a product, test it on a small area of the blade first.
Cleaning Different Types Of Saw Blades
Not all blades are the same. Here’s how to handle the most common types:
Circular Saw Blades
Most woodworking blades are circular. Clean as described above. Carbide-tipped blades need gentle handling—never use harsh chemicals or metal brushes.
If your circular blade has a non-stick or painted coating, avoid abrasive pads that can remove this protective layer. The coating helps reduce pitch buildup, so preserving it keeps your blade cleaner longer.
Table Saw And Miter Saw Blades
These are often larger but cleaned the same way. If your blade has anti-kickback shoulders or expansion slots, pay extra attention to those areas.
Extra care in cleaning these features prevents hidden buildup that can affect balance and cut quality. Some miter saw blades have laser-cut vibration slots—clean these gently to avoid damaging the fine edges.
Dado Blades
Dado sets have multiple parts. Clean each chipper and outside blade separately. Label parts if needed to ensure correct reassembly.
Lay the parts out in order as you disassemble, or take a quick photo. This makes reassembly much easier and ensures your dado set will cut true.
Jigsaw And Reciprocating Saw Blades
These smaller blades can be cleaned with a brush and solution, but don’t soak them too long. Dry immediately to prevent rust.
Because these blades are thin and flexible, be gentle during scrubbing to avoid bending or snapping them. If they show heavy rust or damage, replacement is usually best.
Metal-cutting Blades
Use degreaser instead of regular blade cleaner. Avoid soaking for long periods, as some coatings are sensitive to chemicals.
For abrasive cutoff wheels, avoid soaking altogether—just brush off debris and check for cracks before reuse.
How Often Should You Clean Saw Blades?
There’s no fixed rule, but regular cleaning is best. Most users should clean blades:
- After every major project
- When you notice cutting problems
- Every 1–2 months for frequent users
If you cut a lot of resinous woods (like pine), clean more often. For occasional use, inspect before each project and clean as needed.
For professionals or those working in humid areas, a monthly cleaning routine helps prevent rust and buildup. If you use your saw daily, a quick inspection and wipe-down at the end of each week can save you from more difficult cleanings later.
Advanced Tips And Pro Tricks
Even experienced woodworkers miss some details. Here are advanced tips for better results:
1. Use A Blade Cleaning Station
If you clean blades often, create a dedicated cleaning station. A large plastic tray, wall hooks for drying, and a spot for brushes save time and keep things organized.
Adding a soft mat or towel to the bottom of your cleaning tray prevents blades from slipping and reduces the risk of accidental nicks.
2. Rotate Multiple Blades
If you own more than one blade, clean them all at once. This saves setup time and helps you spot damage early.
This is especially useful for businesses or shared workshops, where many blades are in use. Keeping a simple log or checklist can help track which blades have been cleaned and when.
3. Mark Cleaned Blades
After cleaning, mark the blade with the date using a fine-tip marker on the steel (not on the teeth). This helps track blade performance and cleaning intervals.
Some professionals add a small dot of colored paint on the blade to signal when it was last serviced. Over time, this visual system helps you spot blades due for maintenance.
4. Sharpen After Cleaning
Cleaning reveals the real condition of your blade. If it still cuts poorly after cleaning, it’s time to sharpen or replace it.
Sharpening a clean blade is faster and more accurate. Many sharpening services prefer blades to be free of pitch and resin, and some will charge extra if the blade is dirty.
5. Avoid Harsh Storage Conditions
Store clean blades in a dry place, ideally in a blade case or hung on a wall. Humid shops cause rust even on clean blades.
If your shop is damp, consider using silica gel packs or a dehumidifier in your storage area. This extra step keeps your blades rust-free and ready to use.

Alternatives To Commercial Cleaners
Many people want to avoid chemicals. Here are safer alternatives:
- Baking soda paste: Mix baking soda and water. Apply, let sit, then scrub.
- Vinegar: Soak the blade in white vinegar for 10–15 minutes. Rinse well.
- Dish soap: For light buildup, hot water and soap work surprisingly well.
These are less aggressive but effective for regular maintenance.
If you’re sensitive to smells or have allergies, these alternatives are a good choice. Baking soda and vinegar are especially useful for those who clean blades often and want to avoid harsh fumes. Just remember, these options may take a bit more elbow grease for tough, baked-on resin.
Comparing Cleaning Methods
Different cleaning methods work for different situations. Here’s a summary:
| Method | Best For | Speed | Cost | Blade Safety |
|---|---|---|---|---|
| Soaking & Scrubbing | General Cleaning | Medium | Low | High |
| Ultrasonic Cleaner | Fine Pitch Removal | Fast | High | Very High |
| Wire Wheel (Not recommended) | Heavy Rust (old blades only) | Fast | Medium | Low |
| Hand Scraping | Spot Cleaning | Slow | None | High |
Insight: Ultrasonic cleaners are popular in professional shops. They clean every crevice but are expensive for most home users.
For most people, soaking and scrubbing is more than enough. The ultrasonic option is best for those who need perfect cleanliness, such as in precision metalwork or when working with expensive specialty blades.
Troubleshooting: If Your Blade Still Cuts Poorly
Sometimes, cleaning doesn’t fix the problem. Here’s what to check:
- Dull teeth: If the blade is clean but still struggles, it’s time for sharpening.
- Blade warp: Check for flatness by spinning the blade on a known flat surface. Warped blades can’t be fixed by cleaning.
- Wrong blade for the material: Wood blades struggle on plastic or metal.
- Misaligned saw: A clean blade can’t cut well if the saw’s alignment is off.
- Loose mounting: Make sure the blade is tight, but not overtightened.
If in doubt, consult your saw’s manual or a professional sharpener.
Also, remember that some low-quality blades may never cut perfectly, even when clean. Investing in a reputable brand can save trouble in the long run. If you frequently have problems, double-check the compatibility of your blade and saw, and consider having your saw’s alignment professionally checked.
Caring For Your Blades After Cleaning
Clean blades last longer if stored and handled properly. Here’s how to keep them in top shape:
- Store flat or hang by the arbor hole. Avoid stacking blades, which damages teeth.
- Use blade cases for transport or storage. This protects against knocks and moisture.
- Label blades for wood, metal, or specialty use. Using the right blade each time means less cleaning and fewer problems.
- Check before each use for rust or buildup, even after cleaning.
If you often switch between different types of blades, keeping a simple log of when each was cleaned or sharpened can help you maintain top performance. Some woodworkers use color-coded cases or tags to quickly identify blade type and cleaning status.
When To Replace Instead Of Clean
Not every blade can be saved. Replace your blade if:
- Teeth are missing or severely chipped
- The blade is warped or cracked
- Carbide tips are loose or missing
- Repeated cleaning and sharpening no longer improve performance
A damaged blade is unsafe and will only make cutting harder and more dangerous.
If you’re unsure whether a blade is salvageable, take it to a sharpening service for evaluation. Most professionals will tell you if the blade is worth fixing or should be retired.
Environmental And Safety Considerations
Dispose of cleaning solutions responsibly. Many cleaners are biodegradable, but ammonia or other strong chemicals should not go down the drain. Check local disposal rules. Always clean in a well-ventilated area, wear gloves, and wash hands after handling chemicals.
If you use disposable rags or paper towels, let them dry completely before discarding, especially if they contain solvents. Store chemicals out of reach of children and pets, and label bottles clearly.
Where To Find More Information
For more on saw blade care and woodworking safety, consider visiting Wikipedia: Saw Blade for technical background, blade types, and further resources.
Frequently Asked Questions
How Often Should I Clean My Saw Blades?
Clean your blades after every major project or every 1–2 months if you use them frequently. If you cut sticky woods like pine or see performance drop, clean sooner.
Can I Use Oven Cleaner On All Saw Blades?
No, avoid oven cleaner for carbide-tipped blades. The chemicals can loosen the carbide. Use products labeled safe for carbide or gentle cleaners like Simple Green.
What Is The Safest Way To Dry A Blade After Cleaning?
Dry with a clean cloth immediately, then use compressed air or a hair dryer to remove moisture from tight spots. Never store a wet blade.
Is It Necessary To Lubricate Blades After Cleaning?
It’s not required, but a light coat of silicone or rust inhibitor extends blade life, especially in humid environments.
My Blade Is Still Cutting Poorly After Cleaning. What Should I Do?
If cleaning doesn’t help, check for dull or damaged teeth, blade warp, or saw misalignment. Sometimes, sharpening or replacing the blade is necessary.
Keeping your saw blades clean is a small investment of time that pays off with safer, smoother, and more efficient cutting. Add blade cleaning to your regular workshop routine and you’ll notice the difference in every project.