Testing continuity with a multimeter is a simple but powerful way to check if electricity can flow through a wire, circuit, or device. Whether you are repairing electronics, troubleshooting a car, or fixing things at home, knowing how to test continuity can save you time and frustration.
Many beginners feel unsure about using a multimeter for this task, but with clear steps and some practice, anyone can do it safely and accurately.
Continuity testing is more than just finding broken wires. It helps diagnose problems in switches, fuses, connectors, and even whole devices. Sometimes a wire looks fine from the outside, but inside it could be broken. With a continuity test, you discover these hidden issues fast.
In this article, you will learn exactly how to test continuity with a multimeter, understand how it works, and avoid common mistakes. You will also discover practical tips that even experienced users sometimes overlook.
What Is Continuity?
Continuity means a complete electrical path exists between two points. In simple words, electricity can travel from one place to another without interruption. If there is a break, gap, or fault in the wire or circuit, continuity is lost. Testing continuity tells you if a path is open (broken) or closed (connected).
For example, a good wire between two points will have continuity. A blown fuse, on the other hand, will not. This test is important because sometimes issues are not visible. Corrosion, invisible breaks, or loose connections can all stop continuity, even if everything looks normal.
Understanding How A Multimeter Tests Continuity
A multimeter is a device that measures electrical properties like voltage, current, and resistance. Most digital multimeters have a special setting for continuity. When you select this mode and touch the probes together, the meter sends a small current between them. If the path is complete, the meter usually makes a beeping sound and shows a low value (close to zero).
When there is no path, the meter will show “OL” (over limit) or a very high number, and it will not beep. This makes it easy to test without needing to look at the display all the time.
Why Use Continuity Mode Instead Of Resistance?
Resistance mode also checks for a path, but continuity mode is faster and easier for simple checks. The beep lets you focus on your work without watching the screen. However, continuity mode is not for measuring exact resistance values. It is only for checking if a connection exists.

Types Of Multimeters And Their Features
Not all multimeters are the same. Some are simple and cheap, while others have advanced features. Understanding the differences helps you choose the right tool and use it correctly.
| Type | Main Features | Best For |
|---|---|---|
| Analog Multimeter | Needle display, basic functions, no beep | Simple checks, old devices |
| Basic Digital Multimeter | Digital screen, continuity beep, affordable | Home use, basic electronics |
| Advanced Digital Multimeter | More settings, auto-ranging, better accuracy, backlight | Professionals, advanced troubleshooting |
Tip: If you want to test continuity easily, always choose a digital multimeter with a beep function. This feature makes the job much quicker.
Preparing For Continuity Testing
Before you begin, take a few minutes to prepare. This step is often skipped but can make your testing safer and more accurate.
- Turn Off Power: Always switch off the power to the circuit or device you will test. Testing live circuits can damage your multimeter and is dangerous.
- Discharge Capacitors: If you are testing in electronic devices, make sure capacitors are discharged. Capacitors can store charge even after power is off.
- Inspect the Area: Look for obvious signs of damage, burning, or corrosion. Sometimes, visual clues point to the fault.
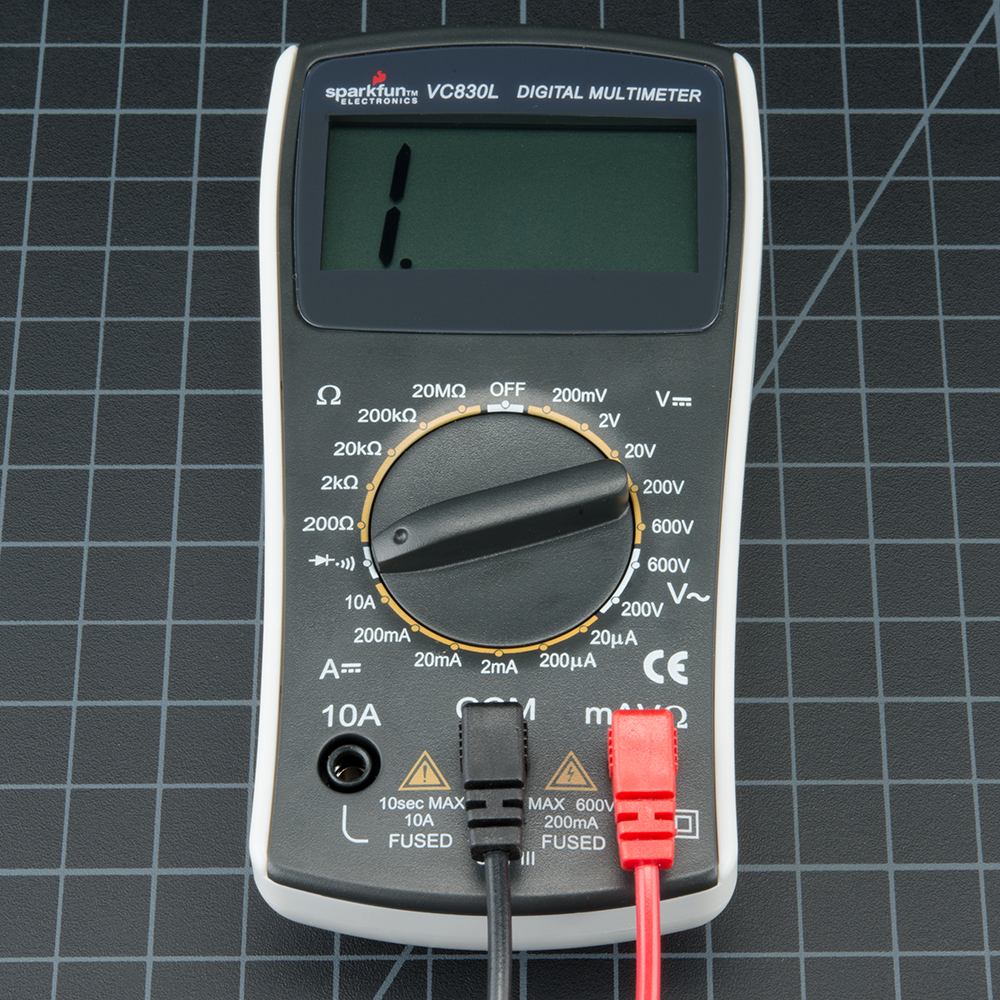
- Select the Right Multimeter Setting: Turn the dial to the continuity mode (usually marked with a sound wave or diode symbol).
Non-obvious tip: Make sure your test probes are clean. Dirty or corroded probes can give false readings.
Step-by-step Guide: How To Test Continuity With A Multimeter
Testing continuity is simple if you follow these clear steps.
1. Set Your Multimeter To Continuity Mode
Find the continuity symbol on your multimeter (usually a sound wave or diode sign). Turn the dial to this setting. Some meters share this with the diode test mode, so check your manual if unsure.
2. Test The Multimeter Probes
Touch the two probes together. The meter should beep and show a value close to zero. This confirms the meter and probes are working correctly.
3. Connect The Probes To The Test Points
Place one probe at each end of the wire, switch, or device you want to test. It does not matter which probe goes where for continuity. Hold them firmly for good contact.
4. Read The Result
- Beep and near-zero reading: The path is complete (good continuity).
- No beep, “OL” or high reading: The path is broken (no continuity).
5. Interpret The Results
If you get continuity when you expect none, or no continuity when you expect a connection, double-check your setup. Sometimes a device must be removed from the circuit to test accurately.
Practical example: You want to test if a lamp’s power cord is good. Unplug the lamp, touch the probes to each end of the cord. If the meter beeps, the cord is fine. If not, the cord may be broken inside.
Common Uses Of Continuity Testing
Testing continuity is useful in many situations. Here are some common examples:
- Checking Wires: Find breaks in long wires or cables.
- Testing Fuses: Identify blown fuses quickly.
- Switches: See if a switch makes or breaks contact.
- Connectors: Check for loose or corroded pins in plugs and sockets.
- Printed Circuit Boards (PCBs): Trace connections between points.
- Home Repairs: Test extension cords, light fixtures, and sockets.
Non-obvious insight: Testing continuity can also help find short circuits. If you test between points that should not connect and get a beep, you may have a short.

Safety Tips For Continuity Testing
Safety should always come first when using a multimeter.
- Always turn off the power before testing continuity.
- Never test continuity on live circuits. It can damage your meter and cause injury.
- Use one hand when possible, especially in high-voltage areas, to reduce shock risk.
- Check your probes for damage before starting.
- Avoid wet or damp conditions to prevent slipping or shorts.
Expert tip: If you are testing in a device with many components, make a simple sketch or take a photo before disconnecting wires. This helps you reconnect everything properly.
Troubleshooting Problems During Testing
Sometimes, you may get confusing results when testing continuity. Here’s how to solve common issues:
False Beep Or No Beep
- Dirty Probes: Clean with alcohol or light sandpaper.
- Loose Connections: Wiggle the probe gently; firm contact is needed.
- Meter Battery Low: Replace the battery if readings are strange or the display is dim.
Unexpected Continuity
- Parallel Paths: Other connected components may create a path. Remove the part or disconnect one end before testing.
- Moisture: Water or corrosion can allow current to flow where it should not.
No Continuity But Should Be Present
- Broken Wire Inside Insulation: Flex the wire gently while testing; the beep may come and go.
- Bad Solder Joints: Check for cold or cracked solder joints on PCBs.
Non-obvious insight: Always test a new fuse outside its holder. Sometimes, fuse holders are faulty, not the fuse itself.
When To Use Continuity Vs. Resistance Testing
Both continuity and resistance tests use the same principle but have different uses.
| Test Type | Best For | Result |
|---|---|---|
| Continuity | Simple closed/open checks | Beep (closed), Silence (open) |
| Resistance | Measuring exact ohm value | Numerical value (Ohms) |
Example: If you want to check if a wire is connected, use continuity. If you want to see the resistance value of a resistor, use the resistance mode.
Testing Continuity In Different Devices And Circuits
The basic steps remain the same, but there are some differences depending on what you are testing.
Testing Wires And Cables
- Disconnect both ends from power.
- Touch one probe to each end.
- Flex the wire to check for intermittent faults.
Testing Switches
- Switch off power.
- Place probes on the switch terminals.
- Move the switch back and forth; the meter should beep when “on” and stop when “off”.
Testing Fuses
- Remove the fuse from its holder.
- Touch both ends with the probes.
- Good fuse: Beep. Blown fuse: No beep.
Testing Home Sockets
- Turn off main power.
- Remove the socket cover.
- Test between live and neutral/earth points.
- Only do this if you are confident and understand electrical safety.
Warning: Never test continuity on mains circuits unless you are trained and sure the power is off.
Advanced Continuity Testing Techniques
As you gain confidence, you can use your multimeter in more advanced ways.
Testing Components On A Pcb
On a complex board, sometimes you need to check if two points are connected. Use the circuit diagram if available. Place the probes on the two points and listen for the beep.
Checking For Short Circuits
If you suspect a short, test between points that should not connect. A beep means there is a short. This method is useful in electronics repair.
Using The Diode Test Mode
Some meters combine continuity with diode testing. In this mode, the meter sends a higher voltage. It is useful for testing diodes and LEDs as well as continuity.
Testing Relay And Contactors
For these components, test the coil and the contacts separately. When energized, the contacts should close and continuity should appear.
How To Interpret Multimeter Readings
Understanding what your multimeter shows is important.
- 0 to 2 Ohms: Good continuity (normal for wires, switches).
- 2 to 50 Ohms: Possible connection, but check for resistance (long wires, coils).
- OL or 1 (on left): No continuity (open circuit).
- Fluctuating values: Check probe stability or for intermittent faults.
Non-obvious tip: Old or oxidized wires may show some resistance (5–10 Ohms) but still work. Clean or replace if needed.
Essential Accessories For Continuity Testing
Using the right accessories can make testing easier and safer.
- Alligator Clips: Attach to probes for hands-free testing.
- Flexible Probe Tips: Reach tight spaces.
- Probe Holders: Hold probes in place, freeing your hands.
- Carrying Case: Protect your multimeter and probes.
Having these accessories is not required, but they can make your testing more efficient.
Maintenance And Care For Your Multimeter
A well-maintained multimeter lasts longer and gives more reliable results.
- Clean probes after each use with a soft cloth.
- Store in a dry place, away from moisture.
- Replace batteries when display dims or readings are unstable.
- Check for cracks or damage regularly.
- Calibrate your multimeter if you use it for professional work.
Expert tip: Keep a spare set of batteries and fuses for your meter in your kit.
Common Mistakes When Testing Continuity
Avoid these errors to get reliable results and protect your equipment.
- Testing live circuits. Always turn off the power.
- Not removing components. Sometimes, you must disconnect one side to test accurately.
- Ignoring probe contact. Make sure probes touch metal, not insulation or dirt.
- Forgetting to reset the meter. After testing, turn off the meter or change settings to avoid battery drain.
- Assuming a beep means “all is well.” Sometimes, unwanted connections can beep too. Know your circuit.
Real-world Examples And Case Studies
Example 1: Diagnosing A Broken Extension Cord
A user’s lamp would not turn on. Testing the plug with a multimeter in continuity mode, there was no beep. Flexing the cord, the beep appeared and disappeared. The wire was broken inside the insulation, a problem invisible from the outside.
Example 2: Faulty Light Switch
A wall light switch did not work. Testing across the terminals with the switch “on” gave no beep. Replacing the switch solved the problem.
Example 3: Car Fuse Testing
A car’s radio stopped working. Testing the fuse in continuity mode showed no beep. Replacing the fuse fixed the radio.
Learning: Quick continuity checks can save hours of guessing and trial and error.
Choosing The Right Multimeter For Continuity Testing
If you are buying a multimeter mainly for continuity tests, consider these factors:
| Feature | Why It Matters |
|---|---|
| Beep Function | Faster, hands-free confirmation |
| Auto-ranging | Simpler operation, less confusion |
| Clear Display | Easy to read values |
| Sturdy Probes | Better contact, less breakage |
| Battery Access | Easy to change batteries |
High-quality brands include Fluke, Klein Tools, and Extech. Even affordable meters can work well for home use if they have the beep function.
For more details on multimeter features, see this Wikipedia article on multimeters.
Practical Tips For Accurate Continuity Testing
- Label wires and connectors before disconnecting for easy reassembly.
- Test in good lighting to avoid mistakes.
- Keep your hands steady for solid probe contact.
- Take notes or photos of your setup, especially in complex devices.
- Practice on old devices before testing valuable equipment.
Frequently Asked Questions
How Does Continuity Differ From Resistance Testing?
Continuity checks if a complete path exists, giving a simple beep or no beep. Resistance testing gives an exact value in ohms. Continuity is faster for simple checks, while resistance is for measuring the quality of a connection.
Can I Test Continuity With An Analog Multimeter?
Yes, but analog meters do not beep. You must watch the needle. If it moves to zero or near-zero, there is continuity. Digital meters are easier and safer for beginners.
What Does It Mean If I Get A Beep When Testing Between Ground And Live Wires?
This can mean a short circuit or leakage. It is a serious issue and should be fixed before using the circuit. Check for moisture, damaged insulation, or faulty components.
Is It Safe To Test Continuity In A Powered Circuit?
No. Always turn off the power before testing continuity. Testing live circuits can damage your meter, cause wrong readings, or lead to electric shock.
Why Does My Multimeter Beep Even When The Probes Are Not Touching Anything?
This usually means there is a problem with your multimeter, such as moisture inside, damaged probes, or internal faults. Try drying the meter, checking the probes, or replacing the battery.
Testing continuity with a multimeter is a valuable skill for anyone working with electronics, electrical repairs, or troubleshooting. With the right multimeter, some practice, and the safety tips in this article, you can quickly find broken wires, switches, and other faults.
Remember to always test with power off, keep your probes clean, and trust your results. As you gain experience, continuity testing will become a natural and reliable tool in your repair and troubleshooting process.