Using a conduit bender might seem simple at first glance, but mastering this tool can change the way you work with electrical conduit forever. Whether you’re a beginner electrician, a DIY enthusiast, or someone who needs to run conduit for home projects, understanding how to use a conduit bender can save you time, frustration, and money. The challenge is more than just bending metal; it’s about precision, safety, and knowing the right technique for each situation.
A well-bent conduit not only protects wires but also ensures your electrical system passes inspection. Poor bends can lead to crushed pipes, wasted materials, and even failed projects. The good news is that with the right approach, anyone can learn to use a conduit bender with skill.
This guide will explain every step, reveal helpful insights, and give you the confidence to bend conduit like a professional.
What Is A Conduit Bender And Why Is It Important?
A conduit bender is a hand tool designed to bend electrical conduit, which is a metal or plastic pipe used to protect and route electrical wiring. Most commonly, electricians use it with EMT (Electrical Metallic Tubing), but it also works with rigid and flexible conduit in some cases. The bender helps create smooth curves, or “bends,” so conduit can follow walls, ceilings, or machinery without sharp turns that could damage wires inside.
Using a conduit bender correctly is important because:
- Smooth bends keep wires safe and easy to pull through.
- Accurate bends help maintain code compliance and a professional look.
- Proper technique reduces wasted materials and increases efficiency.
Bending by hand without a bender often results in kinks and inconsistent angles, leading to failed inspections or unsafe installations. This is why learning to use a conduit bender is essential for anyone working with electrical systems.
Types Of Conduit Benders
Before you start, you need to know which type of bender is right for your project. There are several main types:
| Type | Common Use | Material | Pipe Size |
|---|---|---|---|
| Hand Bender | Basic bends for EMT | Aluminum or steel | 1/2″ to 1″ |
| Mechanical Bender | Larger conduit, more force | Steel | 1″ to 2″ |
| Hydraulic Bender | Heavy-duty, precise bends | Steel | 2″ and up |
| Electric Bender | High-volume, repetitive bends | Varies | All sizes |
For most home and light commercial projects, the hand bender is the tool you’ll use. It’s portable, simple, and works well for the most common conduit sizes.
Key Parts Of A Hand Conduit Bender
To use a hand bender confidently, you must know its parts. Each has a purpose:
- Handle: The long shaft you grip and apply force to.
- Bending Shoe: The curved part that shapes the conduit.
- Foot Pedal: Lets you brace the bender with your foot.
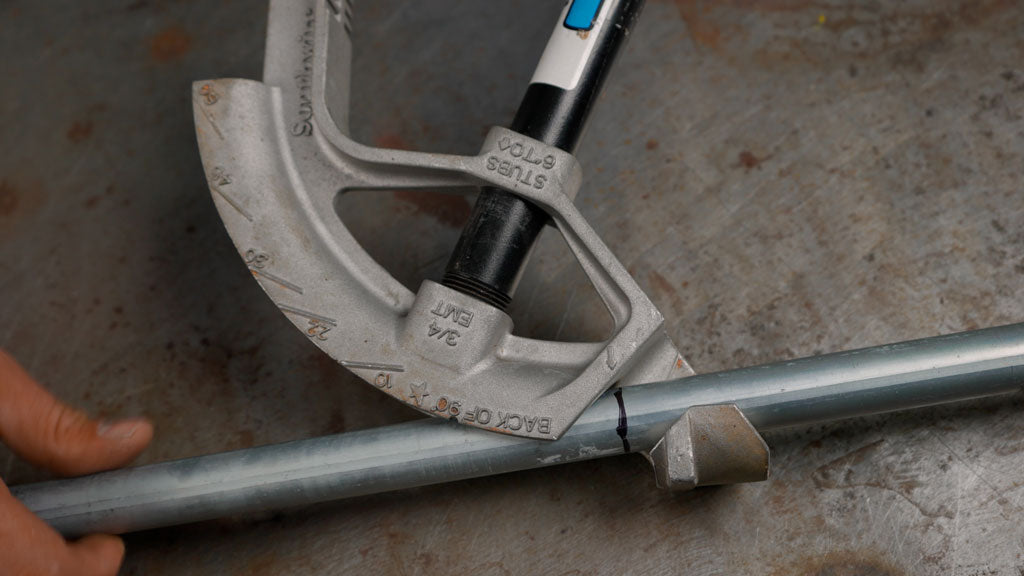
- Degree Markings: Indicate angles like 10°, 22.5°, 30°, 45°, and 90°.
- Arrow: Marks the start point for a standard bend.
- Star: Used for back-to-back bends and offset bends.
- Tangent/Notch: Helps with aligning for 90° bends.
Understanding these markings and features is key to bending accurately.
Essential Tools And Materials
To bend conduit effectively, gather these tools and materials:
- Conduit bender (matched to your conduit size)
- EMT conduit (or other compatible type)
- Measuring tape
- Permanent marker or pencil
- Level (small torpedo style is best)
- Personal protective equipment: Gloves, safety glasses
- Pipe reamer or file (to remove sharp edges after cutting)
- Conduit cutter or hacksaw
Having everything ready will make your work smoother and safer.
Safety First: Key Precautions
Bending conduit is usually safe, but there are some important safety points:
- Wear gloves to protect hands from sharp metal edges.
- Wear safety glasses when cutting or filing conduit.
- Check your work area for tripping hazards.
- Keep your body balanced: Use your foot to brace the bender and hands for control.
- Inspect the bender for cracks or damage before use.
- Never force the conduit beyond its limit; it can kink or break.
Many beginners forget to clear their workspace or check the bender for damage. This can lead to accidents or ruined materials.
How To Measure And Mark Conduit
Accurate bends start with good measurements and clear marks. Here’s how to do it:
- Plan your run: Know exactly where the conduit needs to go, including any changes in direction.
- Measure twice: Use a measuring tape to mark the start and end of each bend location.
- Mark with a permanent marker: Draw a clear line around the conduit where each bend should start.
- Account for take-up: Every bender has a “take-up” value, which is how much the conduit shifts during bending. For example, a 1/2″ EMT bender usually has a 5″ take-up for a 90° bend. Check your bender’s label.
- Use reference points: Mark the conduit at the exact spot where the bender’s arrow or star will line up.
Take-up is a detail many beginners miss. If you skip it, your bends will be too short or long, and your conduit won’t fit.
The Basic Bend Types
You’ll use a few standard bends for most electrical projects. Each has its own method and purpose.
90-degree Bend (stub-up)
The 90-degree bend, also called a “stub-up,” lets conduit turn sharply to follow walls or ceilings.
Steps:
- Mark the spot where the bend should end.
- Subtract the bender’s take-up value from your measurement; mark this as the start point.
- Place the conduit in the bender, aligning the arrow with the start mark.
- Stand on the foot pedal, hold the handle, and pull slowly until the conduit reaches the 90° mark.
- Check with a level for accuracy.
Pro tip: Go slightly less than 90°, then check. It’s easier to bend a bit more than to fix an over-bent pipe.
Offset Bend
An offset bend lets conduit clear an obstacle, like a pipe or beam, while staying parallel to its original path.
Steps:
- Measure the distance you need to clear (the offset height).
- Mark two spots on the conduit: Start and end of the offset.
- Use the bender’s degree marks (often 30° or 45°) for each bend.
- Make the first bend at the first mark, then flip the conduit and make the second bend at the other mark, keeping the bends in the same plane.
A common mistake is using the wrong spacing between bends. Many benders have a chart for offset spacing based on bend angle. For example, for a 30° offset, space the bends at 2 times the offset height.
Back-to-back Bend
A back-to-back bend creates two 90° bends in opposite directions, forming a U-shape. It’s useful for running conduit around obstacles or between two surfaces.
Steps:
- Make the first 90° bend as above.
- Measure the desired distance between bends.
- From the back of the first bend, measure and mark for the second bend.
- Flip the conduit and use the star on the bender for the second bend.
Tip: Measure from the back edge (heel) of the first bend to keep spacing accurate.
Saddle Bend
A saddle bend lets conduit go up and over a small obstacle, like a water pipe.
Steps:
- Measure the obstacle’s width.
- Mark the conduit for the center and sides of the saddle.
- Use a 45° angle for the center bend, and two 22.5° bends for the sides.
- Make the center bend first, then the side bends, ensuring all are in the same plane.
Saddle bends require patience. Check alignment carefully to avoid twisting the conduit.
Step-by-step Guide: Making A 90-degree Bend
Let’s go through a practical example:
- Determine stub length (distance from end of conduit to the wall).
- Subtract take-up: For 1/2″ EMT, subtract 5″.
- Mark the conduit at this spot.
- Insert conduit into the bender, aligning the arrow with your mark.
- Step on the foot pedal; hold the handle firmly.
- Pull the handle slowly, keeping your weight balanced.
- Watch the degree marks: Stop just short of 90°.
- Check with a level: Adjust if needed.
Many beginners rush or pull unevenly, causing lopsided bends. Go slowly and keep the conduit flat for best results.
How To Make An Offset Bend
Offsets look tricky, but they’re easy with practice.
- Measure obstacle height: Say you need a 3″ offset.
- Choose bend angle: 30° is common.
- Calculate spacing: For 30°, multiply the offset by 2 (3″ x 2 = 6″).
- Mark conduit at two points, 6″ apart.
- Align first mark with the arrow, make the first bend at 30°.
- Flip the conduit; align the second mark for the other bend, keeping the plane straight.
- Check with a level for parallelism.
A non-obvious tip: Always check the distance between bends before making them. If your spacing is off, your offset won’t match the obstacle.
Avoiding Common Bending Mistakes
Even experienced users make mistakes. Here are some to watch out for:
- Kinking: Pulling too hard or using the wrong bender size crushes the conduit.
- Over-bending: It’s hard to fix a bend that’s too sharp.
- Under-bending: You can always bend a little more, but never try to bend back the other way.
- Wrong take-up: Not accounting for take-up leads to short or long bends.
- Twisting: If the conduit isn’t flat on the ground or work surface, it will twist during bending.
Double-check your marks and measurements before bending. If you make a mistake, sometimes it’s better to start over than try to fix a bad bend.
Advanced Bending Techniques
Once you’re comfortable with basic bends, you can try more complex methods.
Box Offsets
A box offset is a small offset bend used to connect conduit into an electrical box flush with the wall.
- Measure the height difference between the box and the conduit’s entry point.
- Make two small bends, often at 10° or 22.5°, close together.
Compound Bends
A compound bend lets the conduit change both direction and elevation at once. It’s used in tight spaces or complex layouts.
- Plan the exact path, making careful marks.
- Use a combination of standard bends, but adjust angles and spacing for the 3D path.
These advanced bends take practice. Always make a test bend on scrap conduit first.
Comparing Bending Angles
Choosing the right angle affects the length and look of your conduit runs. Here’s how different angles compare:
| Bend Angle | Offset Multiplier | Use Case |
|---|---|---|
| 10° | 6.0 | Small box offsets |
| 22.5° | 2.6 | Shallow offsets |
| 30° | 2.0 | Standard offsets |
| 45° | 1.4 | Steep offsets |
| 60° | 1.2 | Saddle bends |
The offset multiplier tells you how far apart to make your marks for a given offset height.
Practical Tips For Perfect Bends
- Always bend on a flat, stable surface for accuracy.
- Use a torpedo level to check bends immediately.
- Label your bender with the take-up value as a reminder.
- Practice on scrap conduit before making final bends.
- Keep conduit clean: Dirt or oil can cause slipping.
- Store your bender indoors to avoid rust or wear.
A rarely mentioned tip: Warm conduit bends easier. If working in cold weather, keep conduit at room temperature if possible.
When To Replace Your Conduit Bender
A good conduit bender can last many years, but check for these signs of wear:
- Cracks or chips in the bending shoe
- Worn or faded markings
- Loose or bent handle
- Foot pedal damage
Using a damaged bender risks poor bends and personal injury. Replace it if you see these problems.
How To Fix A Bad Bend
Mistakes happen. If you make a bad bend:
- Try to rebend gently: Small corrections are possible, but avoid overworking the metal.
- Cut and rejoin: For serious errors, cut out the bad section and use a coupling.
- Start fresh: Sometimes, it’s best to use a new piece of conduit.
Trying to “unbend” conduit rarely works well. Plan carefully to avoid this situation.
Maintaining Your Tools
Proper tool care keeps bends accurate and safe.
- Clean after use: Remove dirt and metal shavings.
- Lubricate moving parts if your bender has them.
- Check markings: Re-paint faded degree marks if needed.
- Store upright or hang on a wall to prevent warping.
A well-maintained bender produces better, more consistent results.
Real-world Example: Home Garage Wiring
Suppose you want to run conduit along your garage ceiling, dropping down to a workbench outlet. Here’s how you might approach it:
- Measure the ceiling run and mark where the conduit will drop.
- Make a 90-degree bend at the correct spot using the take-up method.
- Drop the conduit to the outlet height.
- Add a box offset at the end to connect neatly into the outlet box.
By planning each bend and accounting for take-up, your installation will look professional and work safely.
How Conduit Bending Improves Project Outcomes
Properly bent conduit isn’t just about looks; it affects the whole project:
- Faster wire pulls: Smooth bends mean wires go in easier.
- Fewer material costs: No need to buy extra fittings.
- Code compliance: Inspectors look for smooth, correct bends.
- Longer system life: Wires inside well-bent conduit are less likely to be damaged.
It’s not just about technique—it’s about making your electrical system safer and more reliable.
Comparing Hand Bender Brands
Not all conduit benders are made equal. Here’s a look at three popular brands:
| Brand | Price Range | Material | Pros | Cons |
|---|---|---|---|---|
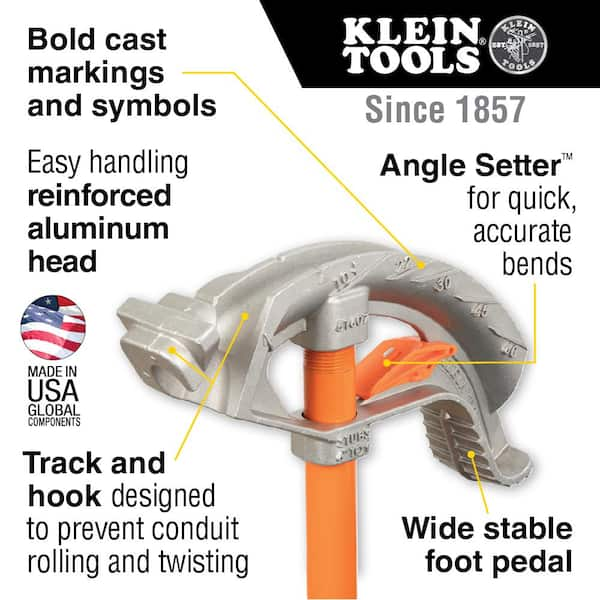
| Klein Tools | $$ | Aluminum, steel | Durable, clear markings | Heavier |
| Ideal Industries | $$$ | Steel | Accurate, long handle | Expensive |
| Gardner Bender | $ | Aluminum | Lightweight, affordable | Markings fade quicker |
If you use a bender often, investing in a higher-quality brand pays off in precision and durability.
Non-obvious Insights For Beginners
- Always check conduit orientation before bending. The writing or seam on the conduit can help you keep bends in the same plane. Misaligned bends are a common beginner mistake.
- Use a permanent marker instead of pencil. Pencil marks often rub off on metal conduit, leading to misplaced bends and wasted material.
Where To Learn More
If you want to see conduit bending in action or need advanced charts, resources like the Wikipedia Electrical Conduit page offer additional diagrams and technical data.
Frequently Asked Questions
How Do I Know What Size Conduit Bender To Use?
Choose a bender that matches your conduit size. For example, use a 1/2″ bender for 1/2″ EMT. Using the wrong size leads to poor bends or damage.
Can I Use A Conduit Bender On Pvc Pipe?
Hand conduit benders are designed for metal conduit like EMT. For PVC, use a heat gun to soften the pipe, then bend it by hand or with a special PVC bender.
What’s The Difference Between Emt And Rigid Conduit?
EMT is thin-walled and easy to bend, while rigid conduit is thicker, heavier, and usually requires a mechanical or hydraulic bender.
How Do I Prevent Conduit From Kinking?
Use slow, steady pressure when bending. Make sure the conduit is fully seated in the bender and use the correct size tool for your pipe.
Is It Okay To Re-bend Conduit If I Make A Mistake?
Small corrections are possible, but repeated bending weakens the metal. If you over-bend or kink the conduit, it’s usually best to cut and start over.
Learning to use a conduit bender is a skill that pays off on every electrical project. With patience, the right tools, and careful attention to detail, you’ll create neat, safe, and professional-looking conduit runs every time.