Splitting wood logs is a skill that goes back centuries. It’s an activity that can bring satisfaction and warmth—literally—to your home. Whether you use firewood for heating, cooking, or campfires, knowing how to split logs the right way saves time, effort, and keeps you safe.
Many beginners think splitting wood is just about hitting a log with an axe, but the reality is more complex. Choosing the right tools, preparing your work area, understanding wood types, and using safe, efficient techniques all matter. With the right approach, you can turn a pile of logs into neat stacks of firewood, ready for the cold months ahead.
This guide explores everything you need to know about splitting wood logs. You’ll learn about the essential tools, how to prepare your workspace, and the proper techniques to split different types of wood. The article also covers advanced tips, safety measures, and common mistakes to avoid.
By the end, you’ll have the confidence and knowledge to split wood efficiently and safely, whether you’re a beginner or want to improve your skills.
Why Split Wood Logs?
Splitting logs is more than just tradition. There are practical reasons why it’s done before burning:
- Faster drying: Split wood dries (or seasons) quicker than whole logs. Dry wood burns more efficiently and produces less smoke.
- Easier to handle: Smaller, split pieces are lighter and easier to carry, stack, and fit into stoves or fireplaces.
- Better burning: Split wood catches fire more easily and burns more evenly.
- Reduces pests: Splitting exposes the inside of the log, helping to prevent insect infestations and rot.
Many people also find splitting wood to be a good physical workout and a way to spend time outdoors.
Choosing The Right Tools
The tools you use can make wood splitting much easier or turn it into a struggle. Different tools suit different types of wood and user strength levels.
Axes, Mauls, And Hatchets
- Axe: A classic wood-splitting tool with a sharp, thin blade. Good for softer woods or smaller logs.
- Maul: Heavier and thicker than an axe. The wedge shape helps split large, tough logs.
- Hatchet: A small axe, useful for splitting kindling or very small logs.
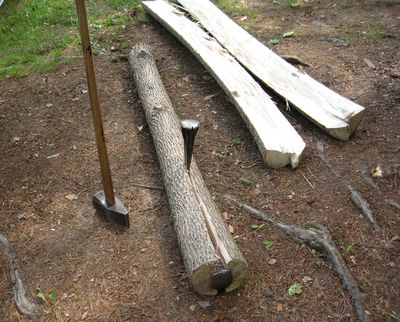
Wedges And Sledgehammers
- Wedge: A metal triangle you hammer into stubborn logs to force them apart.
- Sledgehammer: A heavy hammer used to drive the wedge into the wood.
Modern Alternatives
- Manual log splitters: Devices that use leverage to split wood, requiring less muscle.
- Hydraulic log splitters: Machines powered by gas or electricity. They make splitting large quantities much easier and faster.
Here’s a simple comparison of key hand tools:
| Tool | Best For | Weight Range | Skill Level |
|---|---|---|---|
| Axe | Small/medium logs, softwood | 1.5–4 lbs | Beginner–Intermediate |
| Maul | Large logs, hardwood | 6–8 lbs | Intermediate–Advanced |
| Hatchet | Kindling, small logs | 1–2 lbs | Beginner |
| Wedge & Sledgehammer | Knotty or tough logs | Varies | Intermediate |
Choosing The Right Tool For You
Your choice depends on:
- Log size: Mauls or splitters for large logs, axes for medium, hatchets for small.
- Wood type: Hardwoods often need more forceful tools.
- Physical strength: A heavy maul is hard to use for long periods if you’re not strong.
- Budget: Manual tools are cheaper than hydraulic splitters.
Insight: Don’t assume bigger tools are always better. If you get tired quickly, your accuracy drops, and accidents can happen. Try different weights to find what feels balanced and comfortable.
Understanding Wood Types
Not all wood splits the same. The type of wood affects how easily it splits, how long it needs to dry, and how well it burns.
Hardwoods Vs Softwoods
- Hardwoods (like oak, maple, hickory): Dense, burn longer and hotter. Often harder to split, especially when green (fresh).
- Softwoods (like pine, spruce, fir): Lighter, burn faster, easier to split.
Green Vs Seasoned Wood
- Green wood: Freshly cut, still full of sap and moisture. Harder to split and burns poorly.
- Seasoned wood: Dried for 6–12 months. Splits more easily and burns efficiently.
Common Wood Types And Splitting Difficulty
| Wood Type | Splitting Difficulty | Notes |
|---|---|---|
| Oak | Hard | Very dense, best when well-seasoned |
| Maple | Medium | Splits better when dry |
| Pine | Easy | Splits easily, but lots of sap |
| Birch | Easy–Medium | Splits well, dries quickly |
| Elm | Very Hard | Very stringy, tough to split by hand |
Non-obvious insight: Some woods, like elm or gum, are so stringy that even strong people struggle with axes or mauls. For these, a hydraulic splitter is often the best choice.
Preparing Your Workspace
Splitting wood is powerful work. A safe, organized area helps you avoid injury and work efficiently.
Picking The Right Spot
- Flat, solid ground: Prevents tools from slipping.
- Open space: No overhead obstacles. Watch for branches, wires, or anything you could hit.
- Away from people and pets: Flying wood pieces can hurt bystanders.
Setting Up A Splitting Block
A splitting block is a large, flat stump you put logs on. It absorbs shock, protects your tools, and raises the log to a better height.
- Use a solid hardwood stump, about 16–24 inches tall.
- Place it on flat ground so it does not wobble.
- Replace the block if it gets cracked or unstable.
Organizing Your Logs
- Stack unsplit logs within arm’s reach but not underfoot.
- Place finished firewood in a separate pile, ideally off the ground to keep it dry.
Tip: Clearing your work area after each session prevents tripping hazards and keeps tools from getting lost or damaged.
Safety Gear And Precautions
Splitting wood is physically demanding and can be dangerous if you’re not careful. Proper safety gear and habits are essential.
Essential Safety Gear
- Gloves: Protect hands from blisters, splinters, and vibration.
- Safety glasses or goggles: Prevent eye injuries from flying chips.
- Steel-toe boots: Protect feet from dropped logs or tools.
- Long pants: Shield legs from wood and tool strikes.
- Ear protection: For using power splitters, which can be loud.
Safe Habits To Practice
- Always check your tool’s handle and blade before use. Cracks or loose heads are dangerous.
- Stand with a solid, balanced stance.
- Keep children and pets at a safe distance.
- Never split wood when you’re tired or distracted.
- If you miss your swing, stop and reset rather than rushing.
Non-obvious insight: Most accidents happen not from tool failure but from fatigue and rushing. Take regular breaks, especially in hot or cold weather.
Step-by-step Guide To Splitting Wood Logs By Hand
Now, let’s break down the process into clear, practical steps.
1. Inspect The Log
- Check for knots, twists, or branches. Knots are much tougher to split.
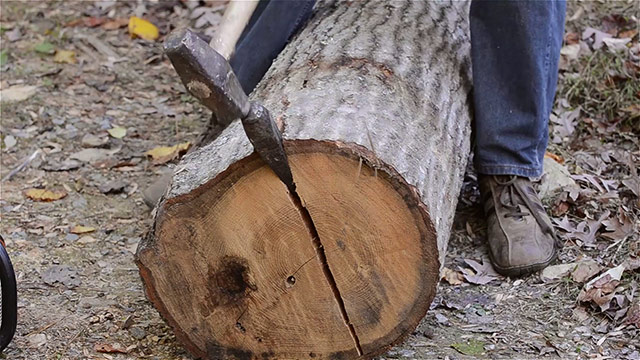
- Look for cracks or lines in the wood—these are natural weak spots.
- If possible, split along existing cracks.
2. Position The Log
- Place the log upright (standing on its end) on your splitting block.
- Make sure it’s steady and not wobbling.
3. Plan Your First Split
- For large logs, split them in half first.
- For logs with knots, avoid hitting directly on the knot; aim near the edge or along cracks.
- If the log is very wide, you may need to make several edge splits before tackling the center.
4. Swing Safely And Effectively
- Grip the tool with both hands—dominant hand near the base, other hand near the head.
- Raise the tool above your head.
- Bring the tool down in a smooth, controlled arc. Use your body, not just your arms.
- Let the weight of the tool do the work.
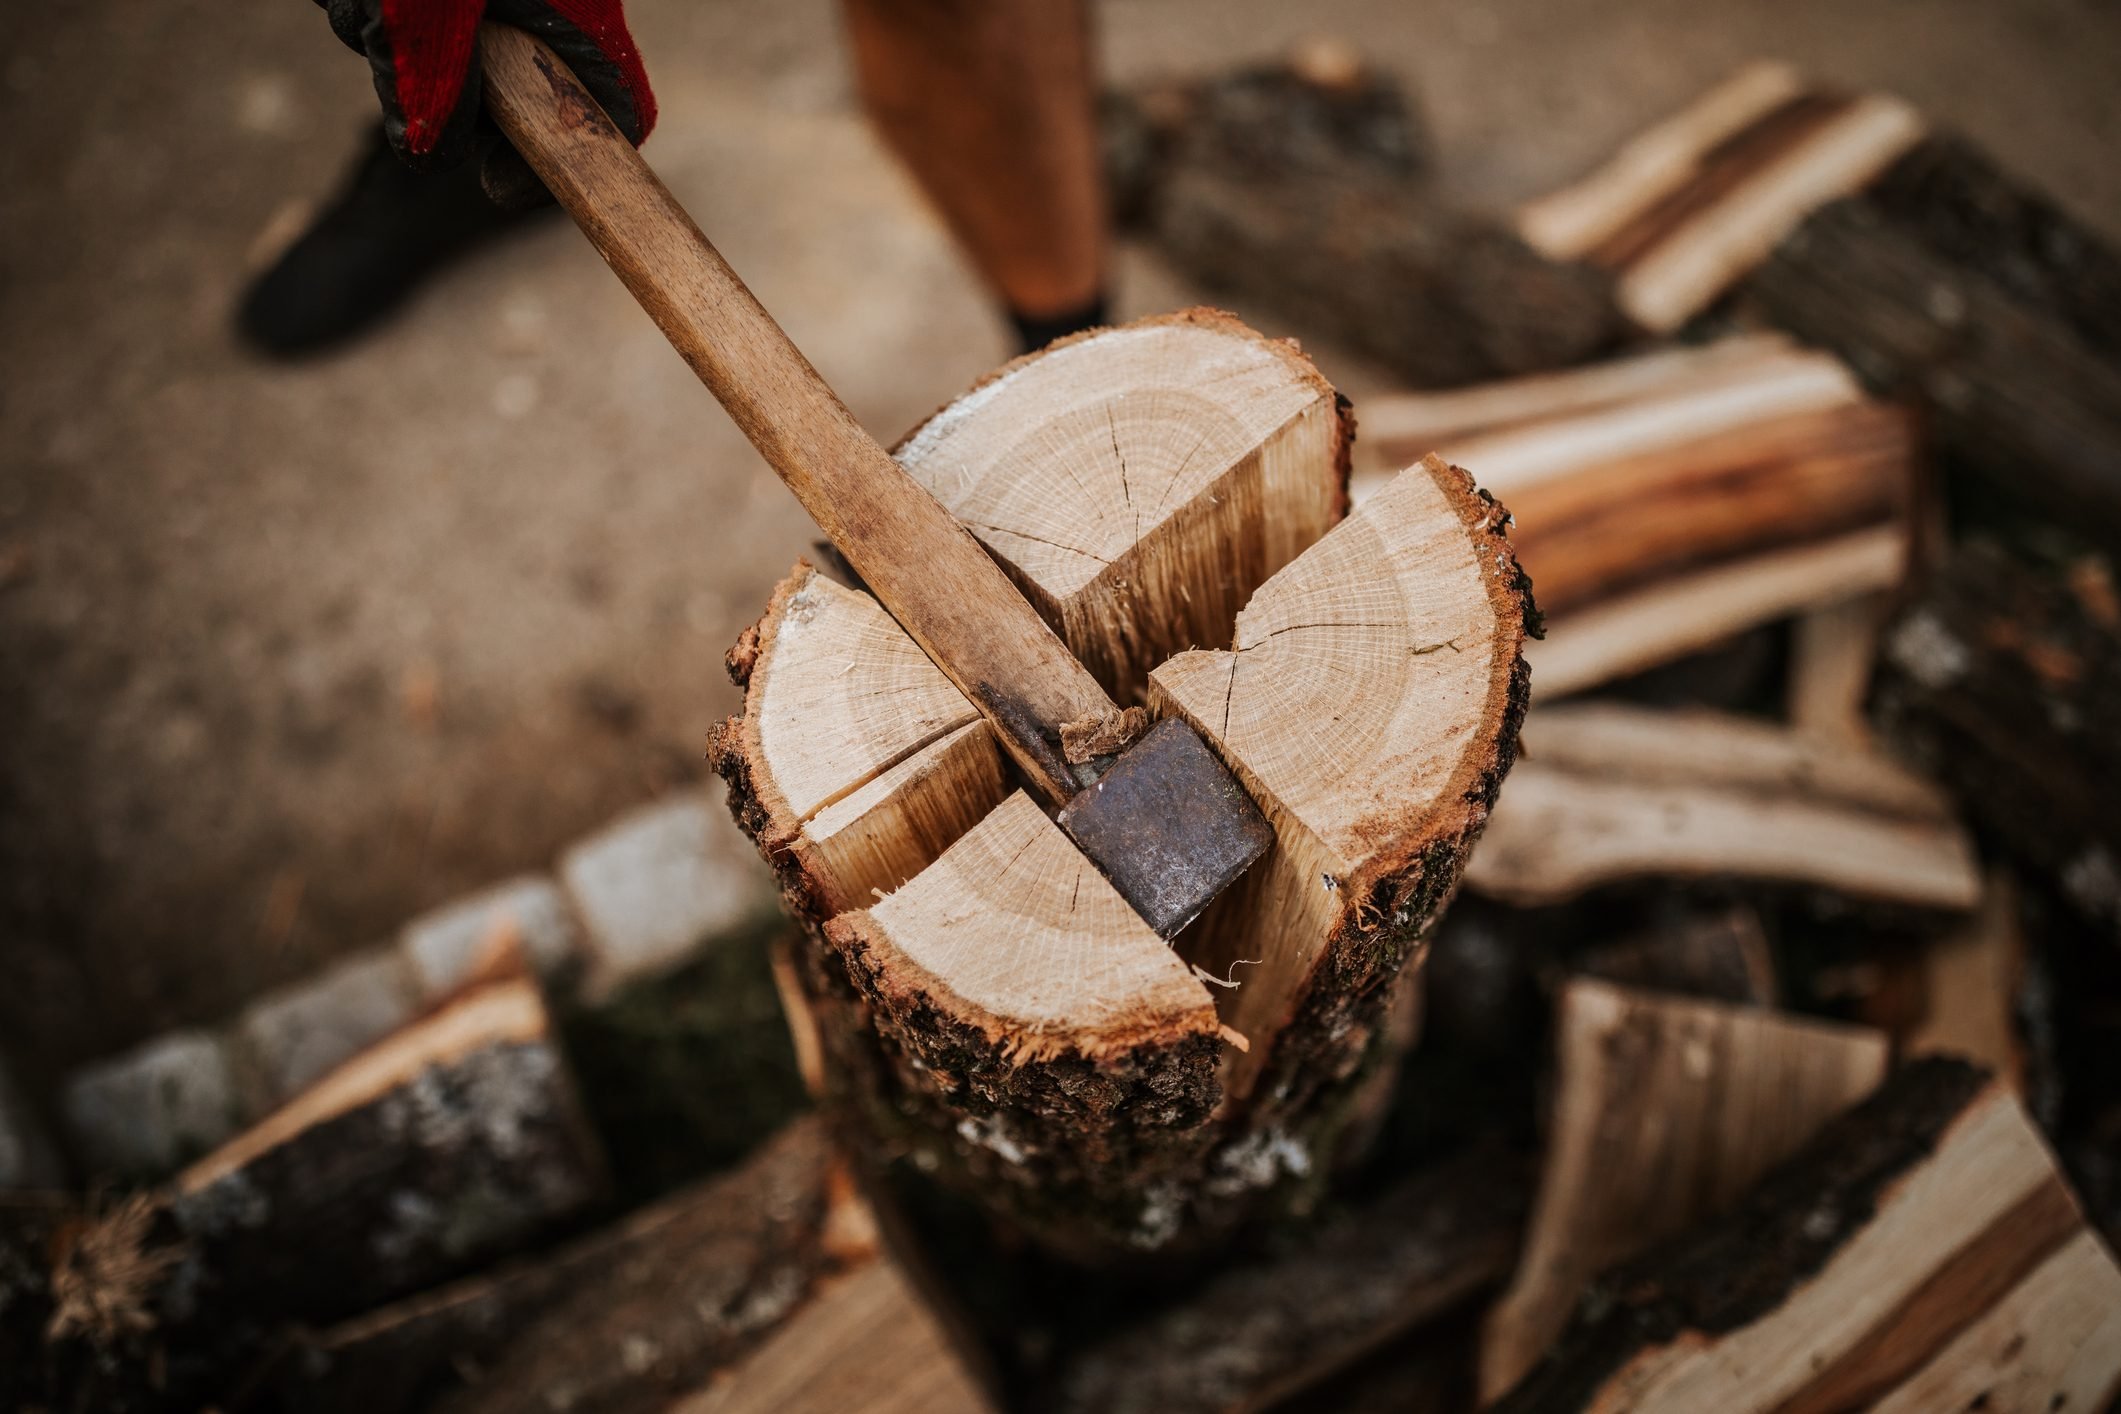
5. Using A Wedge (if Needed)
- If the tool sticks or the log won’t split, tap a wedge into a crack using a sledgehammer.
- Once the wedge is partway in, hit it until the log splits.
6. Split Into Firewood Sizes
- Keep splitting each piece until it’s the right size for your stove or fireplace—usually 3–6 inches thick.
- Remove any bark or splinters as needed.
7. Stack And Store
- Stack split wood in a dry, airy place.
- Off the ground, with gaps for airflow.
- Cover the top if it’s outside, but leave sides open for drying.
Pro tip: If you’re splitting several cords of wood, switch arms or your stance now and then to prevent muscle strain.
Splitting Wood With A Hydraulic Or Manual Log Splitter
For large amounts of wood or tough logs, a splitter is a game changer.
Using A Manual Log Splitter
- Place the log in the device’s cradle.
- Pump or pull the lever to force the wedge into the log.
- These use leverage, so they’re easier on your back and arms.
Using A Hydraulic Log Splitter
- Position the log on the machine’s bed.
- Activate the splitter (usually a lever or switch).
- The hydraulic ram pushes the log against a wedge, splitting it with little effort.
- Remove the split pieces and repeat.
Important: Always read the machine’s manual. Keep hands clear of moving parts and never let children operate a splitter.
Advanced Tips And Techniques
Once you’re comfortable with basic splitting, you can try these methods to improve efficiency and results.
Splitting Knotty Or Irregular Logs
- Start at the edges, not the center.
- Use a wedge to work around knots.
- For very tough pieces, split them into smaller sections and remove the knot last.
Splitting Frozen Or Wet Wood
- Frozen wood can be easier to split since it’s more brittle.
- Wet wood, especially green, is tougher. If possible, let it season (dry) before splitting.
Creating Kindling
- Use a hatchet or small axe.
- Split thinner, dry pieces for easy fire starting.
Working With Different Grains
- Spiral grain or twisted logs are much harder. Don’t waste energy—use a wedge or splitter.
Efficient Work Patterns
- Work with the grain, not against it.
- Rotate logs to find the easiest split points.
- Stack finished pieces immediately to avoid clutter.
Experienced insight: Learn to “read” the log. The pattern of cracks, color, and knots tells you where to aim. With practice, you’ll spot the easiest places to split.
Common Mistakes And How To Avoid Them
Understanding where beginners go wrong can save you time and frustration.
- Using the wrong tool: A small axe on large hardwood wastes energy. Match your tool to your log size and wood type.
- Ignoring safety: Not wearing gloves or boots increases injury risk.
- Poor stance: Standing on uneven ground or off-balance leads to missed swings or injury.
- Swinging wildly: Controlled swings are safer and more effective.
- Trying to split knots: It’s better to split around knots, not through them.
- Overloading your workspace: Too many logs in your area create tripping hazards.
Practical tip: If you get tired, stop. Tired muscles make mistakes. It’s better to split wood in several short sessions than one long, exhausting one.
Stacking And Storing Split Wood
Proper stacking and storage is essential for drying (seasoning) and keeping your firewood usable.
How To Stack Wood
- Stack in single rows for air flow.
- Use a crisscross pattern at the ends for stability.
- Keep stacks off the ground using pallets or rails.
Best Places To Store Split Wood
- Under a shed, lean-to, or roof overhang.
- If outdoors, cover only the top of the stack with a tarp—leave sides open.
- Avoid storing wood against your house (attracts pests).
How Long To Season Wood
- Most hardwoods need 6–12 months to dry.
- Softwoods can be ready in 6 months.
- Wood is seasoned when it’s lighter, has cracks at the ends, and makes a hollow sound when knocked together.
Non-obvious insight: Overstacking (more than four feet high) can cause stacks to fall. Build several shorter stacks instead.
Frequently Asked Questions
How Do I Know If My Wood Is Dry Enough To Split?
Dry, seasoned wood is usually lighter in color, has visible cracks at the ends, and feels lighter. When split, the inside should not feel damp. You can also knock two pieces together—if they make a hollow sound, the wood is dry.
A moisture meter gives the most accurate reading; seasoned wood should be below 20% moisture.
What’s The Best Season For Splitting Wood Logs?
Late winter or early spring is best. The sap is low, and the weather is cool, making the work more comfortable. Splitting in spring gives the wood all summer and fall to dry before winter use.
Can I Split Wood Logs When They Are Frozen?
Yes, and sometimes it’s even easier. Frozen wood is more brittle, so it splits cleanly. However, be cautious—tools can bounce off hard, icy surfaces more easily, so keep a firm grip and wear safety gear.
Is A Hydraulic Splitter Worth The Investment?
If you split large amounts of wood (more than a few cords per year) or deal with very tough, knotty logs, a hydraulic splitter saves time and reduces strain. For occasional or small-scale splitting, a good axe or maul is often enough. You can read more about different types of splitters on the Wikipedia Log Splitter page.
What Should I Do With Leftover Bark, Chips, And Splinters?
Bark and chips make great mulch for gardens, paths, or compost. Avoid burning bark in indoor stoves—it produces more ash and can cause chimney buildup. Sweep up splinters and dispose of them safely to keep your workspace clean.
Splitting wood logs is a blend of skill, patience, and the right tools. With practice, you’ll turn a challenging job into an enjoyable, even meditative, task. Remember to work safely, take your time, and learn from each log you split.
With these tips and techniques, you’ll be ready for any woodpile that comes your way.